WARM UP WITH A 3 DAY BACKPACK IN ALPINE COUNTRY
Introduction: For a photo essay on my (so far) 58 year evolutionary history with backpacking in the High Country, from a beginning using equipment that saw action in World War II against the Japanese, down to pretty good lightweight equipment used in 2009, go to the Articles section and Lightweight Backpacking and Gear. This “WARM UP. . . ” article will show you some of the best gear now available that I will be testing this summer (2010) and I’ll describe exactly how I go about preparing a trip, showing you every piece of equipment and food that goes into my backpack. Some of it will include specialty items that this 74 year old adventurer needs to have for 3 to 18 day no-resupply trips in alpine country. Learn what I do, and then adapt to your own needs and pocket book. I’ll provide links where everything I use and similar options can be acquired. I’ll be frank in telling you that purchases from some of the links will earn me a small commission–others not. I share everything in hopes I can make a small contribution to enhancing your outdoor experience. Below is the way we were doing it more than half a century ago.
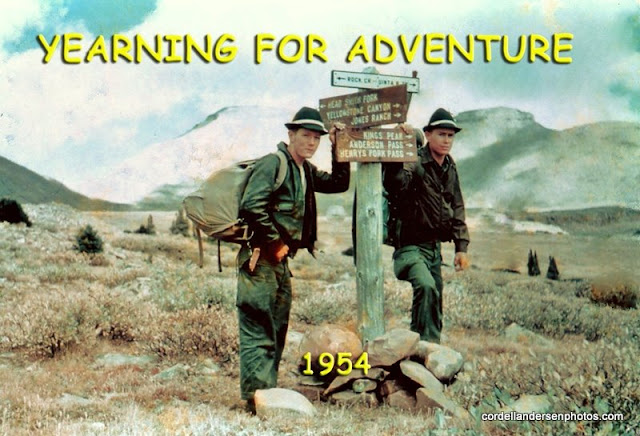
Along with my buddy Ted Packard, here I am with my World War II rucksack.
Inside I have my Army surplus 9 lb. mummy bag, etc. Almost everything has been exchanged,
like my heavy leather jacket changed for a 4 oz. wind shirt, my tough looking sheath knife
changed for a 2 oz. Leatherman Squirt tool, etc., etc.
READ ON and LEARN TO ENJOY OUR GREAT OUTDOORS!
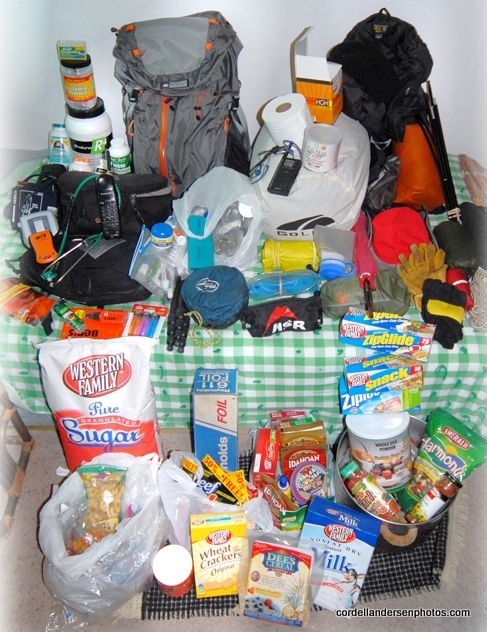
TO GET READY FOR YOUR BACKPACK–GATHER ALL THE STUFF YOU MIGHT WANT and NEED. . . . .
LIKE THE MOUNTAIN OF STUFF BELOW
THEN YOU HAVE TO GET SERIOUS and PRACTICAL
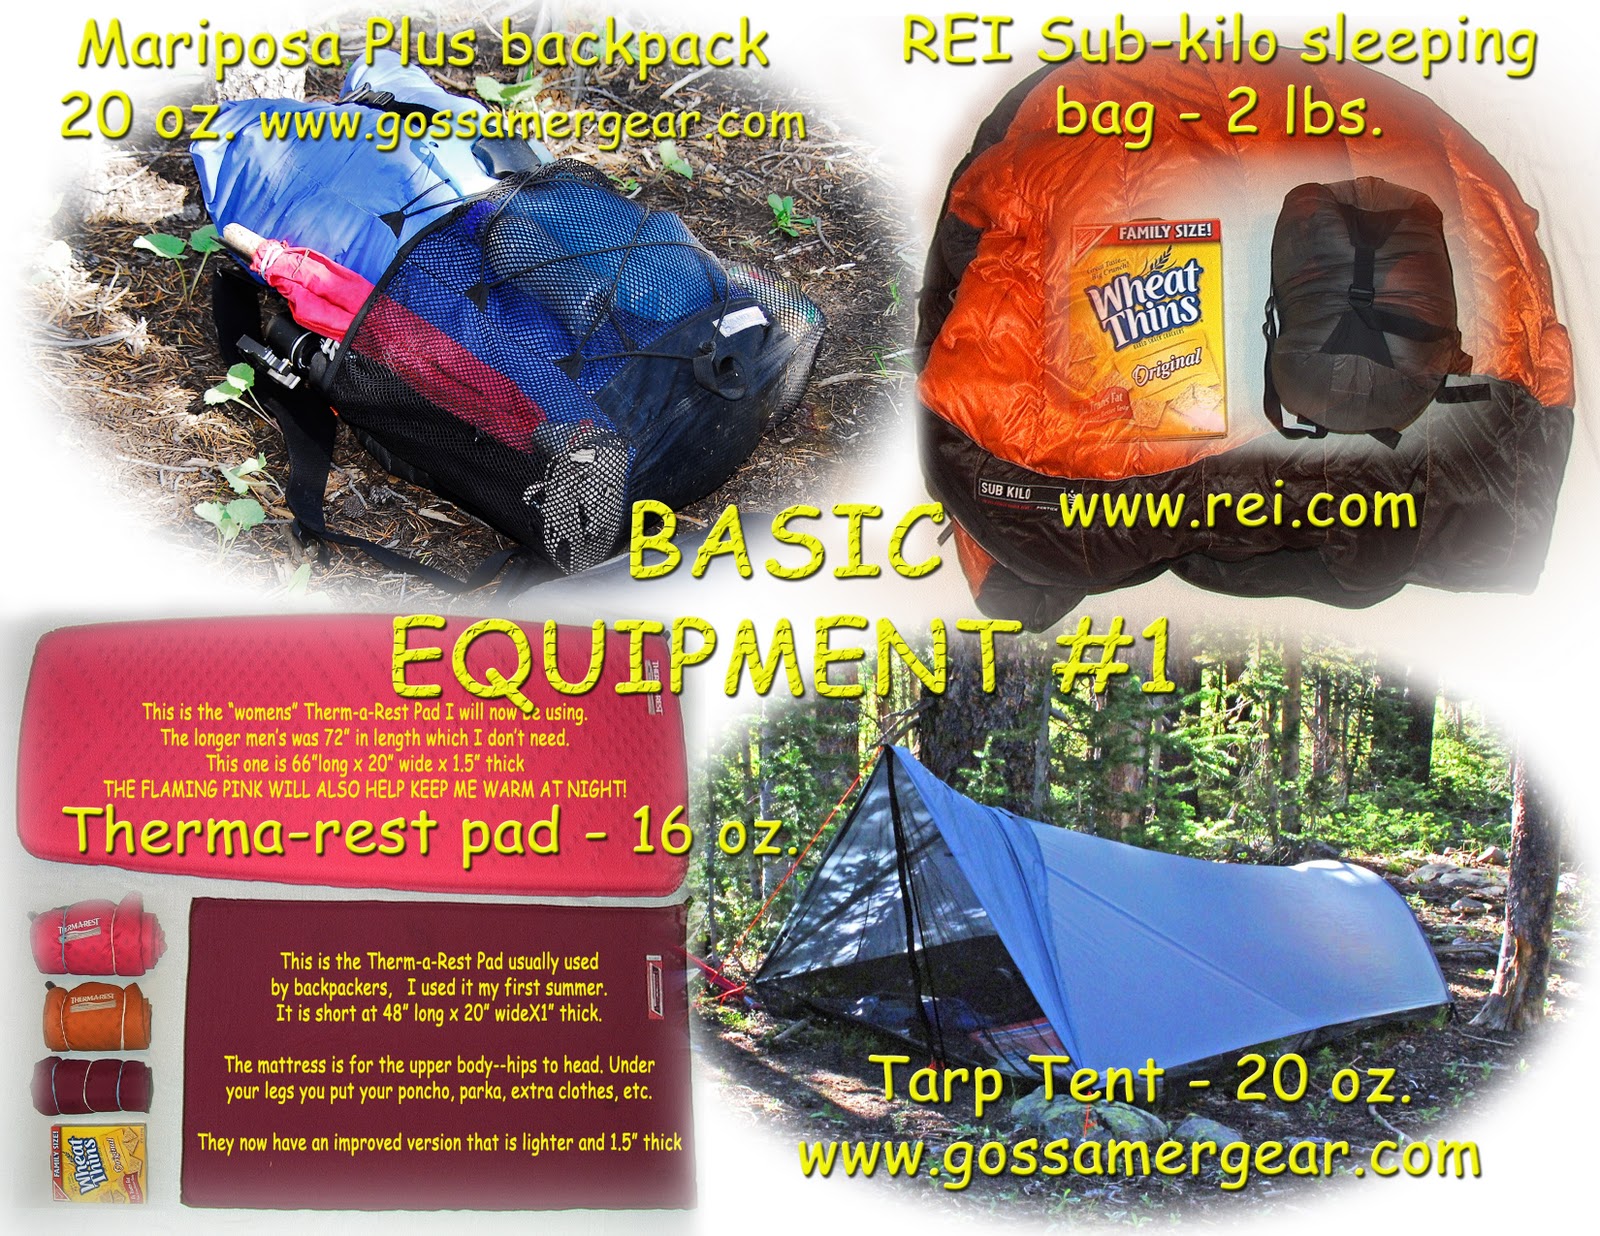
THE BASIC PACK
Most of us backpackers begin with what we call ‘”the basic pack,” which includes: Backpack, shelter, sleeping bag, and sleeping pad. The combination photo I use in the photo essay is seen below–showing what I used until 2009. The indicated weights are exaggerated down a bit by 14 oz. the actual weight was 6 lbs. 4 oz. Actually pretty good.
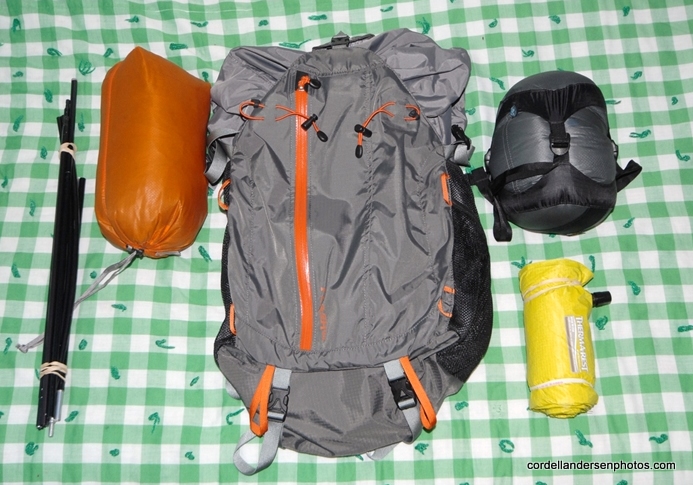
My 2010 “Basic Pack” is as follows:
BACKPACK
TENT (or shelter)
QUILT (instead of sleeping bag)
SLEEPING PAD (or mattress)
Weight = 6 lbs.
Now let’s examine each item:
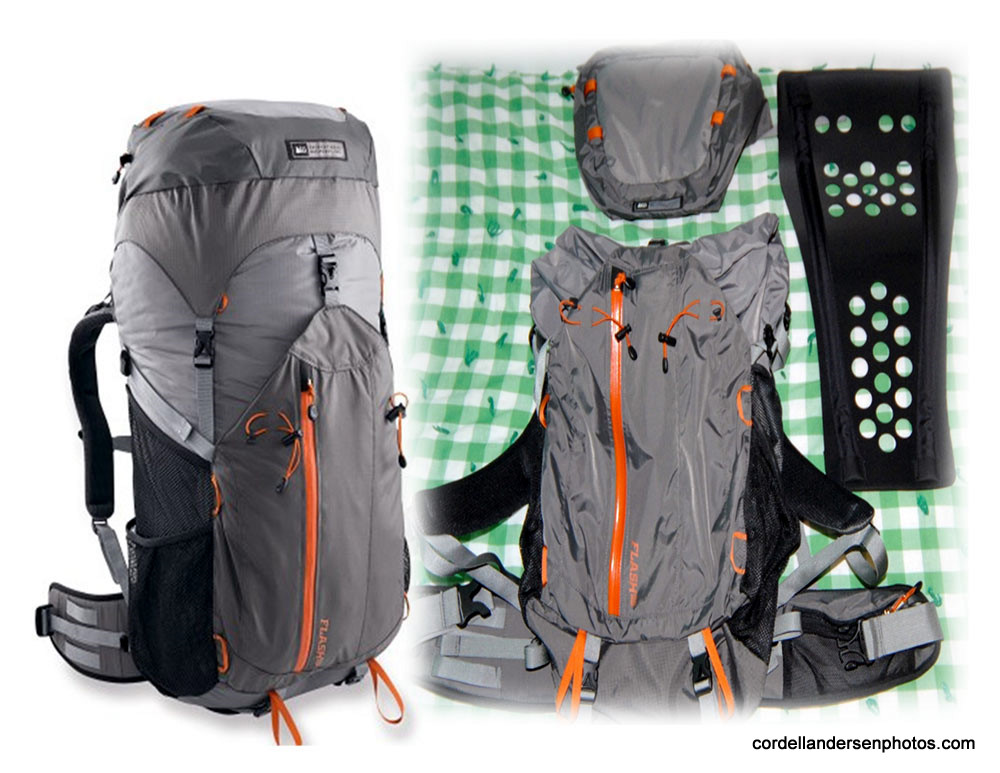
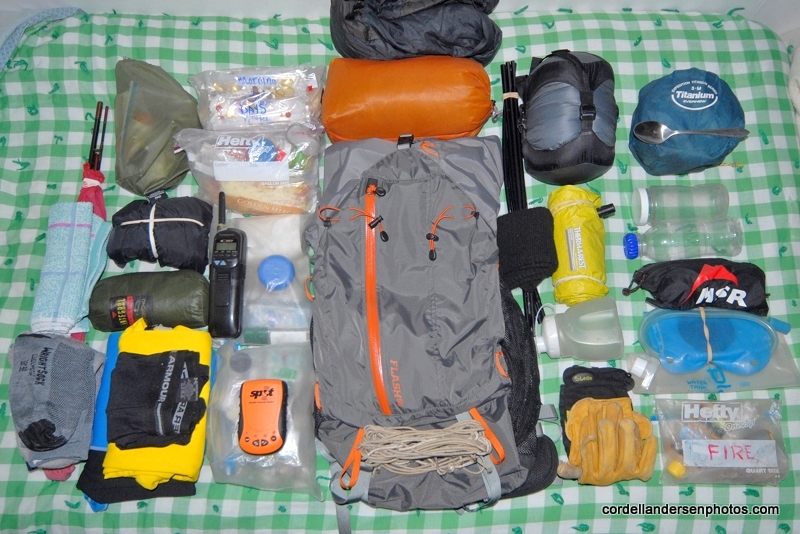
THE BACKPACK : The one I have chosen is the REI Flash 65 Backpack. The complete pack as seen below weighs 3 lbs. To it’s right it is seen with the top hood/lid and the frame sheet removed, resulting in a weight of only 2 lbs. which you will see is still large enough for trips up to 9 days or more. The complete pack will be used for one 18 day no-resupply trip which the very lightweight pack used for the last couple of years couldn’t do.
This pack won the “2009 Editor’s Choice Award” in BACKPACKER MAGAZINE. You can learn more about it, and acquire it clicking on: REI Flash 65 Backpack.
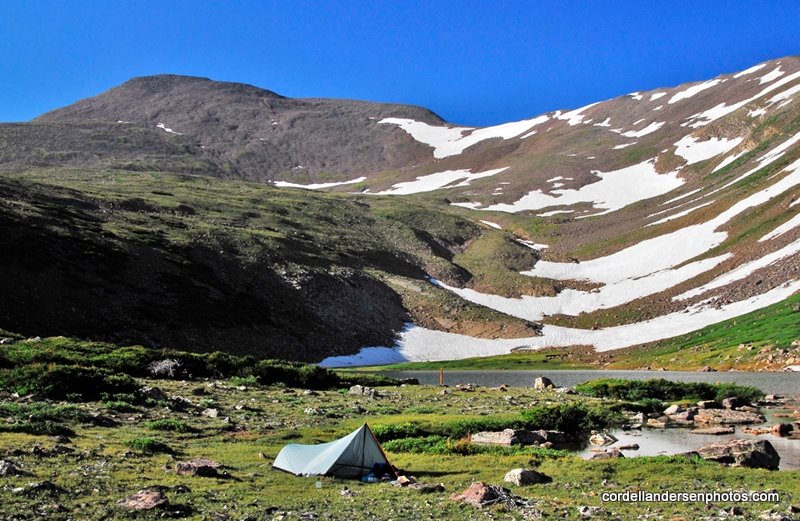
THE TENT: My choice for 2010 is to continue with the same tent I have used for several years: It is the Gossamer Gear Tarp Tent. It is pricey, but extremely light and compact. See it’s slightly improved version called SQUALL CLASSIC at www.gossamergear.com The packed tent (orange), stakes and poles are seen on the left side of the above BASIC PACK photo. Total weight is 28 oz. including the center pole I made as I don’t use trekking poles–with them you could save a couple of ounces in the tent weight, but then have to add the weight of the trekkers to your total weight–a net increase, but hands unavailable for a quick chance photo, or for munchies on the trail. Below is seen the Tarp Tent in the arctic tundra near Bob’s Lake on the slopes of Tokewanna Peak.
Click here: For other tent options. I’m linking mainly to GoLite tents as they are very light and inexpensive, but remember that until late in the summer season you need mosquito protection.
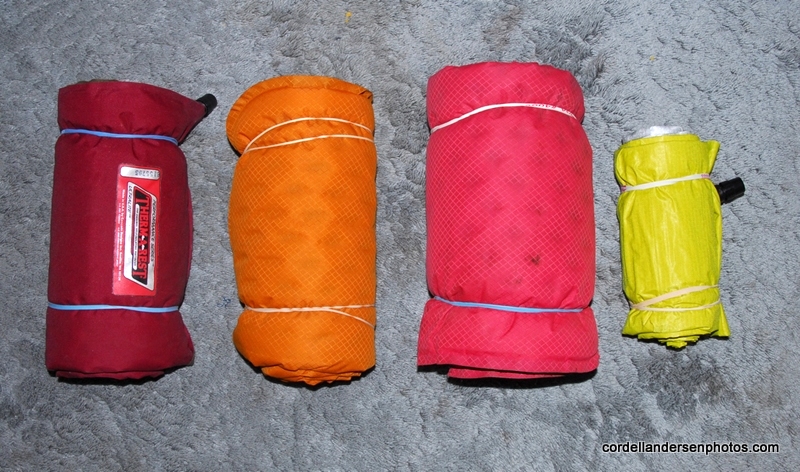
SLEEPING PAD (or air mattress): Below you can see the packed up pads I have used since 2003.
All these pads are from Therm-A-Rest. From the left the maroon and orange ones are 20″x48″. Thickness is 1″ and 1.5″. There are pads as thin as 5/8th in. for the real believers, but after ’03 I went to 1.5″ thick for greater comfort–the flaming pink one is 66″ long, my exact length. I needed the extra length as I began using my bag layed over me like a quilt, laying directly on the pad.
Most of us as we grow older have more difficulty sleeping, and so need more in a sleeping pad rather than less. In addition to the thicker pad, I also need to dig a hip hole (that I dutifully fill in afterwards to “Leave No Trace.”) The young gun “marathon backpackers” can perhaps sleep soundly on a rock, or a very thin pad, but NOT ME. To go with their gear I would also need a sackful of Ambien tablets!
The TINY YELLOW one on the far right is my new one–Therm-a-Rest NeoAir Air Mattress that is 20″x66″x2.5″ thick–just what I need for greater comfort. As you can see it is also very compact, and only weighs 12 oz. compared to 22 oz. for the pink one. It is pricy, but for me will be worth it. Check it out at: Therm-a-Rest NeoAir Air Mattress Click here for other sleeping pad options.
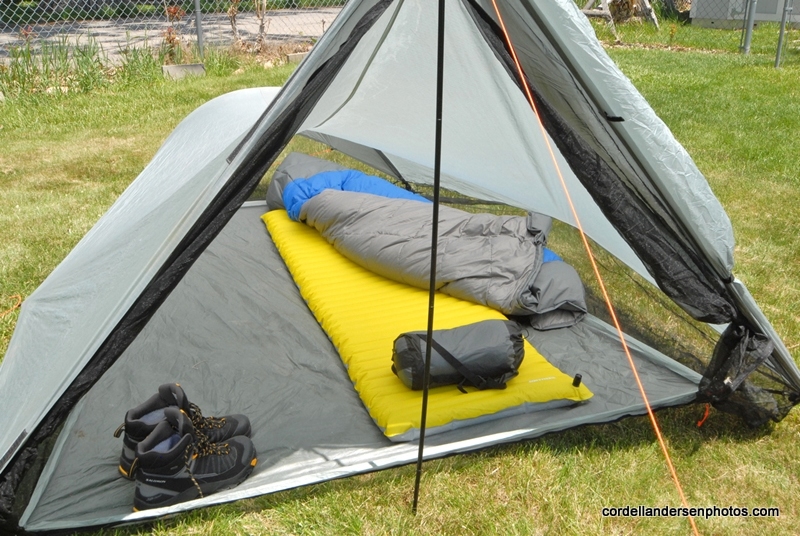
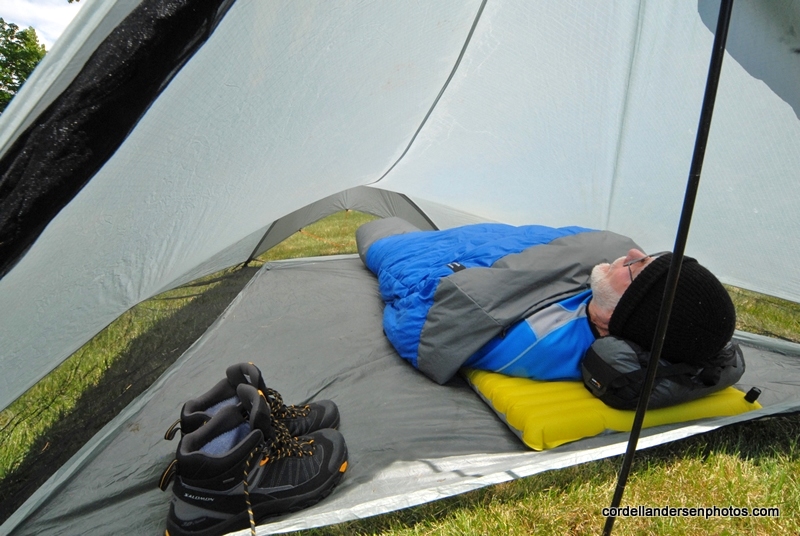
The next photograph shows the NeoAir in use inside of the Tarp Tent. My Mountain Hardware primaloft jacket fills the quilt’s compression sack as my pillow.
My new Golite Quilt is ready to spread over me–below.
For the last 5 years or so I have used my REI Sub-kilo bag as a quilt only zipping it up when the weather was abnormally cold. I now have a real quilt–the Golite UltraLite 3-Season Quilt that weighs 1 lb. 8 oz. You see it covering me in the above photo. Note I use a stocking cap as I can’t stand covering my head as most do with mummy bags. What will I do if the weather turns real cold? I’ll leave my clothes on, including my Mountain Hardware jacket, and use as a pillow. . . maybe a rock? Even colder still? I can give myself another 10 degrees warmth wrapping up in my poncho. But usually my 20 degree bags are on the edge of being too warm for alpine country in summer.
For your interest I’ll insert below a photo of the packed up Quilt, compared to my last two down sleeping bags–all 3 rated at 20 degrees.
The Golite Quilt is of course the smallest on the left weighing 1 lb. 8 oz. The middle bag is the REI Sub-Kilo, weighing 2 lbs.
The one on the right is a NORTH FACE Blue Kazoo down bag weighing 3 lbs. I used from 1981 up to and including when I began my Uinta Project in 2003.
So my 2010 sleeping gear is seen packed up above–1 lb. 2 oz. lighter than the previous gear, and more compact.
SUMMARY OF BASIC PACK. Compared to my previous “Basic Pack” I’m only saving 4 oz. in weight, some in volume, but greater comfort with the air mattress, and a very versatile backpack that will even be capable of carrying what I will need for an 18 day backpack–and even more using loops and extra straps to lash items like the tent outside.
NOW TO THE NEXT ESSENTIAL ITEMS
I’ll insert below the photo essay depiction of 4 more categories of needed equipment.
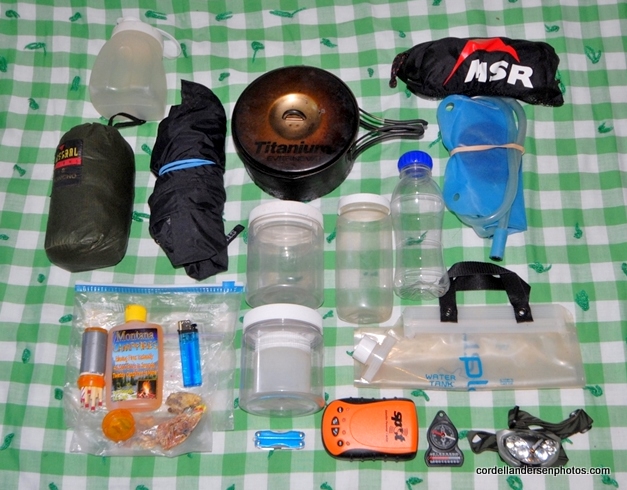
Below is the new version of BASIC EQUIPMENT #2 with a couple of additions: Upper left a plastic bottle I use as a urinal so I don’t have to get up and go outside each night–for this old guy with an enlarged prostate that would mean from 3 to 5 times a night–often in the rain; Next, a plastic bucket used to bring water from the lake, stream or spring to purify at camp, use for washing, etc. Then along the bottom as emergency equipment next to the compass, The SPOT Personal Satellite Tracker.
NOW LET’S TAKE A LOOK AT EACH CATEGORY
First the all important RAIN GEAR seen in the upper left above. We deal with this first as usually every year in the High Uintas, and other alpine areas of the West, hypothermia–simply getting wet and cold to the point where your body can’t keep itself warm any longer is perhaps the most common problem that often kills a few hikers who don’t go prepared to keep dry and warm–in an area where almost daily rain is the norm, accompanied often by very cold temperatures, even below freezing while others are sweating it out in the lower valleys. For information on Surviving it go to HYPOTHERMIA
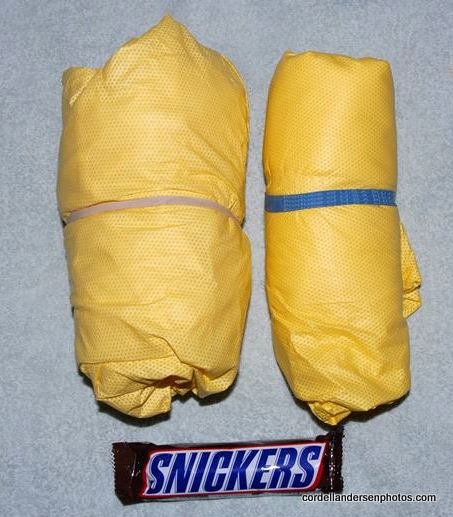
This photo is a bit different with one item added on the left, and the item from the right in a small bag. The right item is my waterproof Kelty jacket that weighs 9 oz.–an essential item. NOTE: The Sierra Designs jacket shown in the photo essays has failed a bit. The Kelty one is very inexpensive. You can see many options at: Rain jackets As you will notice many are very expensive, but a very inexpensive and very lightweight option is Rain Shield hooded jacket and pants seen below all packed up.
The SNICKERS is for size comparison.
They weigh 5 oz. (jacket) and 4 oz. (pants). I will be testing them this season and you’ll get my report. They are a bit more bulky, buy their light weight makes up for it. The pants are very simple without pockets, and without leg zippers–so you’ll have to remove your footgear to put them on or off.
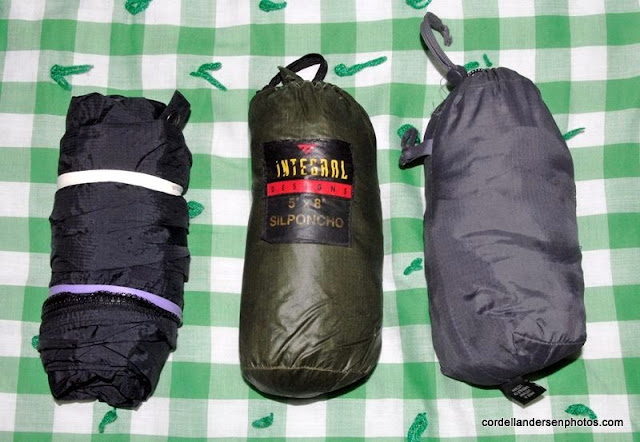
The middle item in the above photo, also an essential, is a rain poncho that will cover you and your gear (backpack) when it rains. The one I use is a 9 oz. Integral Designs product you can find at: Sil Poncho It is pricy but has ties around the edge and can be used also as a shelter. You can see it as a shelter at: Sil Poncho shelter Other inexpensive options can be seen at: Ponchos The last item to the left is a pair of Marmot brand waterproof pants. This is a specialty item I only take on a trip when I know I’m heading into the teeth of a big storm, and/or late in the season. They weigh 10 oz. mainly because they have zippers up each side so that they can be put on and off without removing boots and they have pockets–both very worthwhile advantages.
NEXT, let’s deal with the critical item of WATER–PURE & CLEAN free of the feared “GIARDIA” an intestinal infection that you can get from contaminated water. On my 27 day “expedition” in 2003 I first tried purification tablets, but didn’t like the taste, and the need of drinking lots of water to avoid dehydration would have been very expensive with tablets. I then tried boiling water and hated the smokey taste–besides it would have required far too much fire. I didn’t even know yet about purification pumps. So for the next 200 + miles I was just careful to use reliable water sources–and WAS LUCKY!
For the next few years (2004-2007) I wore out a Katadyn water filter. I now use the very effective
MSR HyperFlow Microfilter you see below.
To go along with the MSR system I use a Platypus bucket to bring water to camp and from it filter the water into my 1/2 gallon water bladder supplied with a bite-me valve that I have hanging over my shoulder to constantly sip water as I hike. After filling my bladder & bottles I usually leave half a bucket full for washing, etc. evening & morning. For more info go to MSR HyperFlow Microfilter For what I call a bucket go to: Platypus buckets They seem pricey as I recall paying less at REI. Cheaper options: other buckets Of course you can forget a bucket filtering your water at the spring, lake or stream filling your water containers directly. I don’t even recall what the brand is of my water bladder–it is so well used any name has worn off, but remember, to work with the MSR filter you have to have wide-mouthed bladders or canteens. Perhaps the best and cheapest are: NALGENE canteens
Below you can see my water bucket at work getting water from about a quarter of a mile from our camp.
The below you see me back at camp doing the pumping and filling of my containers that need clean water:
Last of all let me include one item related to my water bladder–a special glue to repair it and any other items–the only glue I have found that really works on plastics and anything else.
It is PLASTIC SURGERY in a super glue kind of tube. This item will always go with me for emergency repairs. Let me tell you the story quoting from my GEAR and SUPPLEMENTS section.
This 48 oz water bladder has served me well for 6 years, but 3 years ago it split open on the upper left corner. I tried many glues, but none lasted until I found Plastic Surgery Super Glue. The repair has lasted 3 years and counting.
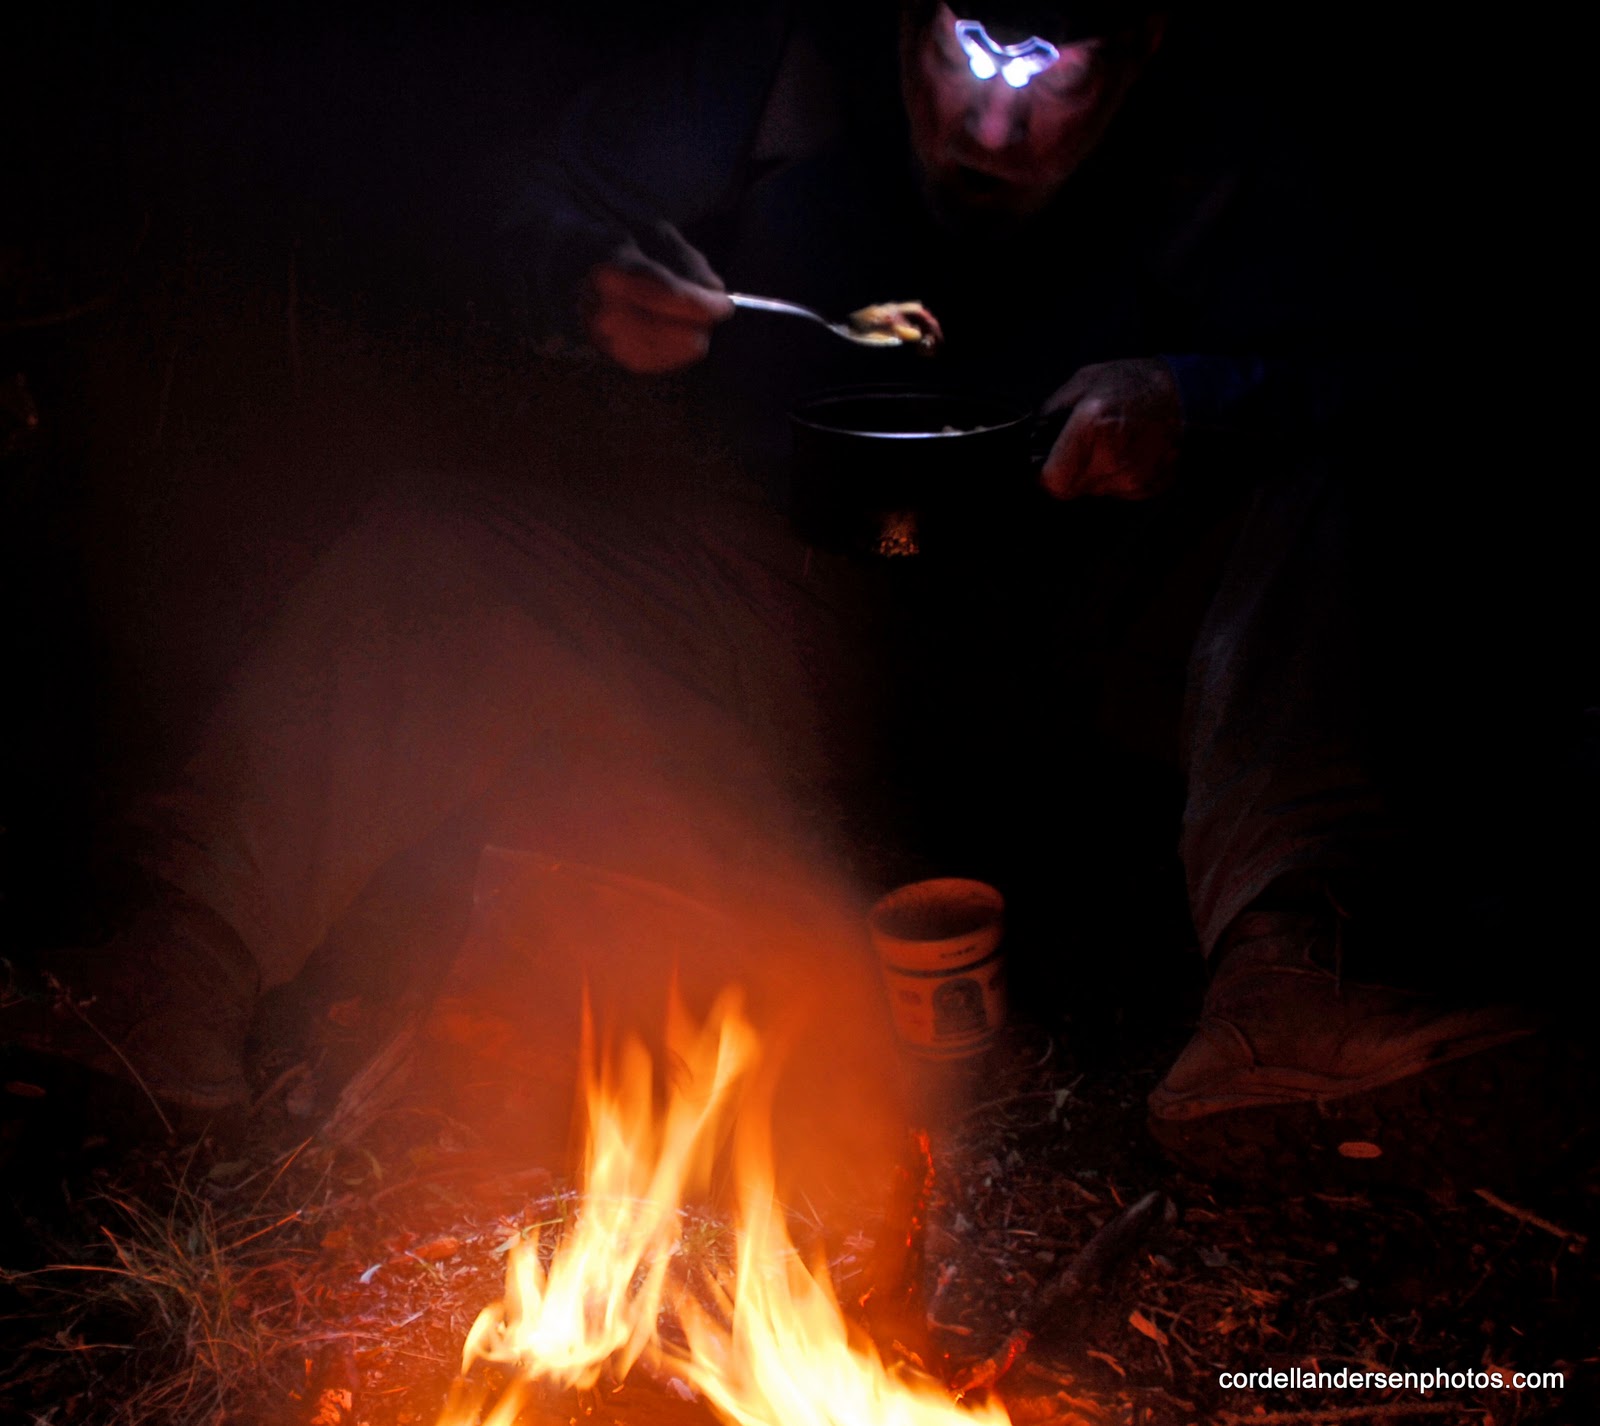
You can get it at ACE HARDWARE STORES, or at Plastic Surgery NOTE: It is much cheaper using my link. With water in camp I’m ready to get going on my recovery supplements, and dinner. Below is my simple system (for a solo hiker): A 1 quart pot, and clear plastic shaker containers that cost nothing.
The 1 quart pot I have used since 2005 is Titanium. It is very light, with a no-stick coating inside. The outside is well coated from my small camp fires–so I always carry it inside its cover to keep from soiling my gear. It would actually be sufficient for 2 backpackers, but for 3, 4 or more you will need something larger. You can see a large selection at: TITANIUM POTS and PANS Of course titanium is quite expensive. For several years I used a 1 qt. pot bought at the supermarket for $11.95–yes, a few ounces more weight, but it worked fine. To save a bunch of money go to: OTHER POTS & PANS
As mentioned the clear shaker bottles cost nothing. Just buy supplements, peanut butter, etc. or drinks that are clear plastic, preferably smooth for easier cleaning, and large mouthed. Then soak the label, remove and clean-up with Goop-Off or such. You might say, “But they aren’t tough and will wear out.” Yes, but they are so much lighter and a replacement filled with whatever will still cost less than what you get at outdoor outlets.
The pot also serves to fry an omelet/bacon bits for breakfast. For fish I used aluminum foil–usually folding up a piece sufficient for a fish a day.
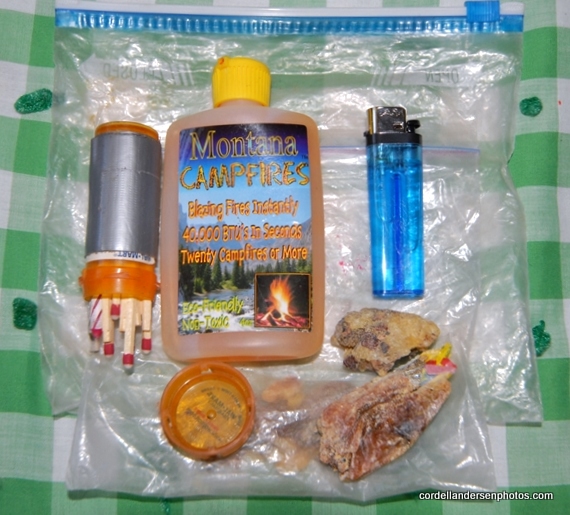
Next up FIRE MAKING KIT seen below
Of course for preparing a hot meal a day, and crucial for survival as mentioned in the Article on SURVIVAL. I use strike-anywhere matches in a water-proof medicine bottle, along with a few of those magic birthday candles you, or a breeze, can’t blow out. Just in case I take along a lighter. As mentioned in the SURVIVAL article, once there was nothing dry to strike a match on. Once the lighter saved me, another time I used the file on my tiny Leatherman Squirt tool to strike a match. The Montana Fire Maker dripped over the twigs you use to get the campfire going makes it all very easy. You should be able to find it at outdoor outlets.
Last, on the lower right is a gob of pine pitch mixed with a candy wrapper or such. This will burn long and hot enough to dry out your firewood and get a warming, maybe life saving, cook fire going. On your first day up the trail you can easily gather a bit of this in a Ziploc bag and be ready for any emergency.
Now to the last category in our Equipment #2 gear: Knife, SPOT Tracker, Compass and Headlamp
To see my evolution on knives, go to: KNIVES As explained I have got smaller and smaller, now convinced that the Leatherman Squirt is all I need–not just in the mountains, but it’s in my pocket always even in Church! The blade is small, but sufficient to gut a fish, etc. and the pliers always come in handy–like to unhook a fish, etc. See it at: LEATHERMAN SQUIRT
Next in line is the SPOT Satellite Personal Tracker. Check out how important it is to let people at home know you, or your group is alright each day. A SPOT EXAMPLE click ahead about 3-4 times. Of course you can also hit the HELP or the 911 buttons if you have a serious problem–and help will be on its way.
I can’t let this shot of Russ go by without putting emphasis also on a satellite phone like he is using in the photo. A solo backpacker should have one for sure. For all my trips I have had one–and for the first 4 years didn’t need it for myself–but twice was able to loan it to Scout groups with injured boys. A group should have one for sure, and I can guarantee that parents would be more than happy to share the cost. Then at the end of my 4th year–2006 I had my own emergency and used it to call Russ for help. Check out the experience at SURVIVAL The opening shot of the experience is seen below. Once again you can rent a satellite phone from Russ Smith at: SKYCALL COMMUNICATIONS
Next comes the all important compass–to orient yourself, or your map to navigate safely in the high country, as seen below being taught to a group of Explorer/Boy Scouts in the Four Lakes Basin.
You don’t have to spend much money. Mine probably cost $2.95 or so. Get info at: COMPASS
Last comes the all important LIGHT, which in my mind now means HEADLAMP. Forget the big flashlight you might need to protect yourself from a thief. The one I show in the photo is very inexpensive Energizer you can see along with other options at: HEADLAMPS See other well-known brands at: OTHER OPTIONS The main one I show in the OPTIONS is the Princeton brand, one of which I have used for years. It has important features your headlamp should have: 3 light levels for long (150 hours) life, tiltable head, and waterproof.
TOILETRIES
To be able to live happily with myself, and not rub a companion or two the wrong way, I have found it worthwhile to put a little effort into personal hygiene. I don’t use deodorant as reportedly it attracts bears, but I do try and keep clean. Each afternoon after finishing the day’s hike and setting up camp I remove my t-shirt, rinse it out and hang to dry, and splash a little water on my body, dry and put on a fresh shirt. I include here a couple of items I keep handy on the trail: Mosquito repellent (has to be 98-100% Deet), and Sun protectant as solar radiation at high altitudes is much more intense.
Make sure and take a bit more than enough toilet paper. If I recall I tell in my LIGHTWEIGHT BACKPACKING photo essay what I had to resort to on one trip when I forgot the bum fodder. Check the comments at: NO BUM FODDER Below is this collection of hygiene items in its Ziploc bag with the repellent, sun protectant and roll separate as they are put within reach as I hike each day.
The weight of these items is = 1 lb.
NOW THE MEDICINES and EMERGENCY ITEMS
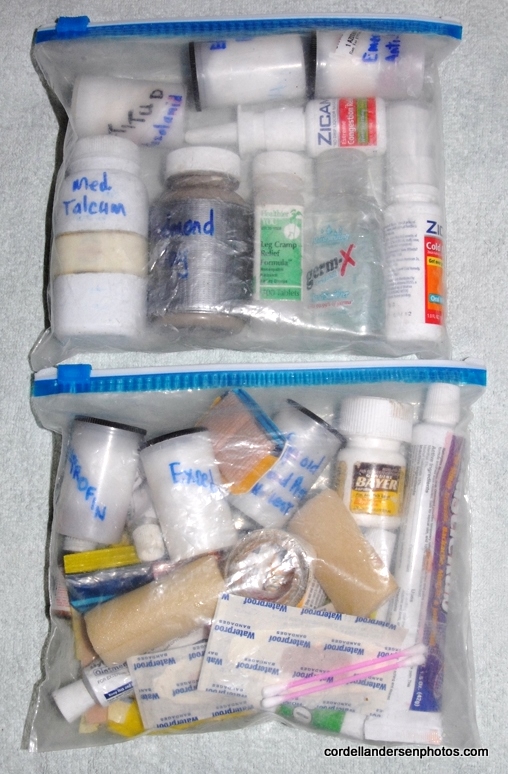
This looks like A LOT, but only weighs = 1 lb. 4 oz. Let me explain as briefly as possible. From the upper left reading across:
1. A handful of water purification tablets–just in case;
2. A bit of Moleskin, just in case of a blister (which I haven’t had since using special socks–shown later);
3. An assortment of band-aids;
4. Last on the right Zicam Cold Remedy, just in case;
5. Back to the left, a roll of stretch tape to make my own bandages;
6. A couple of toe bandages, and a package of 2 small ones;
7. Disinfectant cleaner;
8. Small chap stick which will be in my pocket (I find a rarely need it in the mountains);
9. Back to the left, my Thyroid (a cancerous thyroid was removed in ’03) and blood pressure medications;
10. Small bottle of dental pain killer medication;
11. Below it, another small bottle with Nitro Glycerin tablets in case of heart trouble;
12. 2 tubes of strong local anesthetic;
13. 3 larger tubes: Camphor-Phenic, Hyrocortesone Cream; Neosporin Ointment (triple antibiotic);
14. Aspirin–I take one a day, and more if chest pains occur;
15. Zicam decongestant which I sometimes need to sleep soundly;
16. Medicated talcum mainly for feet;
17. Altitude sickness medication (Diamox) mainly used at night to sleep better;
18. In 2nd film container, my emergency anti-biotic treatment (Arithromycin);
19. Redmond Clay for intestinal problems, and difficult skin infections and wounds;
20. Duct tape around the Redmond Clay bottle;
21. Mineral treatment for leg cramps;
22. Excedrin, Ibuprofen, and a narcotic pain killer for extreme situations.
23. and 24. Muscle Rub, and Hemorrhoid medication (useful for any irritations).
1 lb. 4 oz.
As you can see I go into the Wilderness ready to solve almost any emergency that might arise–and I have done so and survived everything up to and including a heart attack–faith was the key ingredient in that miracle, so don’t leave it behind. I might add that the “Emergency anti-biotic Treatment” has been used 2 times in the 7 summers and 1,327 miles of the Uinta Project. Each time I had to be patient, resting and giving the treatment 2-3 days to begin taking effect.
It’s worth mentioning that every individual in a group doesn’t have to have all this stuff, as most of the emergency items will not even be used. Sufficient for each 3 or 4 individuals to have these items, just in case.
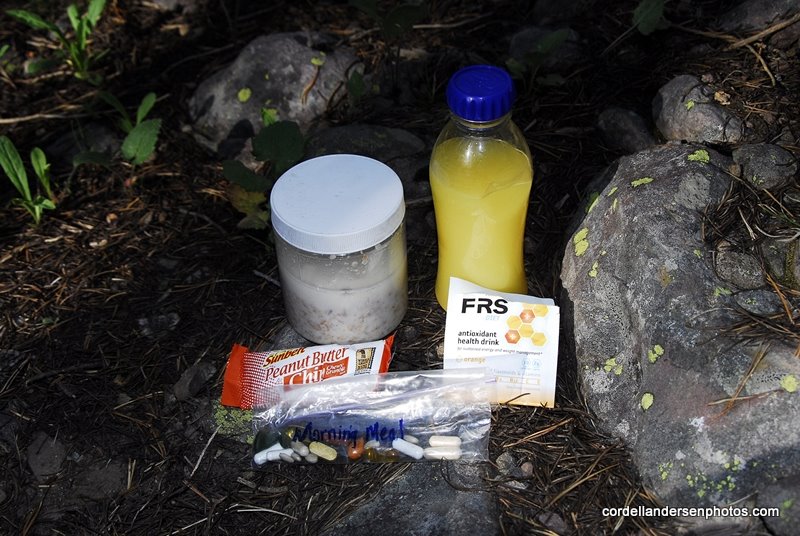
NOW THE HEALTH and EMERGENCY RELATED VITAMIN/MINERAL/AMINO ACID SUPPLEMENTS
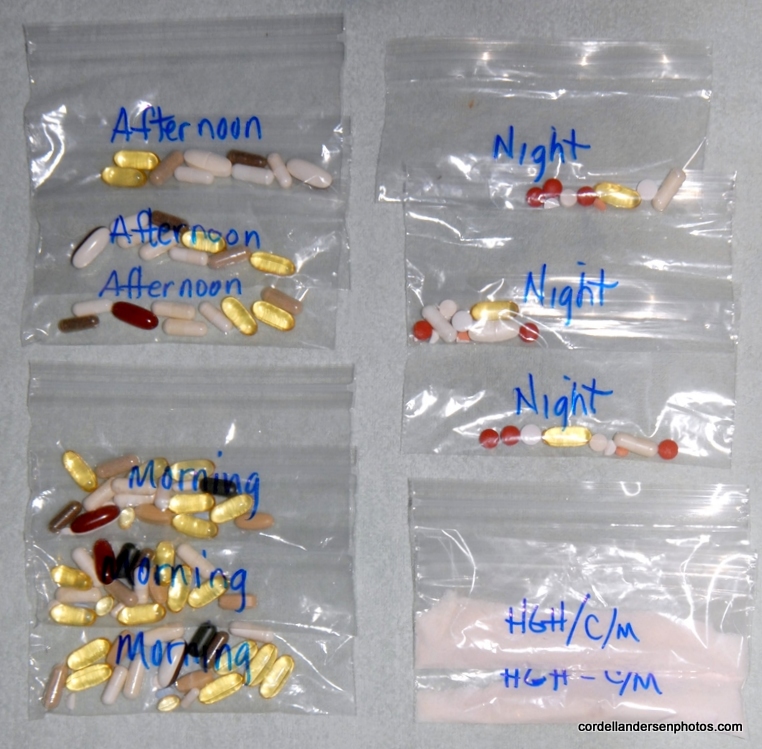
To avoid any confusion and make everything easy and automatic I have all I need for a 3 day trip in “Morning,” “Afternoon,” and “Night” bags you see here. Don’t be shocked as everything here is simply nutrients that I have found make possible me doing 8 miles a day , 5 days a week in my work–half of it jogging, and half pushing heavy loads. It is similar to doing a half-marathon a day, which I hope will translate smoothly into doing 250 miles of backpacking above 10,000 feet. Total weight for 3 days = 6 oz.
NOTE: At the end of this article I will picture all the vitamin/mineral supplements I use and where you can get them.
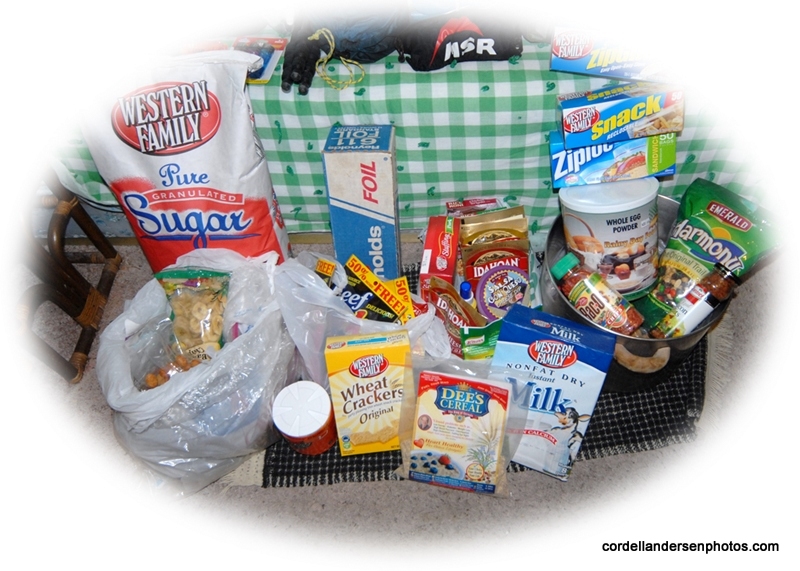
NEXT, FOOD FOR A 3 DAY BACKPACK
It starts with a whole bunch of stuff like you see below and more:
It is all put in individual marked meal bags to make everything easy in the mountains. Just grab the right bag, empty into a pot or shaker bottle, & add water. The main course needing cooking is left to soak while I do my personal cleaning, or go fishing to complete my dinner meal. Then the small cooking fire and in 10 minutes dinner is ready. My breakfast of Dee’s Cereal is also put to soak overnight. This includes my recovery supplements (Endurox, Gatorade, glutamine, calcium/magnesium, and HGH) you see next:
Not the wide mouths on all the containers making it easy to pour in the powders to mix with water. They are all very light and cost nothing.
THE FOOD:
The BREAKFASTS (2) are on the left which includes Dee’s Cereal with powdered milk, sugar and cinnamon plus dehydrated egg with bacon bits to make an omelet. This combination has helped to do the miracle in my work giving me the energy I need plus has had my 18 year old irregular heart beat and high blood pressure GO AWAY!
Next are the LUNCHES (3) with a bag of Trail Mix (I create myself), plus an egg nog drink with powdered milk, sugar and, again, cinnamon.
Then the DINNERS (2) one with dehydrated potatoes, bacon bits, Wheat Thins, and an instant pudding. The other with Creamy Chicken Macaroni, Wheat Thins, and pudding. A fish cooked in aluminum foil will complete the meal.
Previous to eating the dinner I will have a recovery drink made of Endurox and Gatoraid you see on the right.
Along the bottom are Chile flavoring, Bacon Bits, and sauces you will recognize.
Total weight of food and supplements for 3 day trip = 4 lbs…1.3 lbs./day
FOR LONGER TRIPS JUST MULTIPLY BY 1.3 lbs./day AS SEEN BELOW
For a 6 day trip = 8 lbs. of food.
For a 9 day trip = 12 lbs. of food.
For an 18 day trip = 24 lbs. of food.
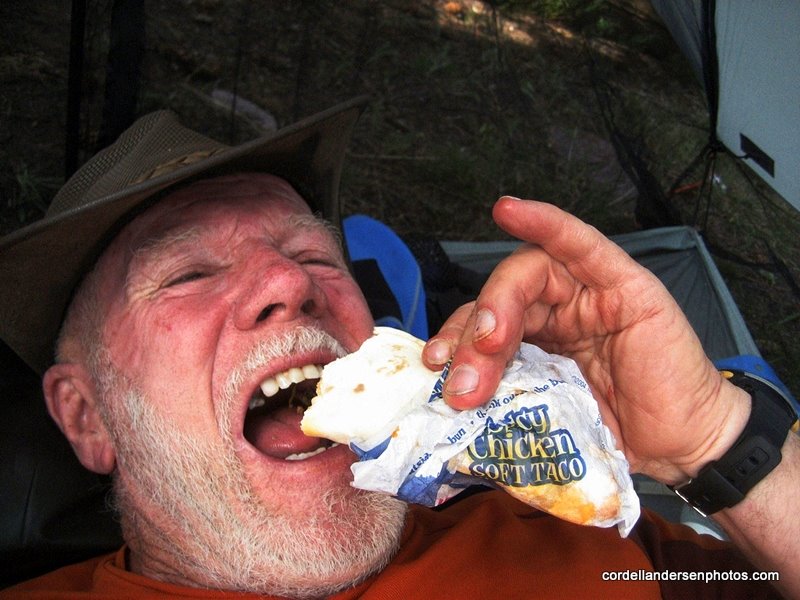
I ALMOST FORGOT! FOR JUST A 2 or 3 DAY TRIP I EAT REAL GOOD THE FIRST DAY as you see below
TACO BELL IS GREAT!
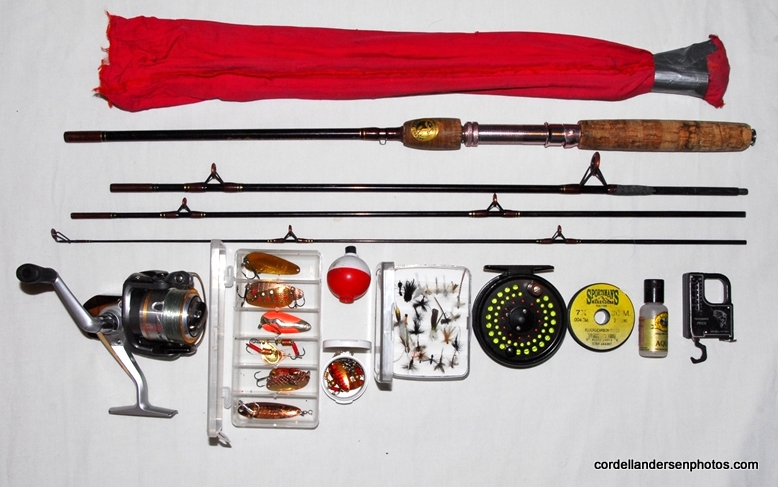
LAST OF ALL THE FISHING EQUIPMENT
Basically I use a combination rod–spinning/fly fishing, so I have both types of reels, plus an assortment of the lures and flies I have found most effective.
Total weight = 2 lbs. 2 oz.
HERE’S A PORTRAIT OF ALL THE GEAR and FOOD
BEFORE PACKING UP
I see a couple of items not mentioned yet and others not represented here. Some of them are critical, so here goes:
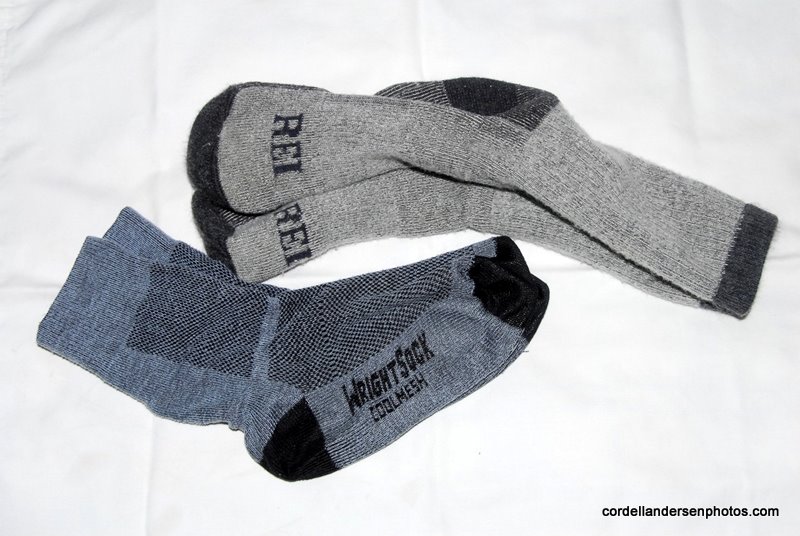
1. Socks: I always take one change of socks with the theory being that each day I begin with a fresh pair–having washed out the ones used in the afternoon when I also rinse out my T-shirt. Below is what I use:
I am not necessarily promoting REI socks, but you need to have on 1 pair of good quality boot socks, but next to your skin you need to have the CoolMesh WrightSocks that prevent blisters.
Since I have used them with my running shoes, and hiking boots I have never got a blister. They are worth their weight in gold! See them at: CoolMesh WrightSocks You can see good boot sock options at: boot socks
2. Extra clothes and such: You can see on the far left my small towel. Then a couple of extra T-shirts, the blue one long sleeved, the yellow one my Lance Armstrong cycling T-shirt. You should use polyester fabric T-shirts. They are more expensive, but last forever, even when humid retain some insulation value, and dry quickly. For a trip longer than 3 days I might take one more. For more information see my photo essay at: CLOTHES
3. Along the upper edge of the photo you can see something black. It is my Mountain Hardware Primaloft jacket. It weighs 12 oz. but feels fantastic when the sun goes down, or a real cold spell hits. I use it in my quilt stuff sack to make a good pillow. I’ll insert a shot below showing it in use.
4. GLOVES— in the above photo you can see my fishermen’s gloves that help keep you warm but make possible zipping up or down whatever, operate a camera, or do a bit of fishing. You can get info on them at: FISHING GLOVES Also pictured in my gear ready to pack up are my elk skin gloves I love to use as explained in 3 or 4 shots at Lightweight backpacking You can get them at: Elk skin gloves
5. One last item in the photo: A length of nylon rope to hang my food away from the critters.
6. A phone is in the photo, but just a regular one representing a Skycall Communications Satellite phone that will go with me, and make possible phoning into KSL Outdoors every Saturday morning–LISTEN IN!7. Tube of PLASTIC SURGERY — Not shown in this gear photo, but shown and explained above when talking about Water Bladder & other repairs.
NOW A COMMENT OR TWO ABOUT WHAT I WILL BE WEARING:
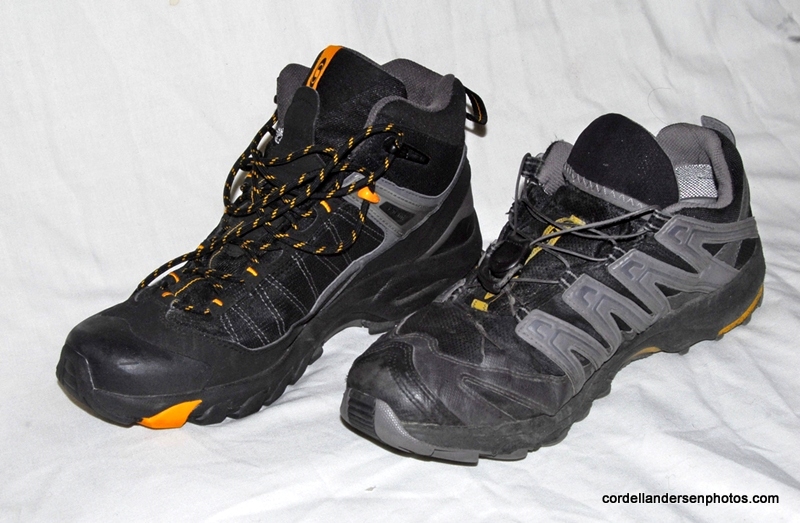
1. BOOTS –
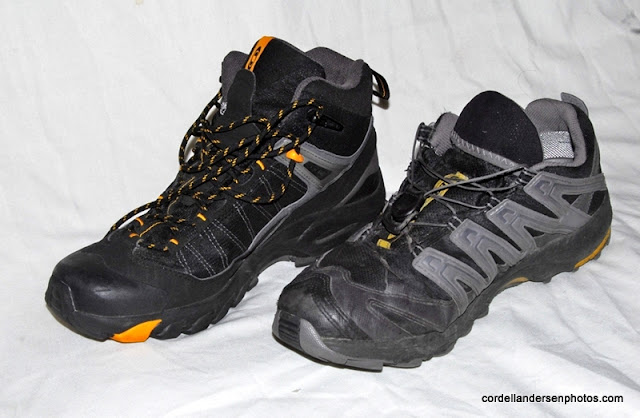
In the LIGHTWEIGHT BACKPACKING photos essay I tell my history from being told in 1994 that I shouldn’t run half-marathons or backpack anymore because of problems with my feet, but how I didn’t give up but began modifying my running shoes and high top boots to persist and that by last year I finally was able to backpack with just a mid-high hiking boot. Well, for the last year I have done my 40 miles a week using the Salomon Mountain Running shoe you see here on the right and felt my ankles strengthening. I began believing I would be able to do a 250 mile backpack summer with lightweight hiking boots. So, with my REI dividend I got me a pair of waterproof Salomon 3D Fastpacker Mid GTX Fast Light Backpacking Boots you see above on the left. This boot will likely be my mainstay, but I’ll also use the mountain running shoe and see how it goes. These are quality products without the high end cost. See them at: HIKING BOOTS For your information the Salomon Wings Sky GTX book won the 2010 BACKPACKER MAGAZINE’S Editor’s Choice award. You can check it out, but will see it also has a high end cost.
3. CREW LENGTH TOESOCKS – just in case you need them.
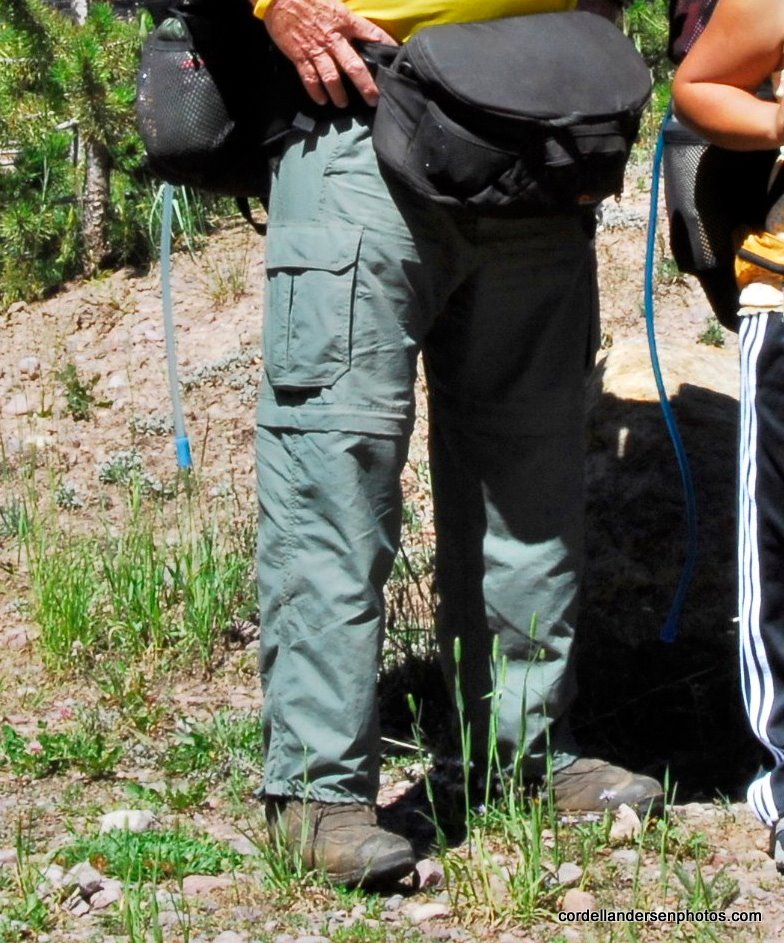
3. PANTS –
If you have gone thru my photo essays on LIGHTWEIGHT BACKPACKING and GEAR and SUPPLEMENTS, you will have noticed I am a believer in convertible pants as you see below.
Remember, it is important to have legs with zippers so you can put them on and off without removing your boots or shoes. Also go for synthetic material, like Nycott, as it is lightweight, a windbreaker, and mosquitoes can’t go through it. See a number of options at PANTS
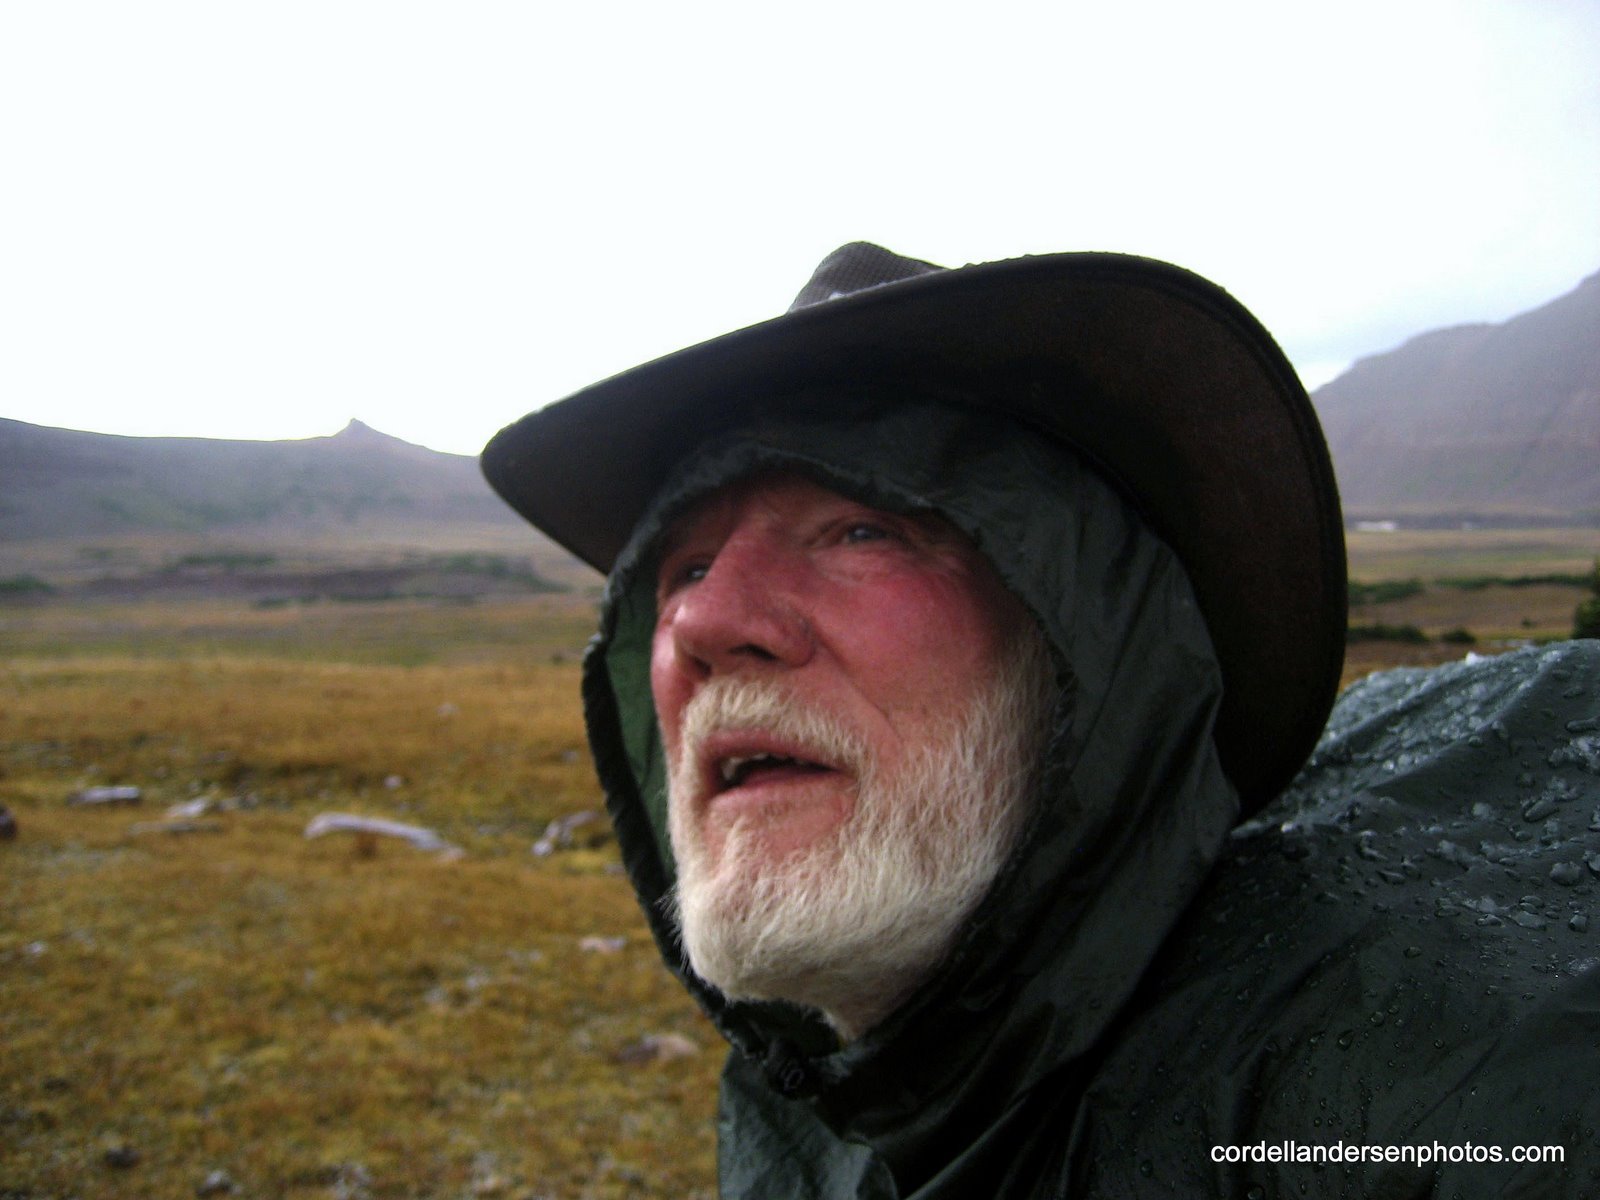
4. HAT –
You see below what I have used since 2009. It is waterproof, and the sides come down to give you protection from the sun or rain. See it at: OUTDOOR RESEARCH SEATTLE HAT
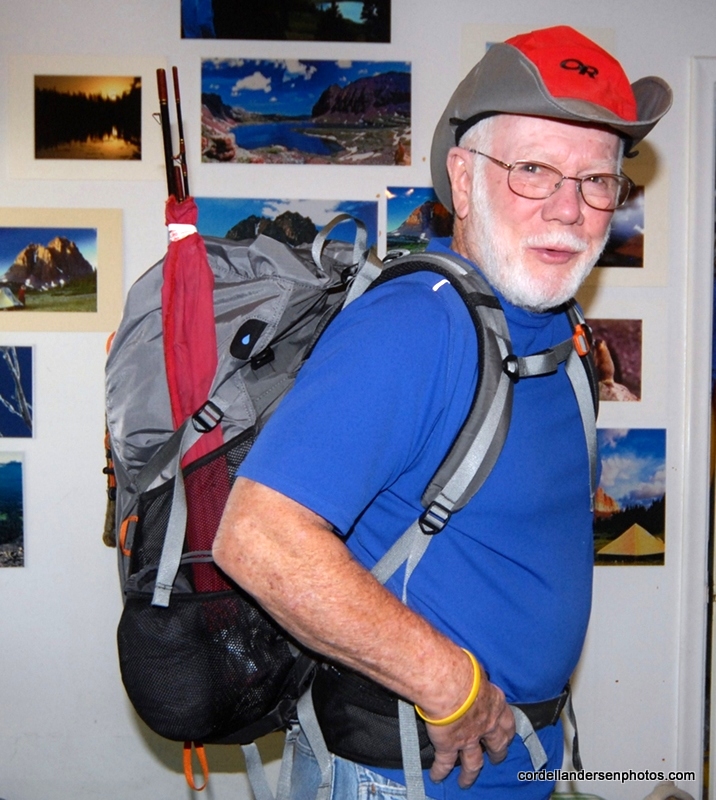
I THINK WE’RE READY TO SHOULDER OUR PACK and GET ON THE TRAIL

Here I am with a 23 lb. pack for 3 days of adventure.
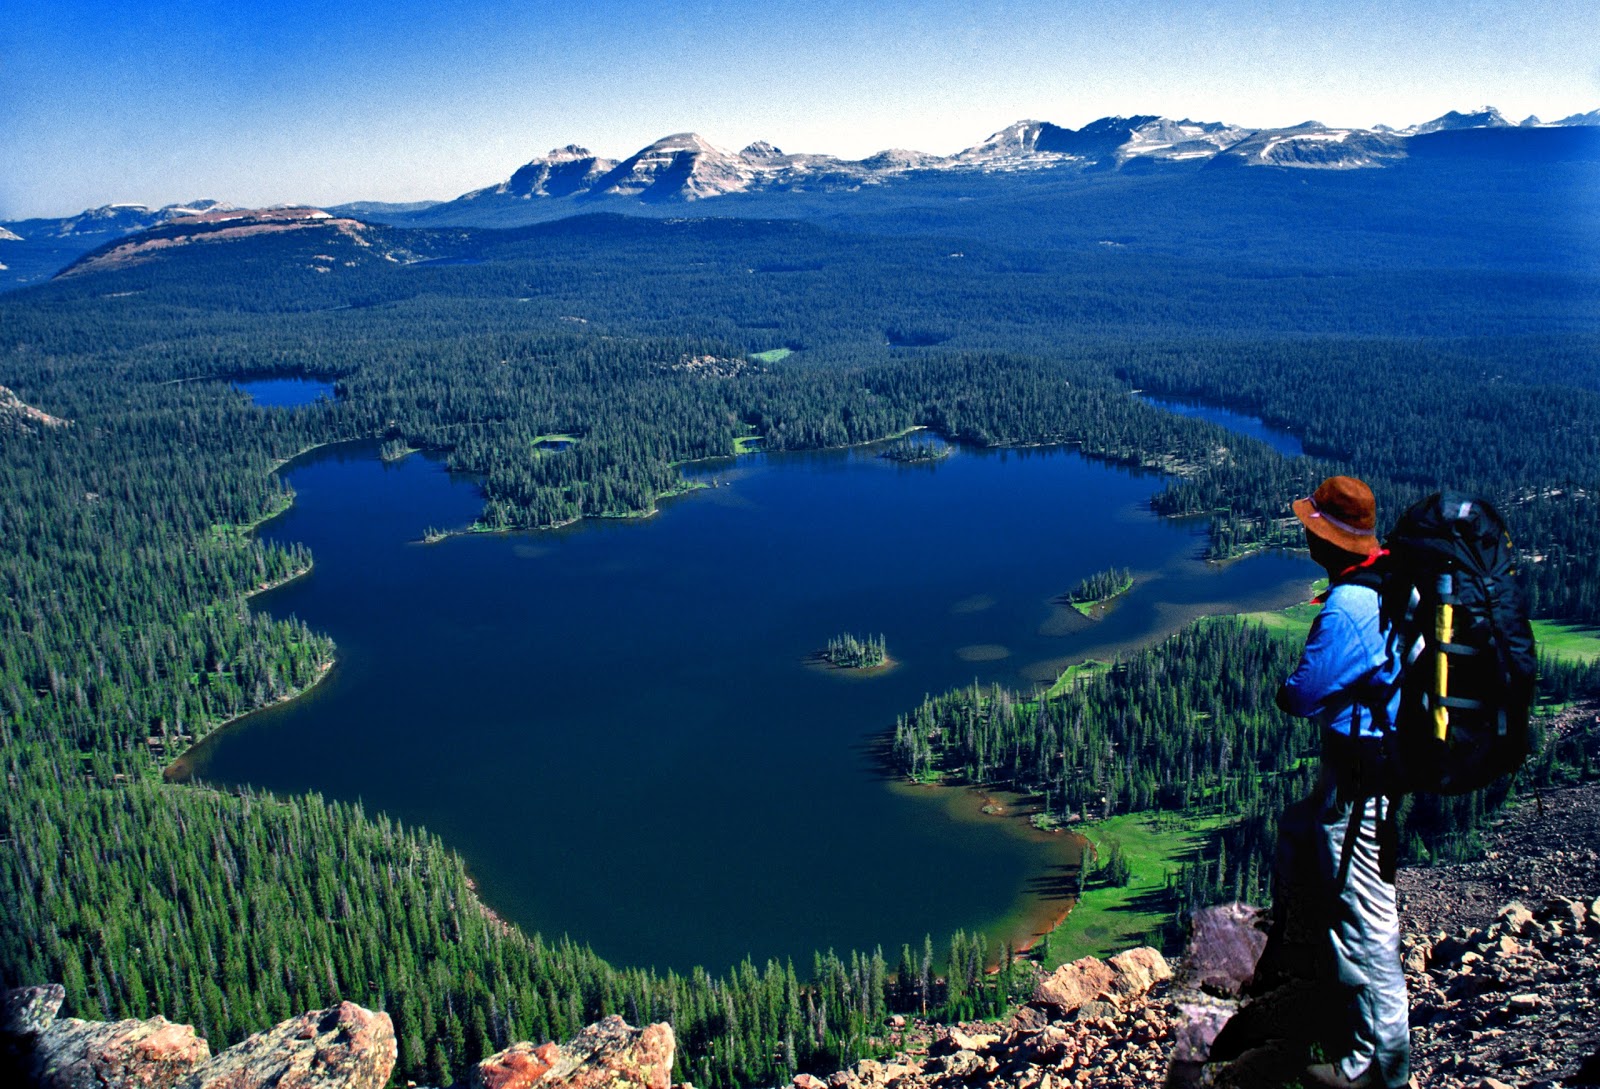
MAYBE ONE MORE ESSENTIAL — A CAMERA TO BRING THE WONDERFUL EXPERIENCES HOME TO SHARE WITH LOVED ONES.
This means for me this year 12 lbs. of photographic equipment! Just the wide angle zoom lens you see here weighs more than my backpack. That’s what happens when you really begin to take capturing the beauty of nature seriously.
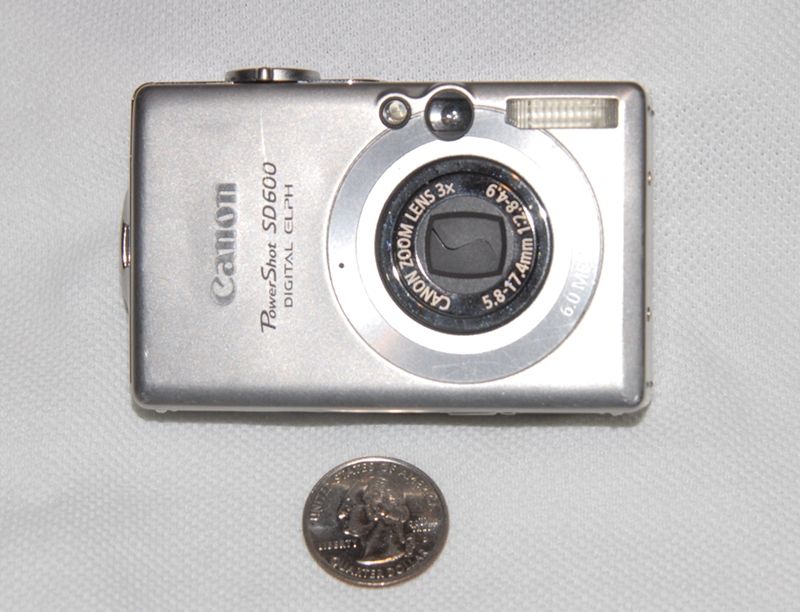
But for 99% of you, something similar to the following is the way to go–and the quality will be exceptional. Even this above photograph was taken with the tiny camera that follows–using my left arm to get the hand held shot.
For the story of this camera and why I give the following recommendations, go to Canon point and shoot experience and click on several shots reading the captions. But first believe me that these little cameras, even this antiquated 4 year old, one are capable of taking great photos–for example the following from my wildflower collection.
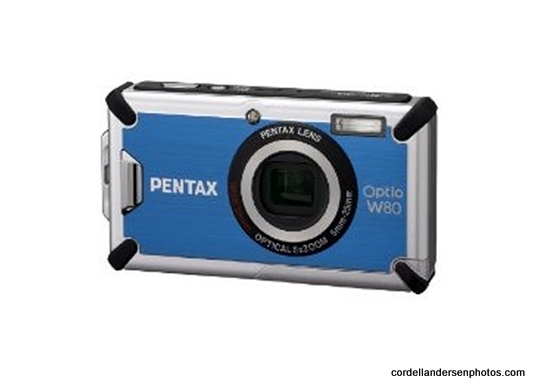
With the need of being waterproof, shock proof and more, I narrow my recommendations down to two great little cameras. The first one you see below:
It is the PENTAX Optio W80 which is one good waterproof option–they also say “freeze proof and crush proof” with 12 MP with 24-140mm zoom, and even video capability, etc.
My other recommendation is an Olympus product you see below:
The OLYMPUS STYLUS TOUGH-8000, virtually indestructible, and of course waterproof. 12 MP with image stabilization and slim enough to fit in your pack’s hip belt.
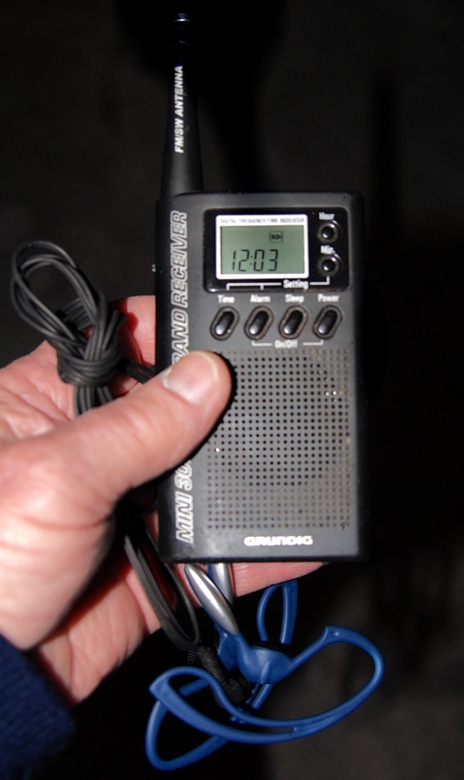
ALSO IN MY PHOTO WAISTE PACK: I always take with me my tiny Grundig radio to listen to the news, a talk show, the weather report, and OF COURSE KSL OUTDOORS each Saturday morning from 6:00-8:00 to make sure Tim, Russ and Jeff are ready for my call from the High Uintas. See the best and smallest I’ve found so far at MINI RADIO
IN THE INTEREST OF FULL DISCLOSURE I ALSO HAVE IN MY WAIST PACK my OLYMPUS Digital Recorder (DS-30) which is sort of a specialty item that perhaps only someone like me needs, but here it is. I use it to record names and addresses of new “Uinta Friends,” interesting stories and experiences, and even once a great recording of a pack of coyotes. Of course I have some good things recorded to listen to: Special music, and even an audio book or two. See it and other options at RECORDER
One last item I feel is a necessity: READING MATERIAL
As seen below, for me it usually includes one National Geographic, one Outdoor Photographer (or more often than not a handful of special techniques articles I rip out), and my tiny Military version of the scriptures. Add 1 lb. to the pack weight.
NOTE: Due to preparing this article I’m already packed up and ready to go for 9 days.
THE ALL IMPORTANT SUPPLEMENTS and links are found in the GEAR and Supplements section. Go to: VIT/MIN/ENERGEY/RECOVERY
WEIGHT TOTALS:
The BASIC PACK, plus the other gear & personal items outlined and shown in this article would basically be the same for trips longer than 3 days, approximately 20 lbs, plus food and perhaps an increase of 2 lbs. for 9 days and 3 lbs. for 18.
So without photographic equipment the totals would be 3 days = 24 lbs., 6 days=28 lbs. 9 days= 34 lbs. 18 days=47 lbs.
I of course will take my photography equipment that weighs 12 lbs. bringing my totals to:
3 days=36 lbs. 6 days=40 lbs. 9 days=45 lbs. 18 days=60 lbs.
Still sounds like a lot but for me it will still be a light load as I train with a 62 lb. pack walking around my living room while watching TV. To be able to do the 18 day trip with a starting weight of 60 lbs., I will likely have to up the weight of my training pack. What comes out of the 2010 season will indicate what and how will be possible for 2011.
If you will be carrying more than the 24 lbs. shown in this article, I highly recommend you do what you have to do to get in shape–even with 24 lbs. on your back at over 10,000 ft. you will need to get in shape.
CONCLUSION: I have shared in this article some of what I have learned over many exciting, enjoyable, and soul stirring years of backpacking. Of course this is something with which you never stop learning to improve your technique and equipment to be able to even enjoy more the wonderful creations of our benevolent Creator. I pray that something I’ve brought to you will move you to pack up and experience more the magnificant and vibrantly beautiful swath of God’s great creation we call The High Uintas–or any of the incredible Wilderness Areas, and make your outdoor experience a continual inspiration and blessing. May the Lord grant us the opportunity to soon meet on the trail–remember to not pass up an old bearded guy limping along, and say hello–HE WILL LIKELY BE ME!
Last of all remember the words with which I end my LIGHTWEIGHT BACKPACKING photo essay.