Trip #1-2010 THE GRANDADDY BASIN and LESSONS LEARNED

THE GRANDADDY BASIN and the ENERGY FORMULA CONFIRMED
On my FACEBOOK page I posted earlier today the following:

The “ACID TEST” and “ENERGY” — For those interested, I did survive the “acid test” in the High Uintas and learned a lot. I’ll get a report up on the website by late evening, but if you want more “ENERGY” why wait for the details–just go to my article on the subject and get the stuff that works miracles at: GET THE ENERGY


Afterwards it seemed like what I was suggesting is done on that funny TV commercial about the great metal roof on a house the realtor was trying to sell, expounding enthusiastically how great, long lasting, fireproof, beautiful, etc. the roof was.  She then asked, “Would you like to make an offer?”  The buyers replied asking, “Could we see inside the house?” The salesman asked smilingly, “WHY?”


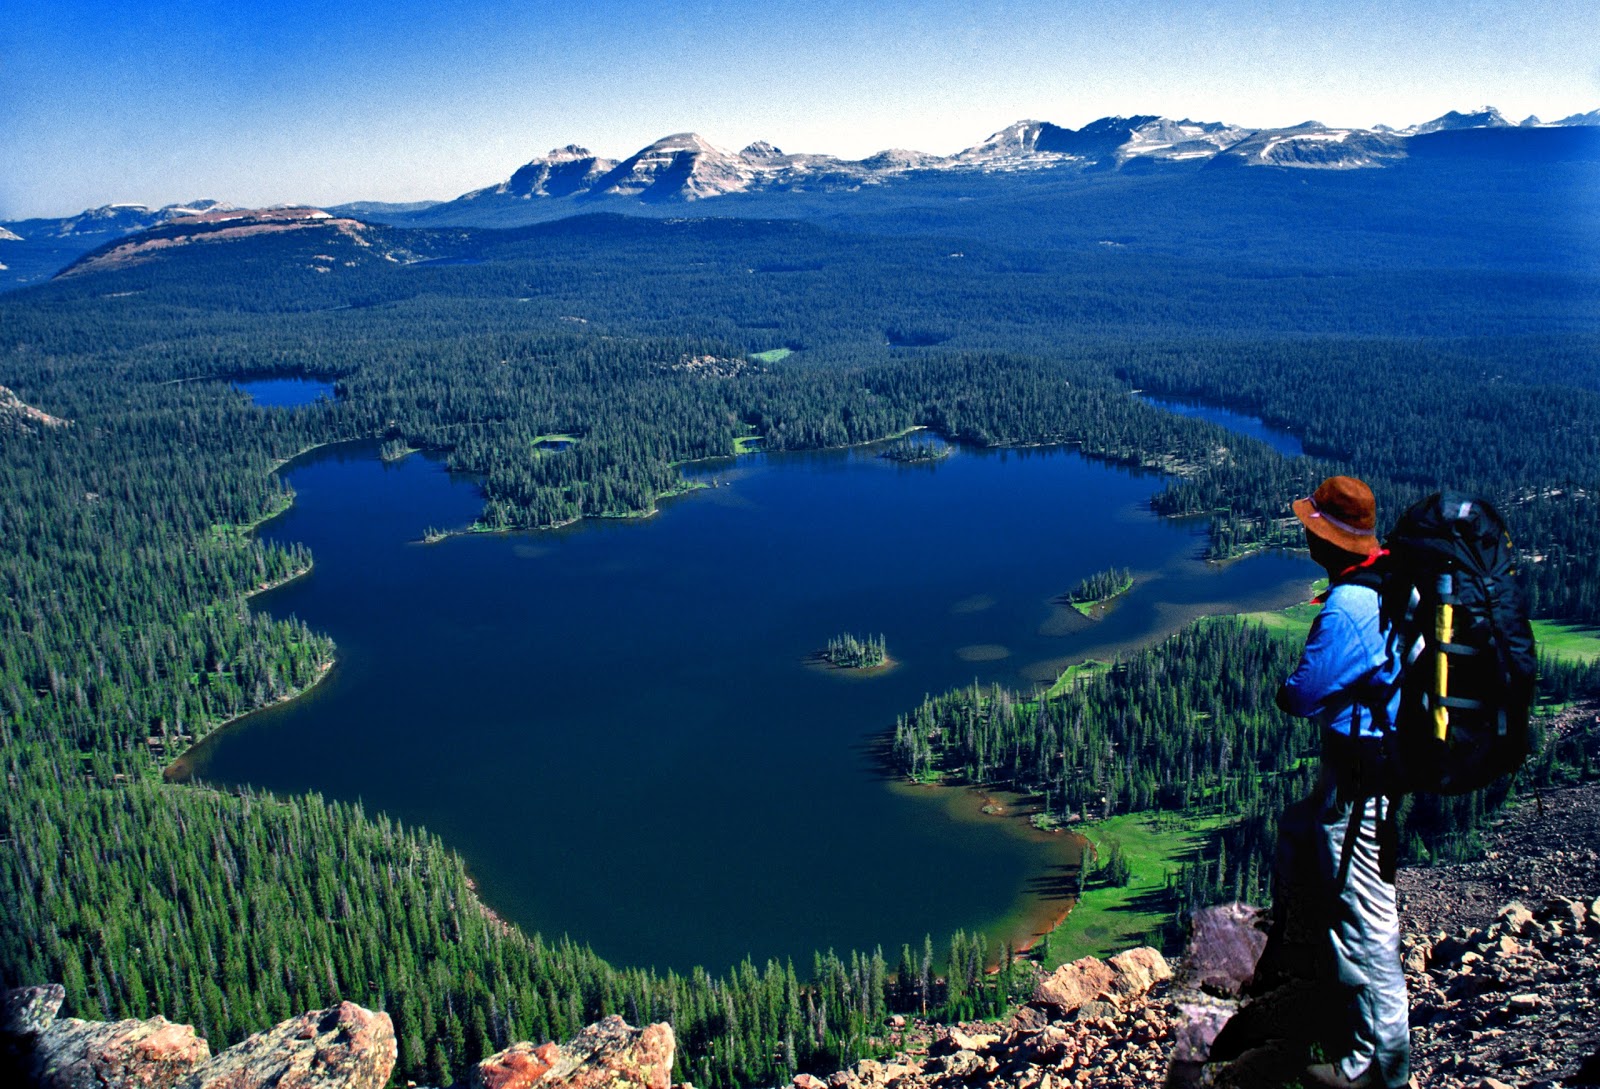
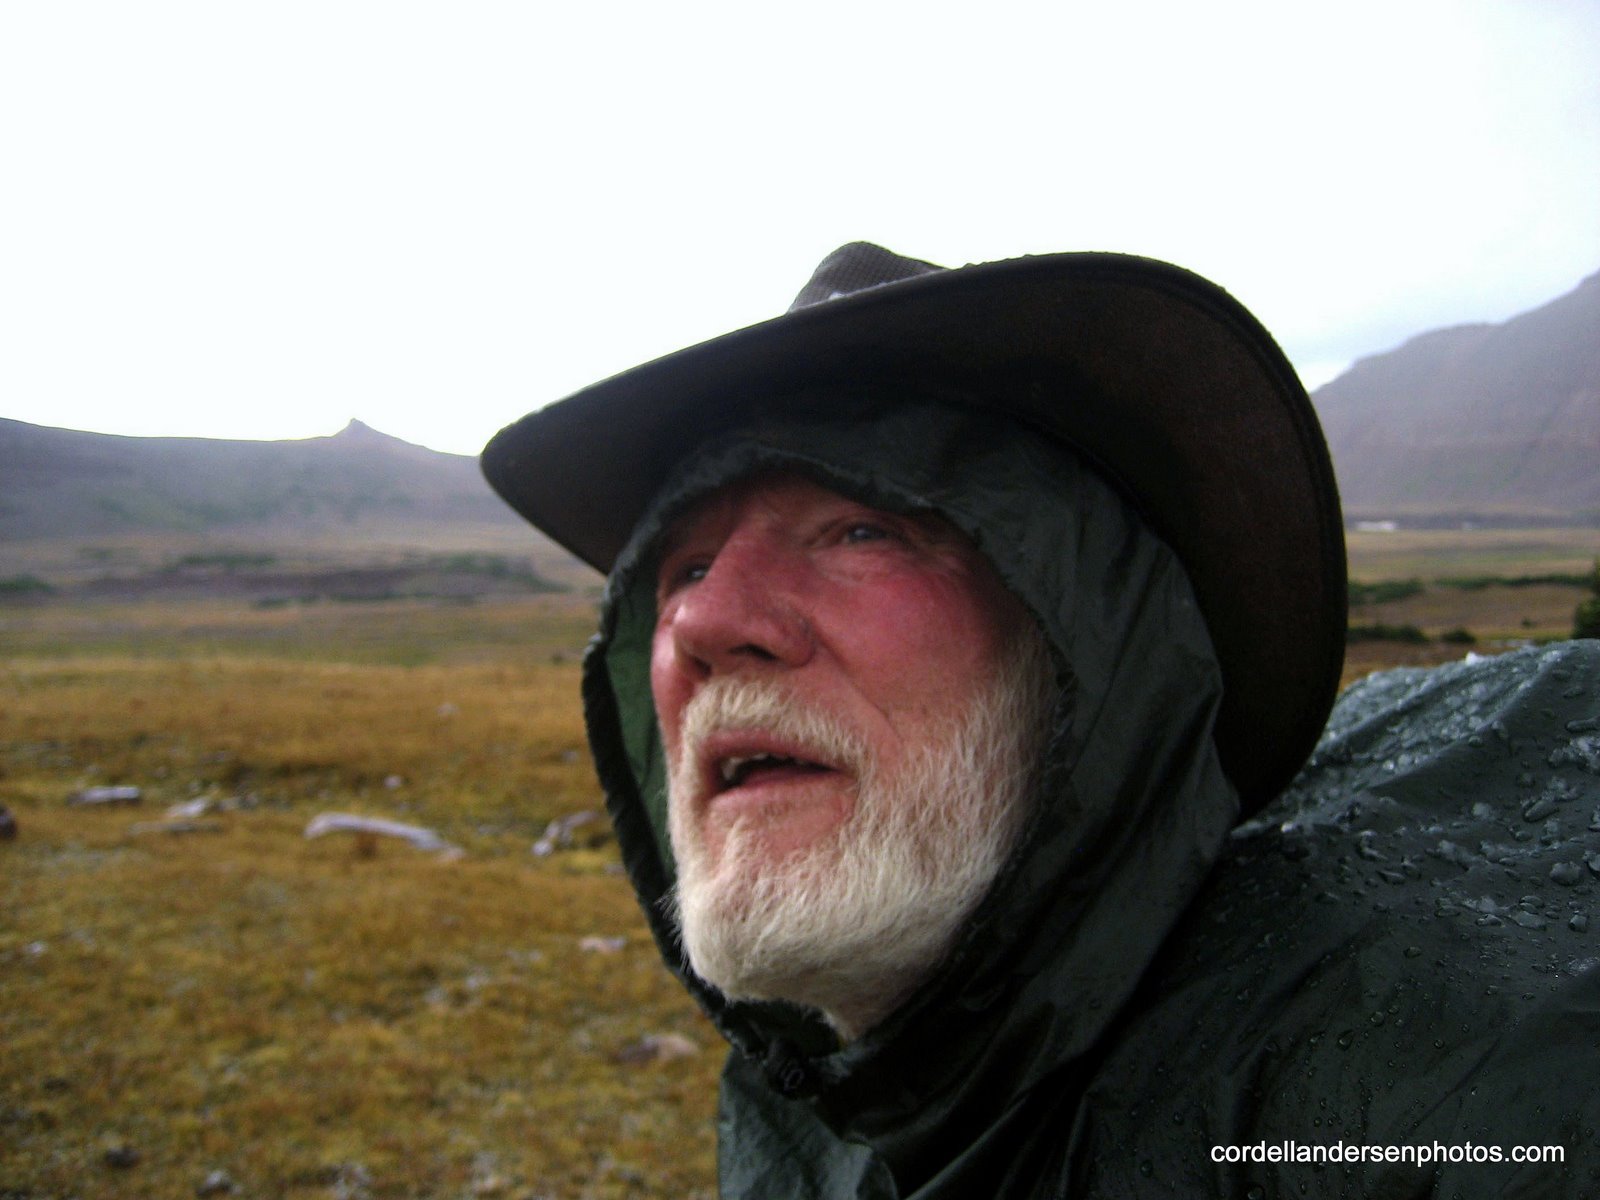
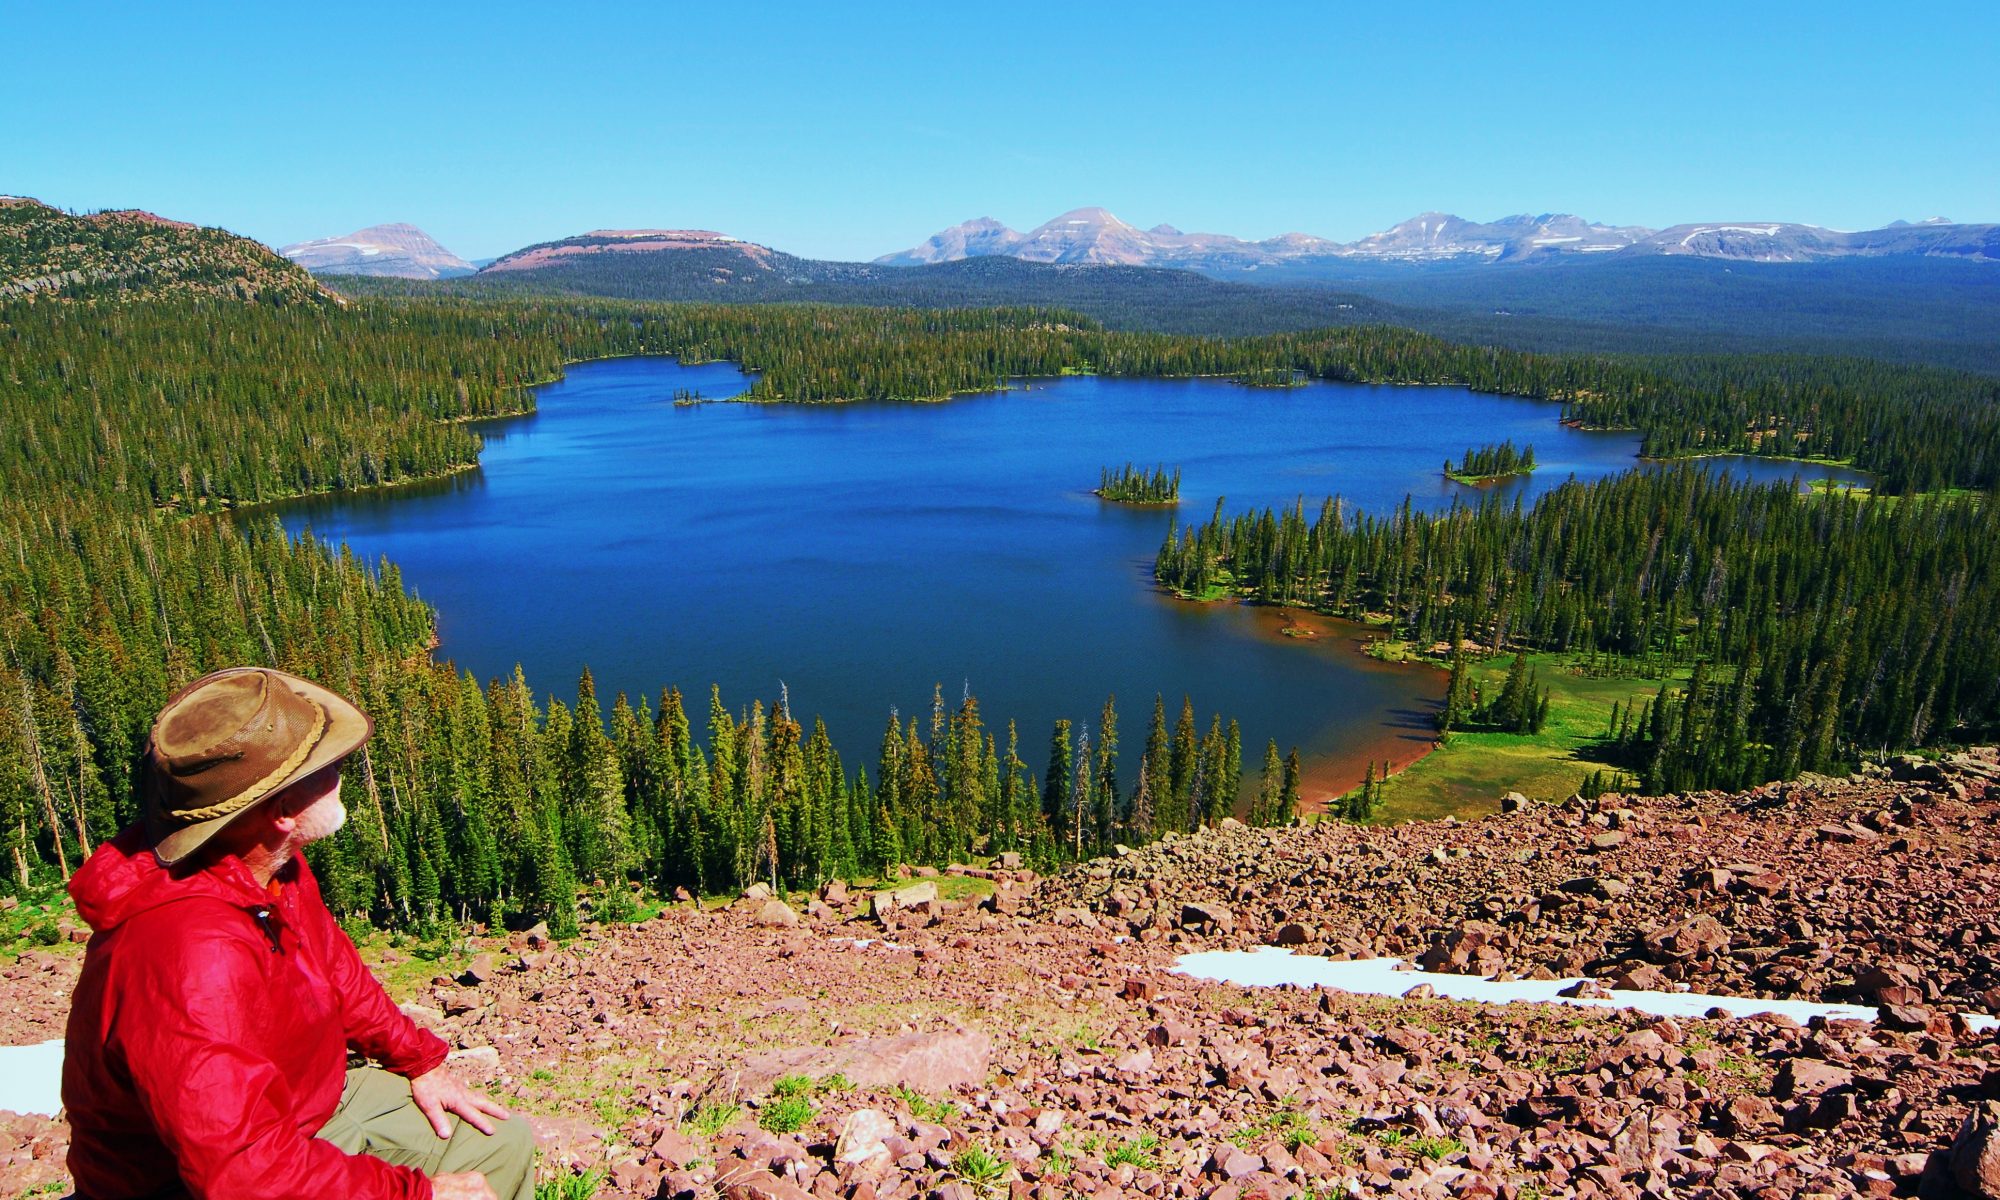
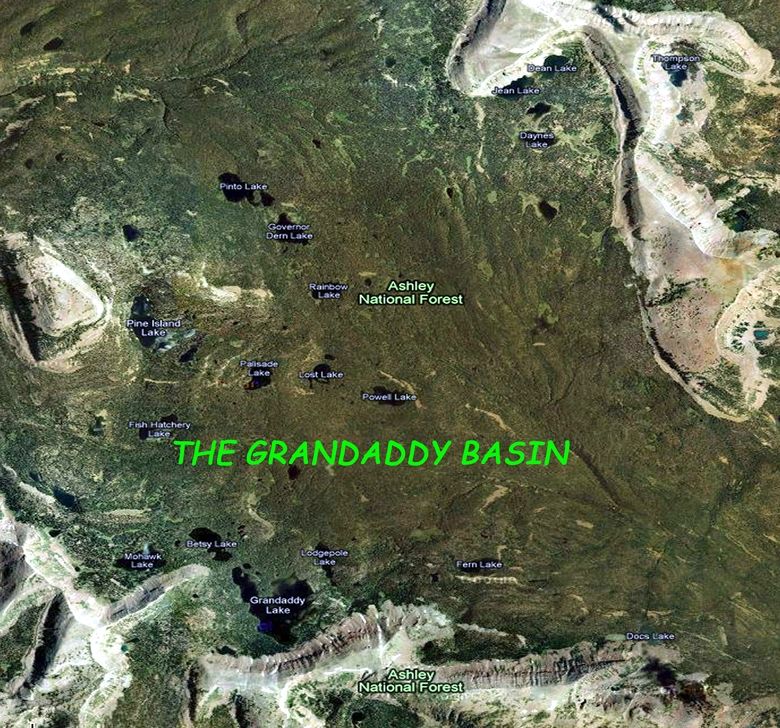
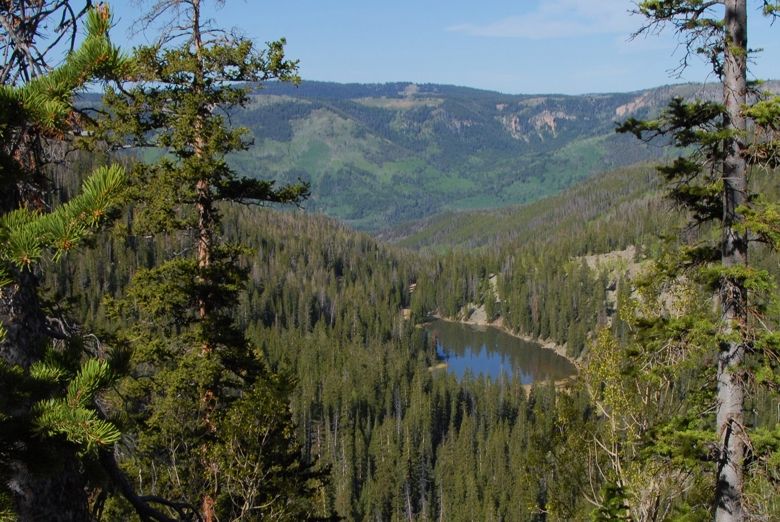
Here’s the story about “why” you should maybe get the good “stuff,” along with some good information about the Grandaddy Basin, or as me and buddies have termed it, “The Grandaddies.” It is probably the highest traffic area in the Wilderness with the fishing in the lakes along the trail pretty slow, but yet is a most beautiful area worthy of your attention–and I’ll clue you in to where the good fishing is too. First the overall view from up high on East Grandaddy Mountain on the southern rim of the basin.  By the way that isn’t me in the photo. I still have some hair!  It is my buddy, Ted Packard, who went with me on one of my 3 trips to East Grandaddy Mt. to get this stunning view of “The Grandaddies.”

As I describe the photographs that tell my 3 day, 16 mile backpacking experience, I’ll point out some very important lessons learned, like, recognizing your limitations and paying heed to them.  But let’s get started with an overall view of the High Uintas, with an arrow pointing to the Grandaddy Basin, followed by a zoom in of the area:


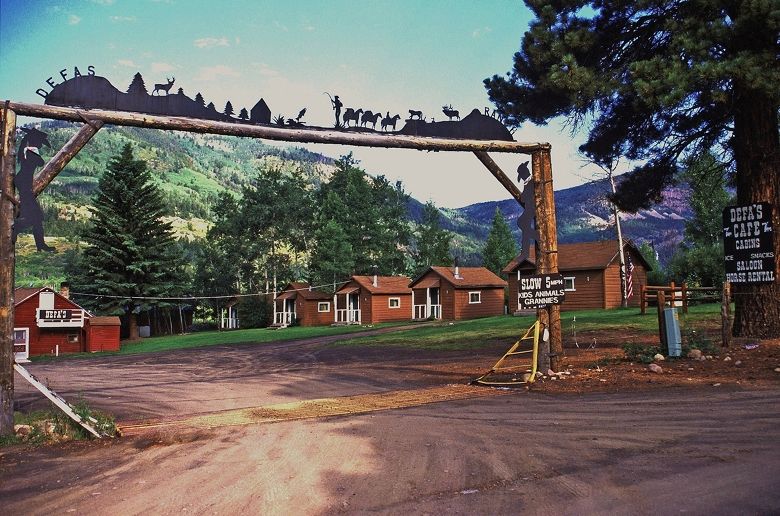
To get to this area you drive east from the Wasatch Front to the town of Francis, 2 miles south of Kamas. At the 4 way stop you go due east towards “Woodland.”  That highway, SR-35,  will take you up over Wolfcreek Pass and down to the North fork of the Duchesne River.  After crossing the river you turn to the north up the canyon.  For more detailed directions go to TO HADES and click on half a dozen photos.  About 6 miles up the canyon you come to Defa’s Dude Ranch you see next from the air.


Just past Defa’s you turn off at the sign to the Grandview Trailhead (you can see clearly the turnoff on the previous Google Earth view).  Along the way you get a view of the canyon and Lightning Ridge with the trail visible we used many years ago when we had to hike the 10 miles up to Hades Pass.

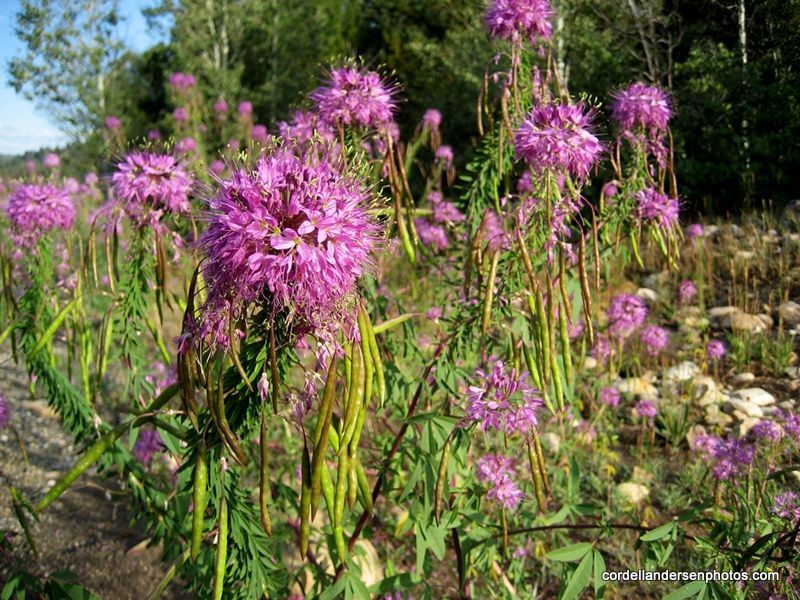
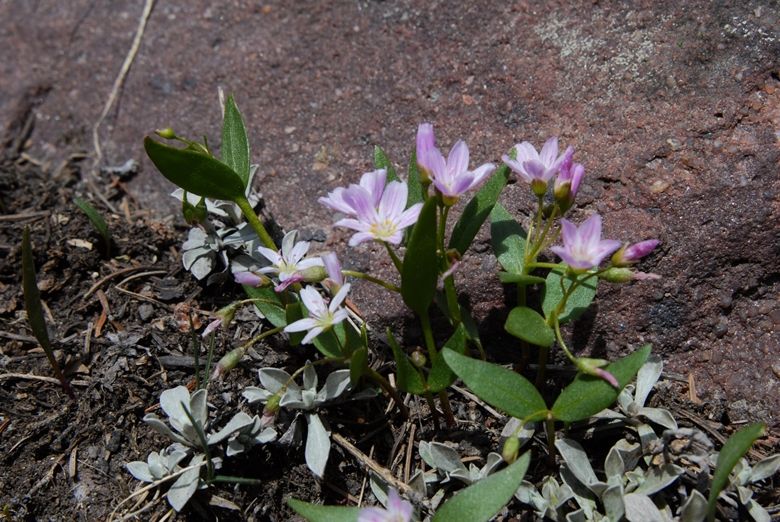
This was Thursday, June 24th and the road was in good condition.  I got shots of several new wildflowers along the way.  I will refrain from showing too many flowers in this photo essay, but below is a new one.  About half a dozen of such photos will be added to my Wildflower albums.

Soon you pass Splash Dam Lake.

You continue to switch-back up the canyon and soon you are looking back at the Splash Dam Lake.

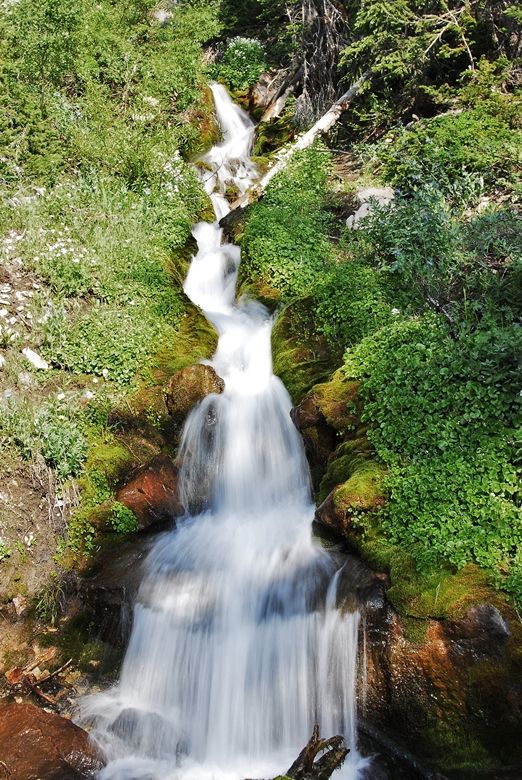
Just before arriving at the Trailhead you pass on your right a wonderful stream cascading down the mountains. I always stop to fill my water bladder.  No need of purifying this wonderful water.

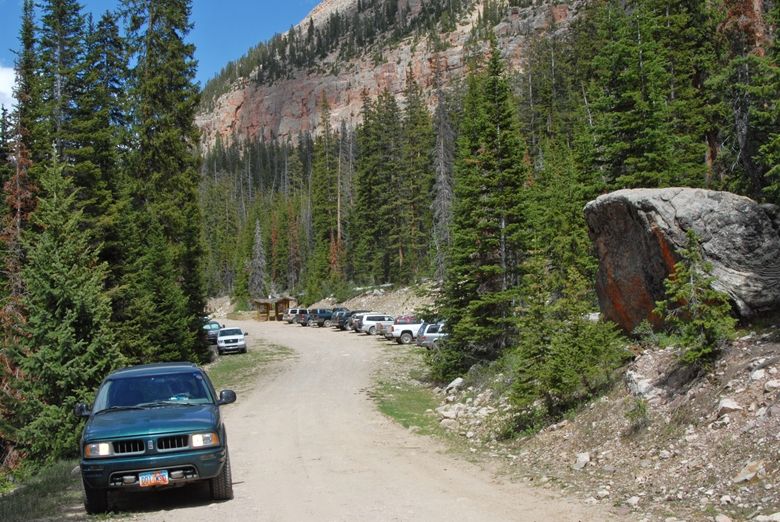
Soon you arrive at the Trailhead.

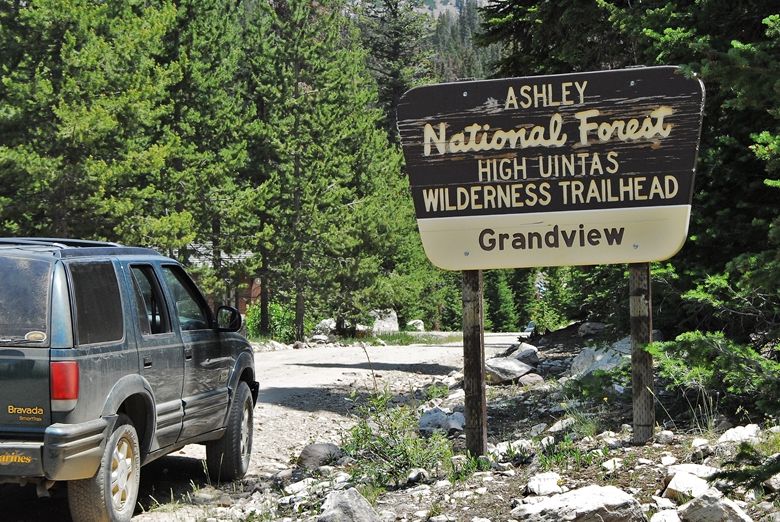
There were only 2 cars in the parking lot and only half a dozen entrees in the register.

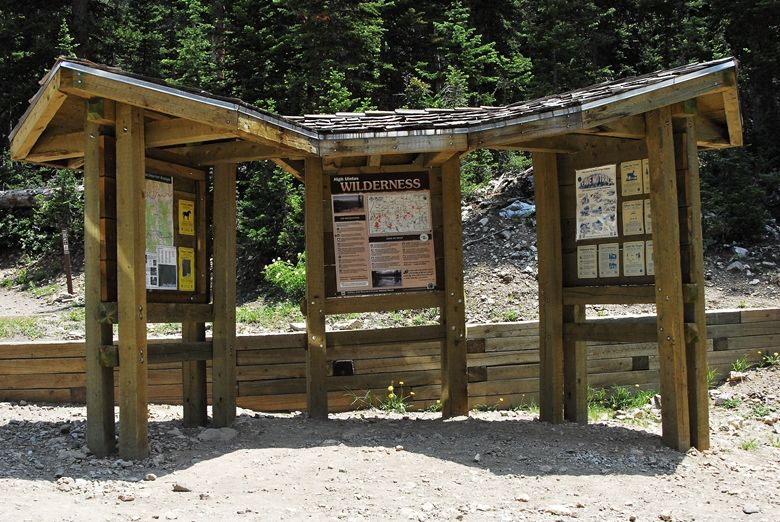
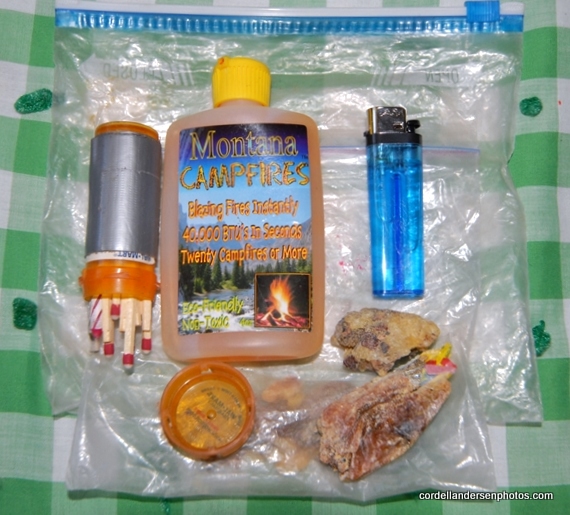
Every visitor should review the Forest Service rules and regulations, one important one being that due to this being a high traffic area it is prohibited that any camp fire be within 1/4 mile of any lake. If you have a stove you can set up your camp 200 feet from lakes, streams, trails, or other camps. Of course Rule #1 is LEAVE NO TRACE!

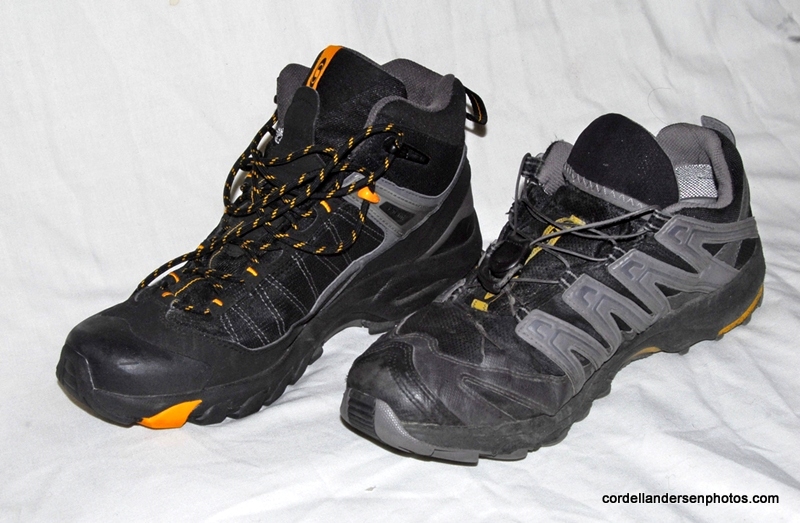
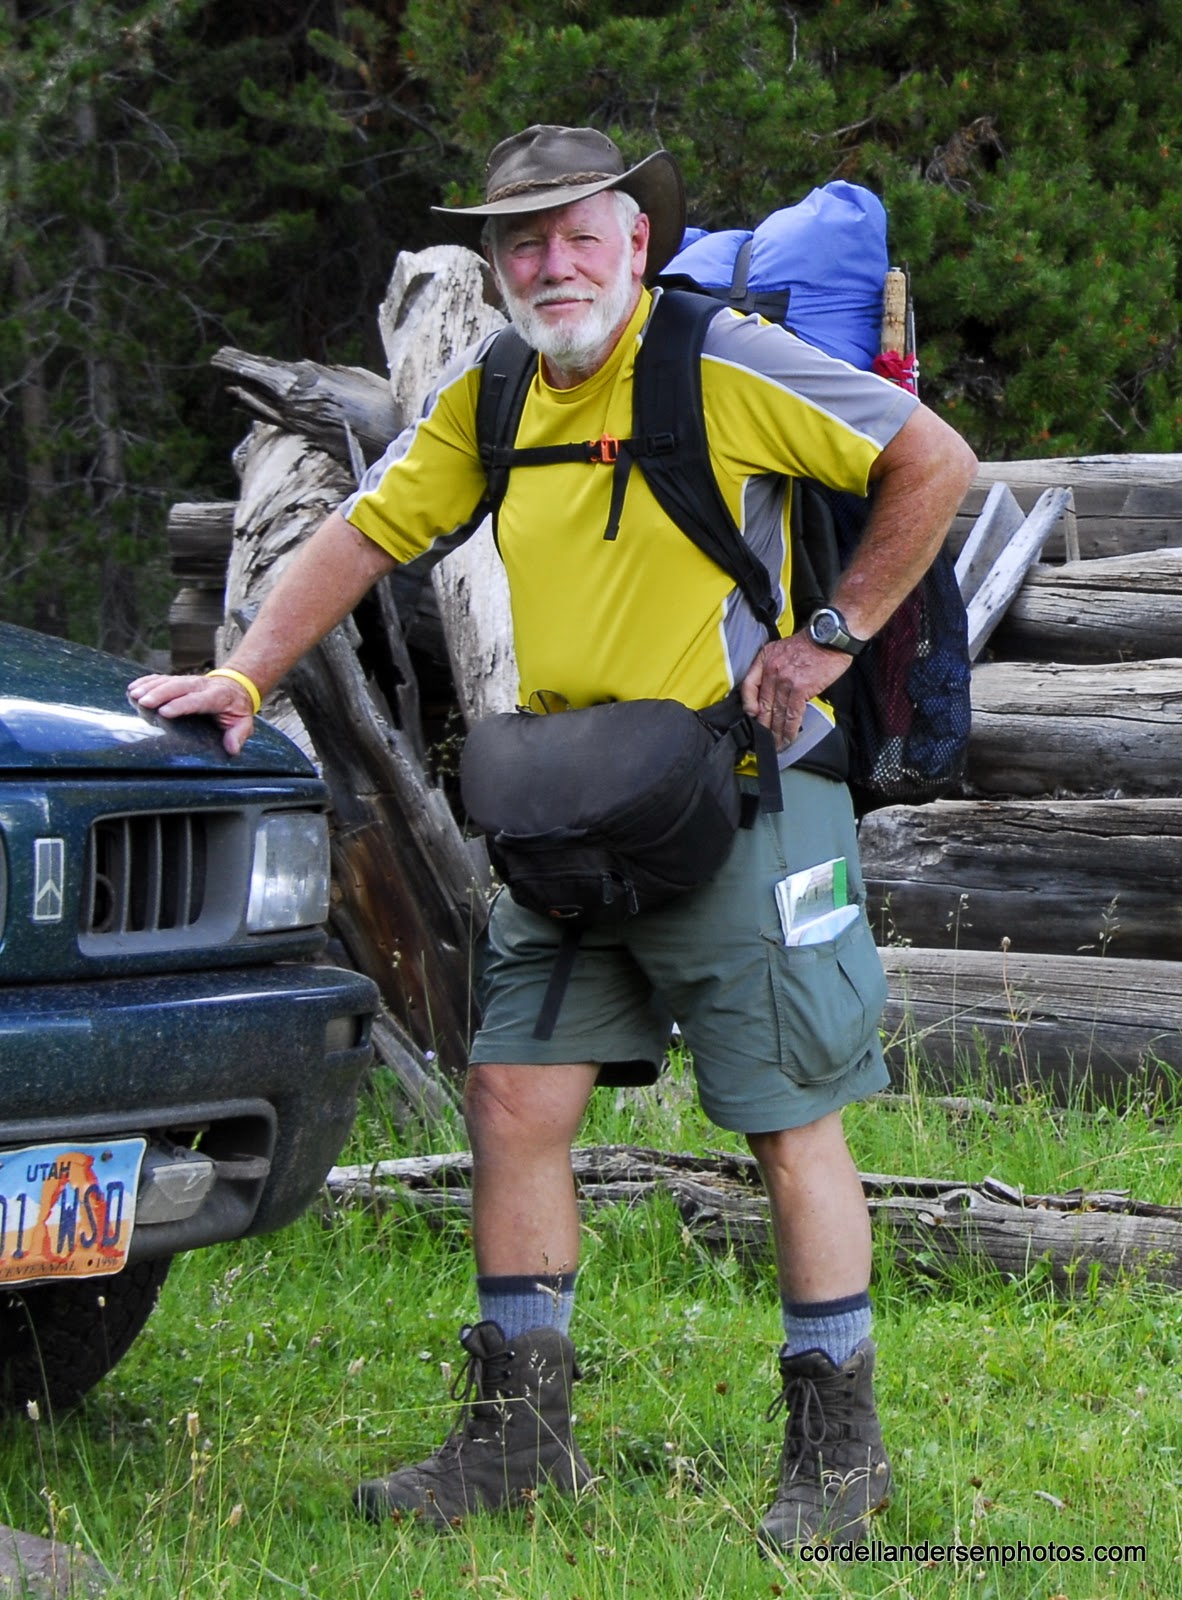
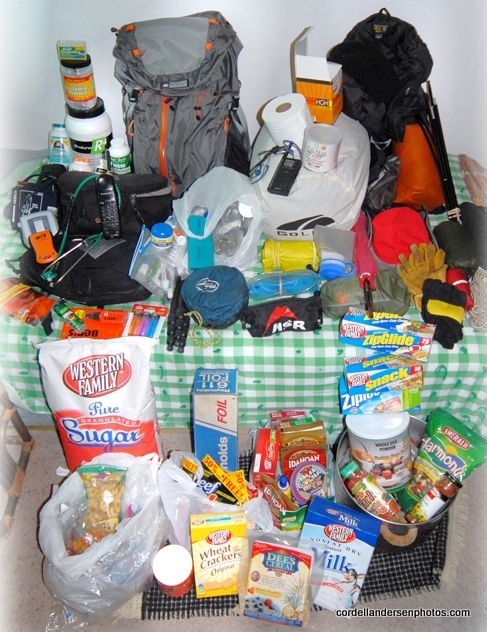
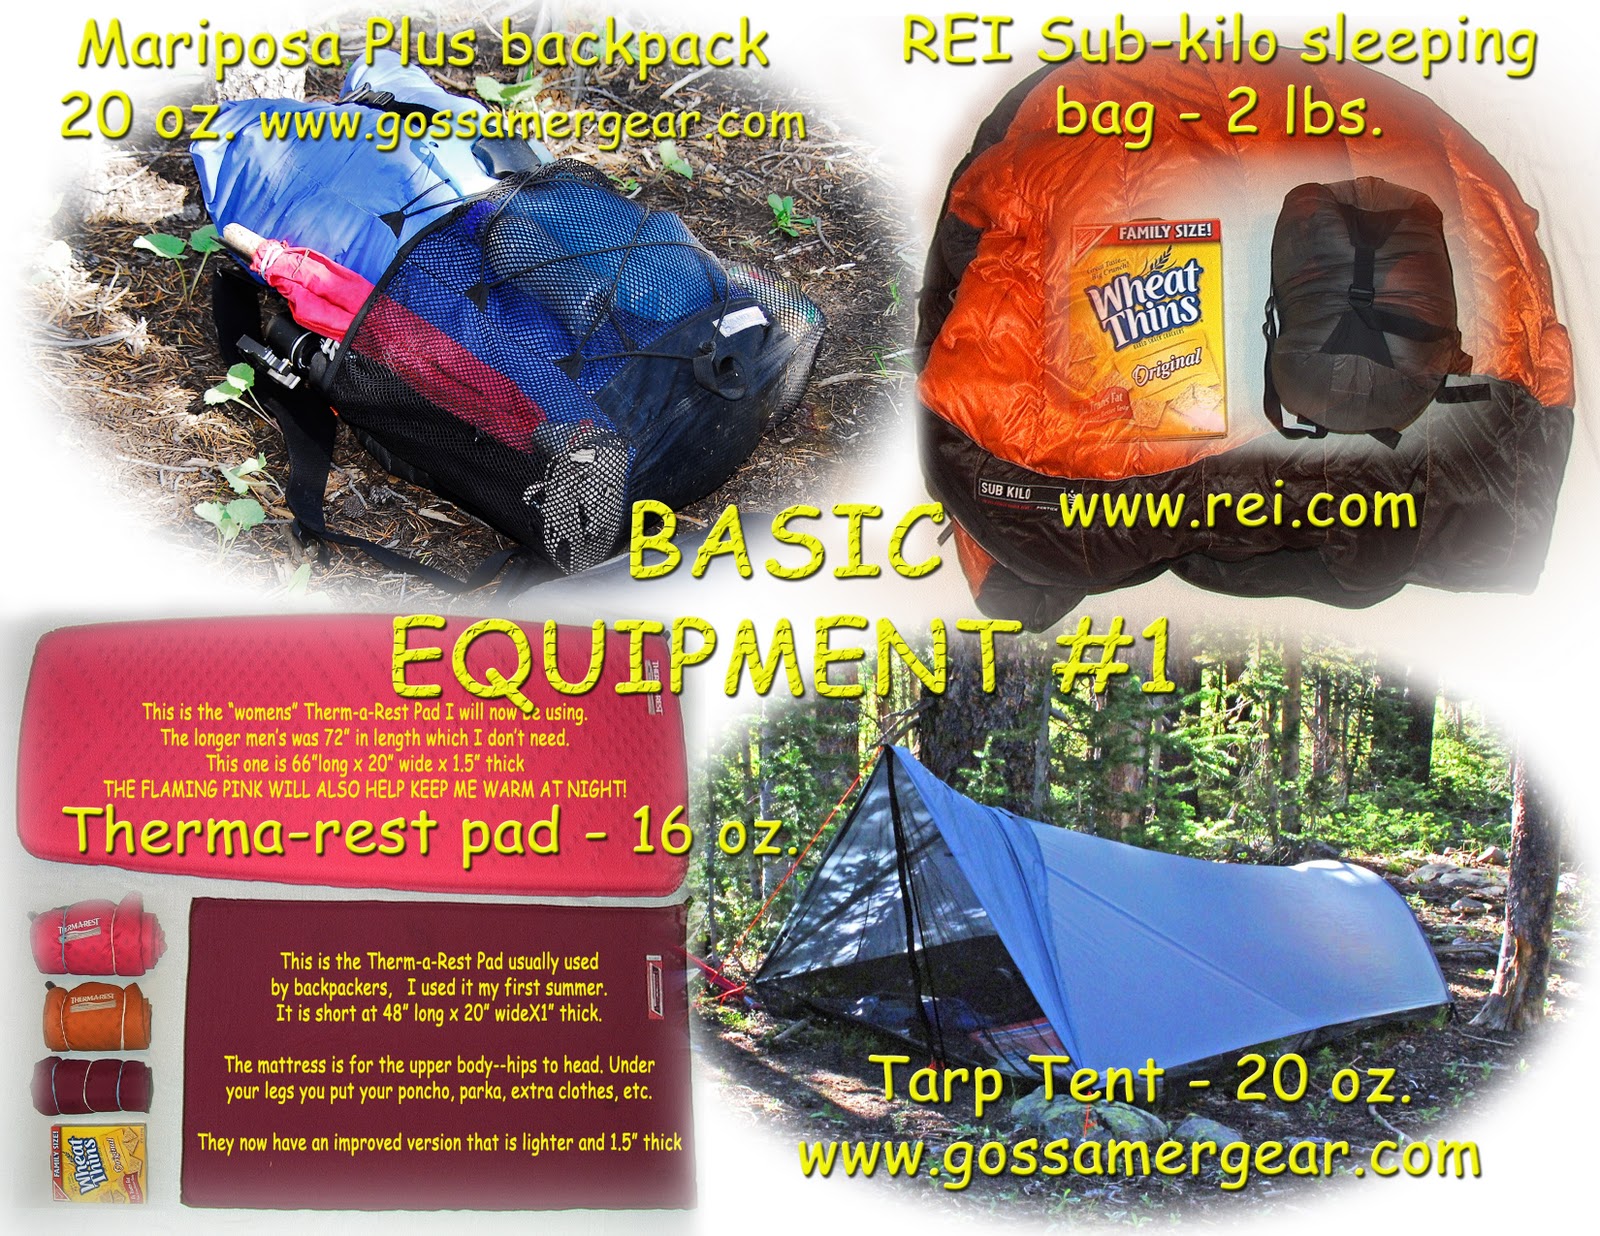
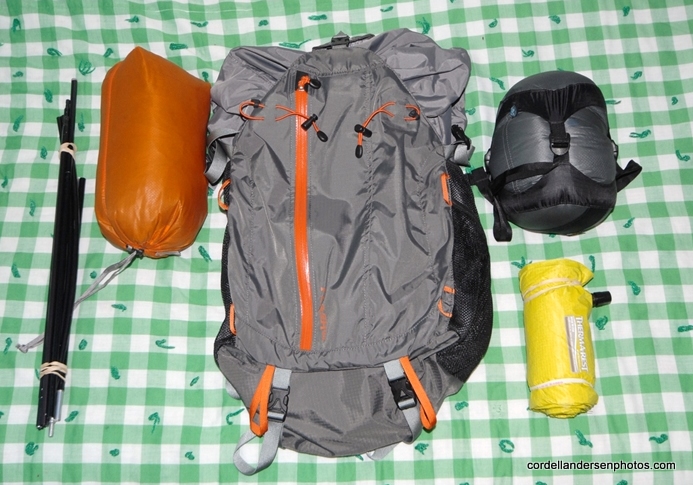
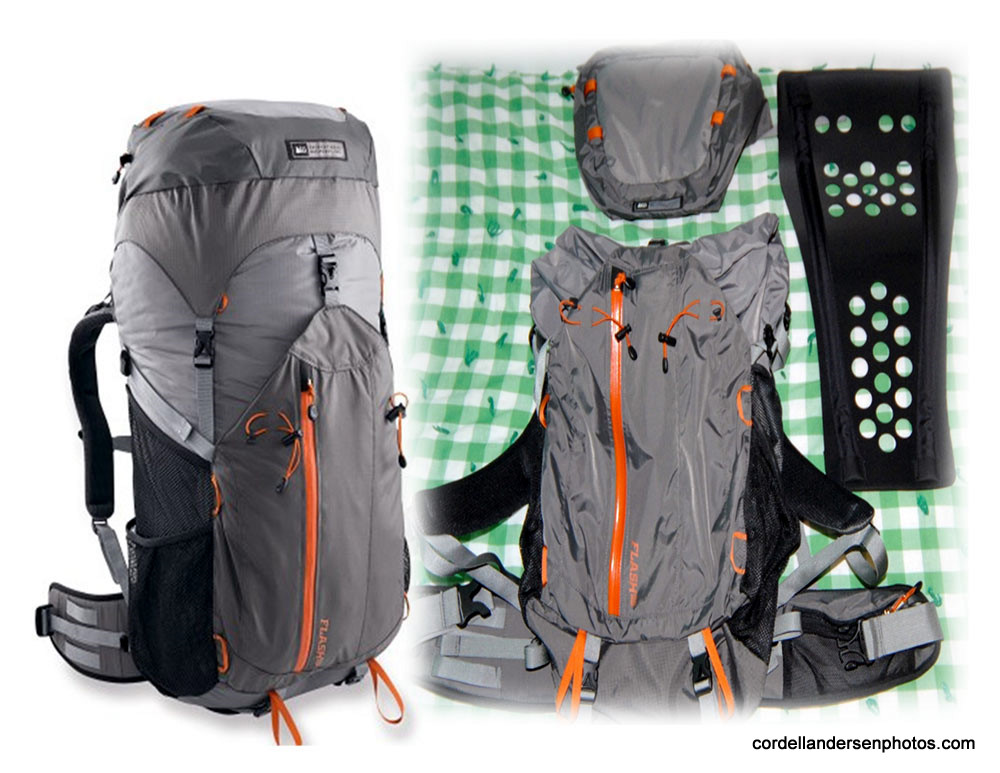
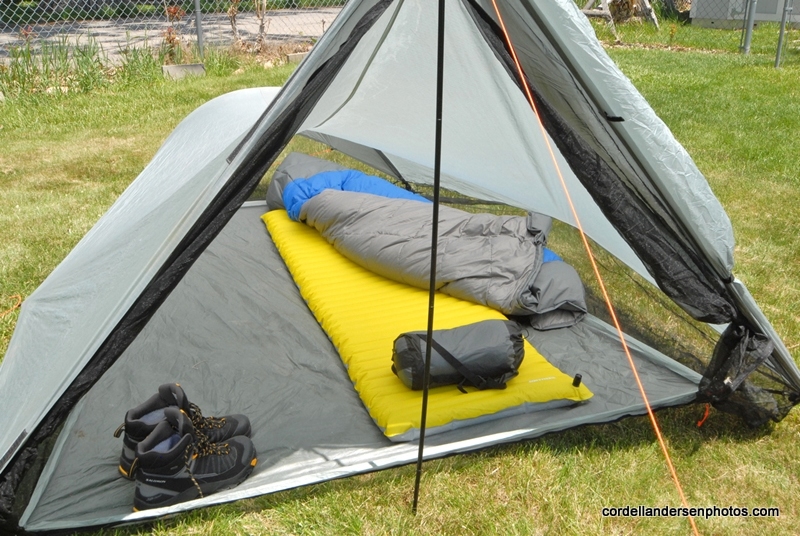
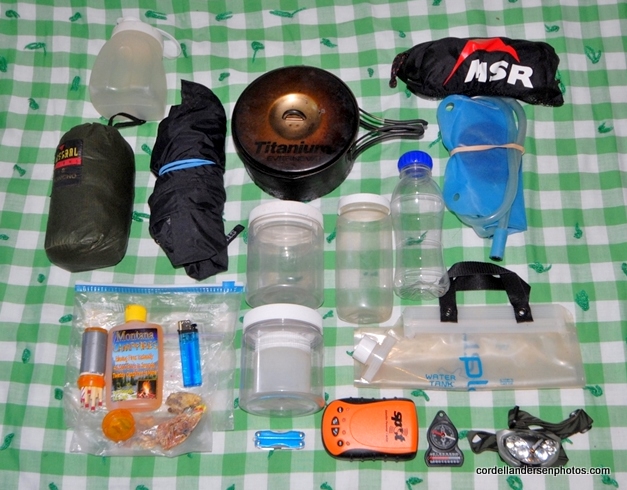
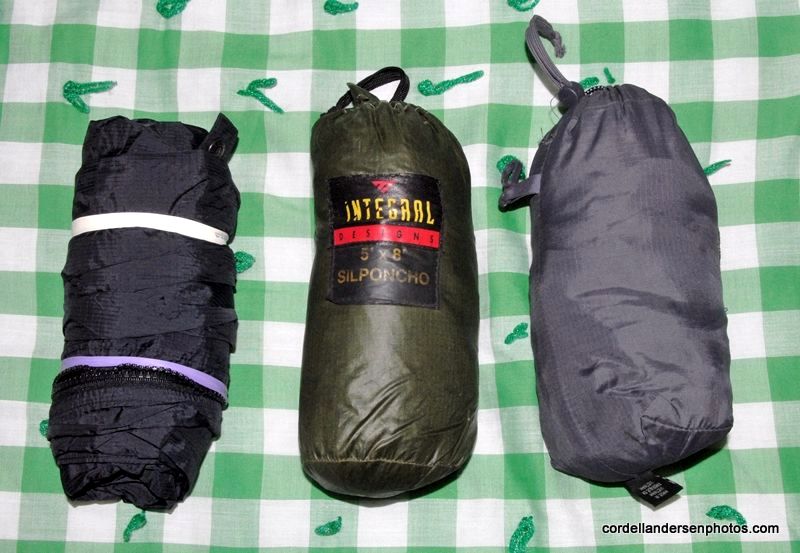
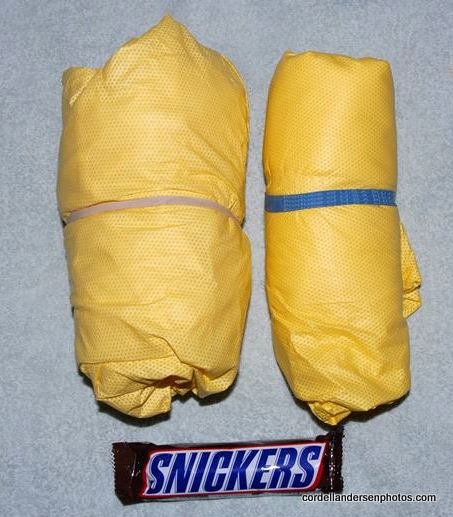
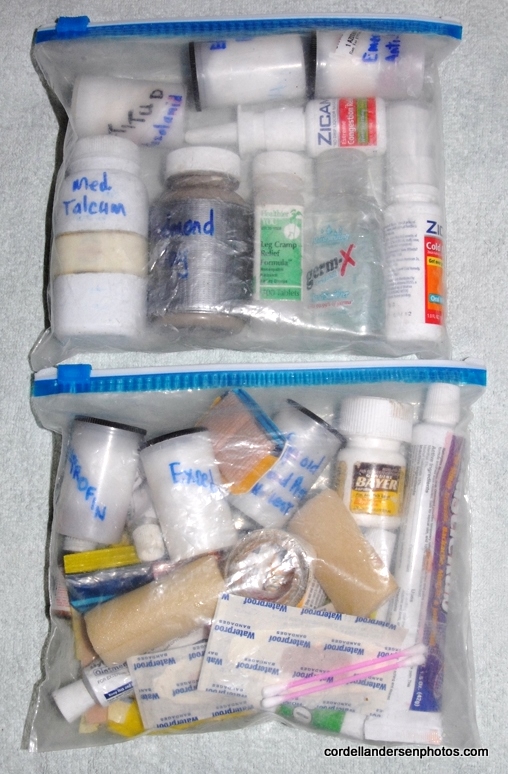
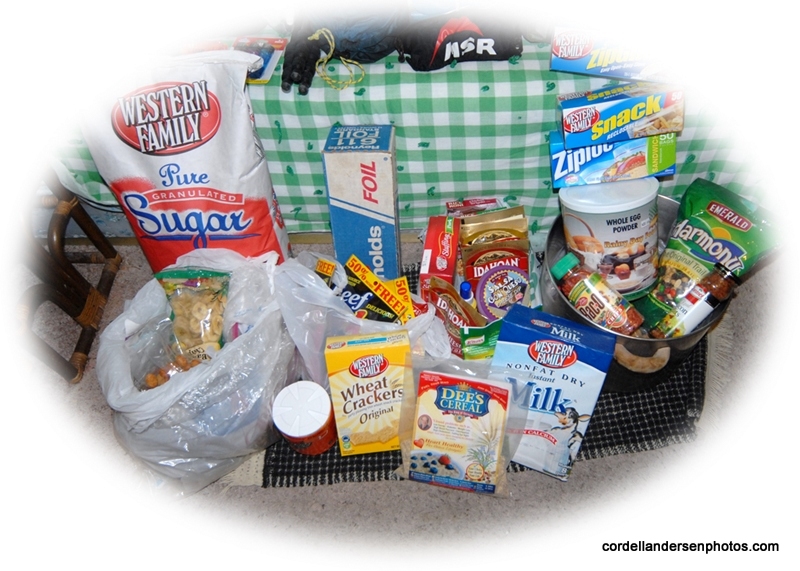
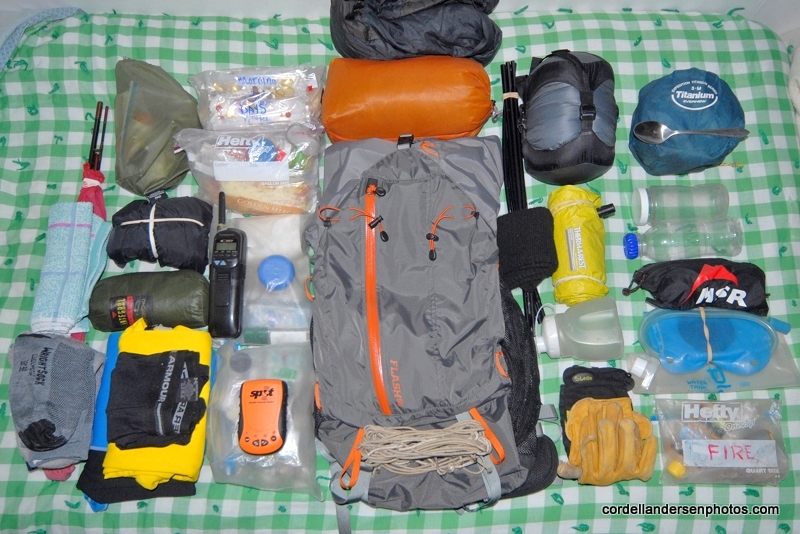
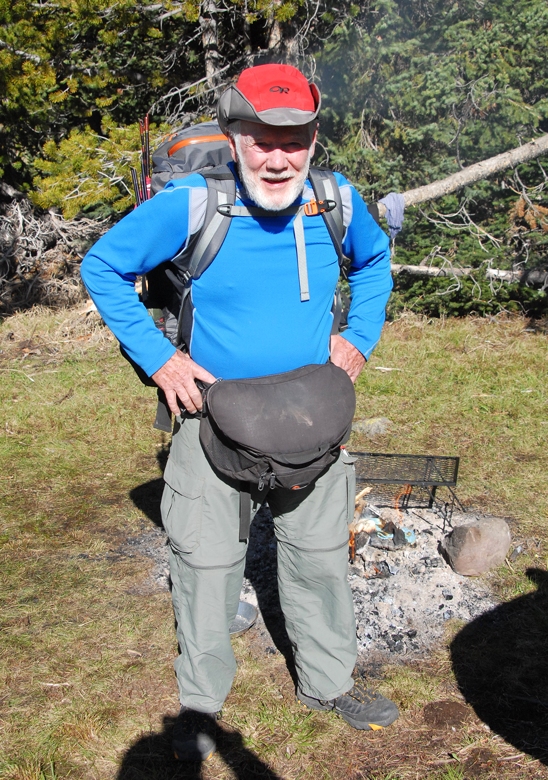
I was ready with a pack weight of 25 lbs.–excluding my photo equipment.  This included food for a 4th day if  necessary. Contrary to what I said in my article about “A 3 Day Backpack” I put the pack hood back on as I needed that pouch for my extra photo equipment, the Iridium Satellite phone, and the SPOT Tracker–so all would be easily accessed.  For details on my equipment and preparations go to:  3 DAY BACKPACK


I activated at the Trailhead my SPOT SATELLITE TRACKER, and then hit the message button again once at my destination, Fish Hatchery Lake.  This sent the above Google Earth tracking to all interested. Of course my route was far from a straight line.

So I was on my way up the rocky trail you see below.

As I have advised all going into such a Wilderness, you have to be very cautious until you get your “mountain legs” working.   It takes special concentration, balance, agility, and often quick reaction when a rock begins to move on you.  It began to be obvious, likely due to now being in my 75th year, that my balance was off, as well as my agility.  Special focus, and pretty quick reactions kept me moving safely up the trail.

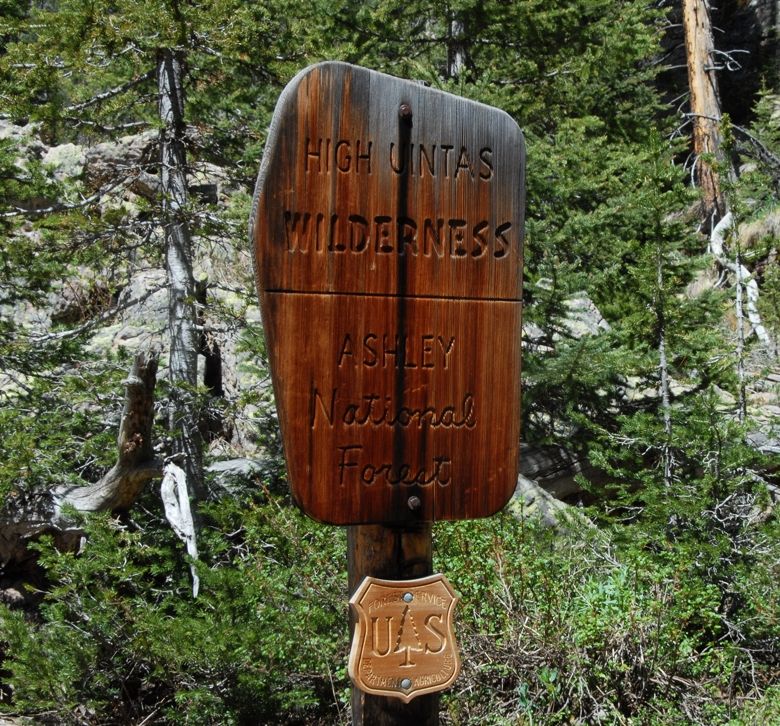
Pretty soon you cross the Wilderness Boundary.

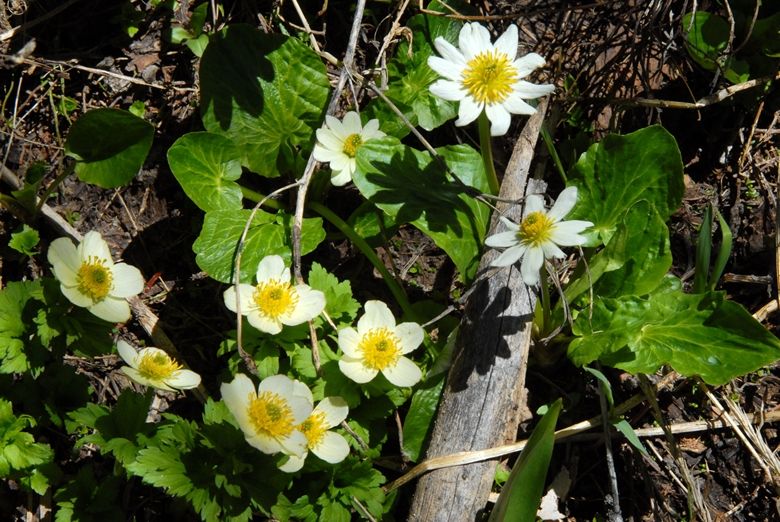
As usual the wildflowers in bloom attracted my attention–such as the two you see here, White Globeflower, and Marsh Marigold.  The collection on my website now numbers 238 varieties.

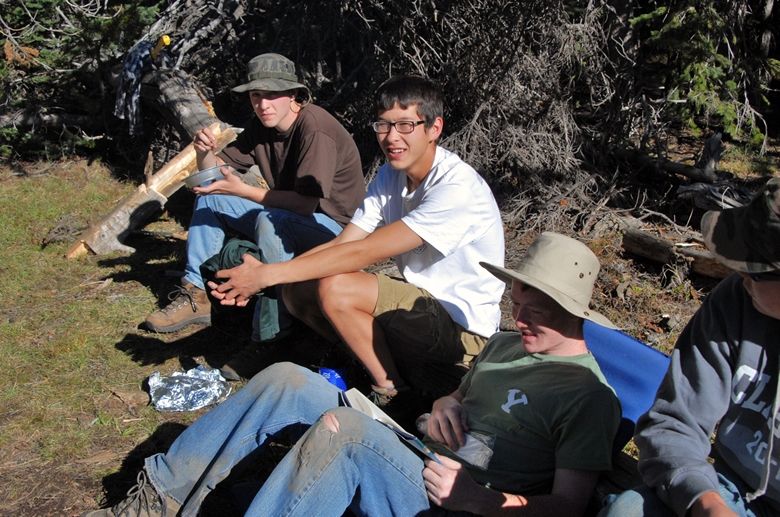
Along the trail I was overtaken by Dr. Toby and a troop of Explorers from Heber, Utah.

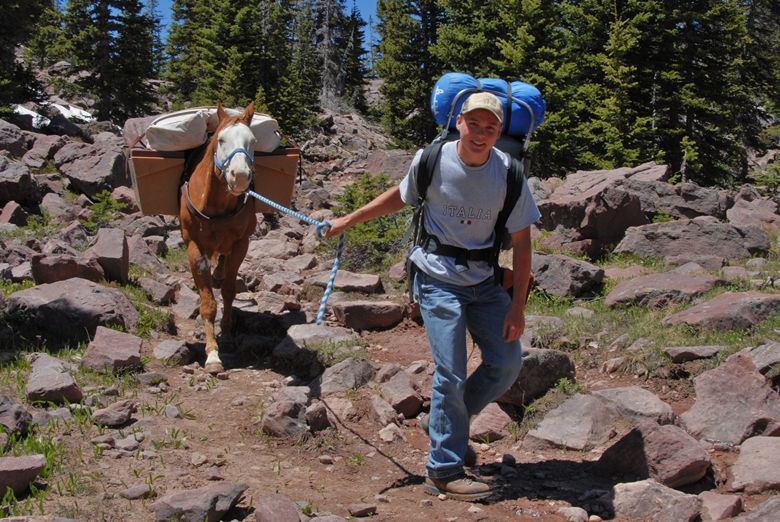
They had several pack horses, and several riders–of course the leaders.  All the hikers had backpacks.  We’ll run into them later on as they were heading for the same lake.

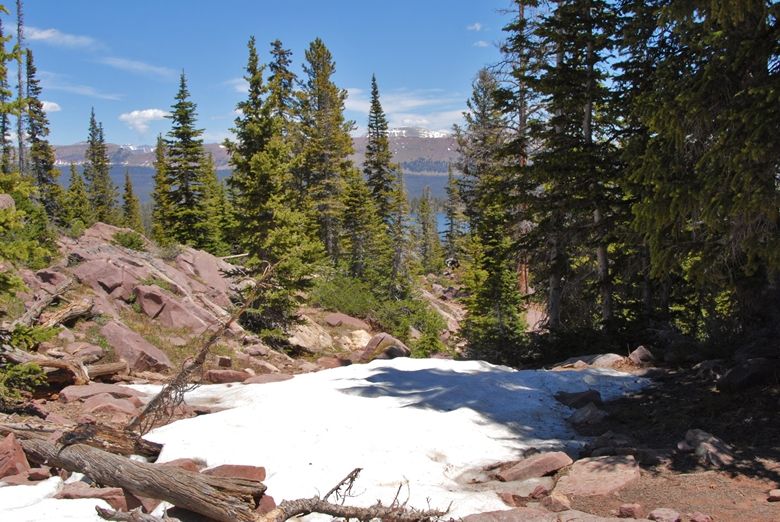
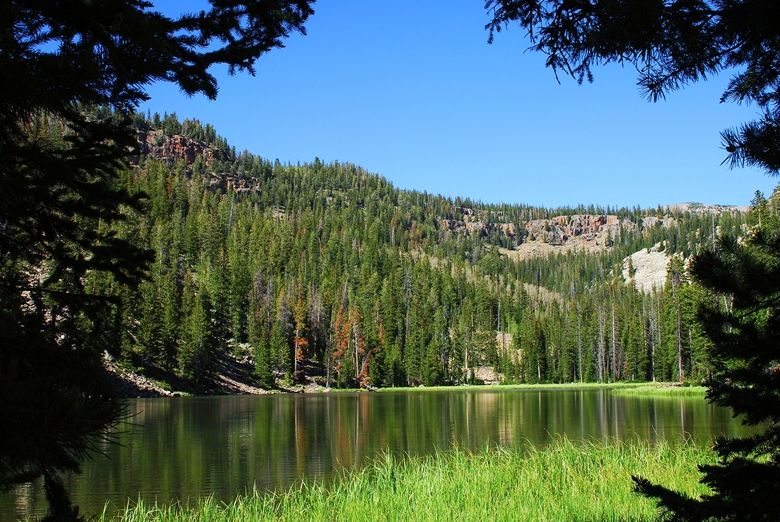
There was no snow on Hades Pass.  A drift or two had been slogged through climbing to the pass, and then another patch a  few hundred yards down into the Basin with the first view of Grandaddy Lake in view.

Grandaddy Lake is the largest lake in the High Uintas Wilderness.  It was barren of fish in the days of the mountain men and pioneers, but thanks to the Fish and Game (Utah Department of Wildlife Resources) there are now fish in around 667 lakes–quite a few now with natural reproduction.  Grandaddy Lake is one of them with the native cutthroat trout spawning from mid-June into July in the 3 streams that come into the lake on the western side, a few shots of which you see below.

Fishing is closed in  these streams until July 7th.


More photographs of the spawn and info on fishing the Uintas at:  FISHING

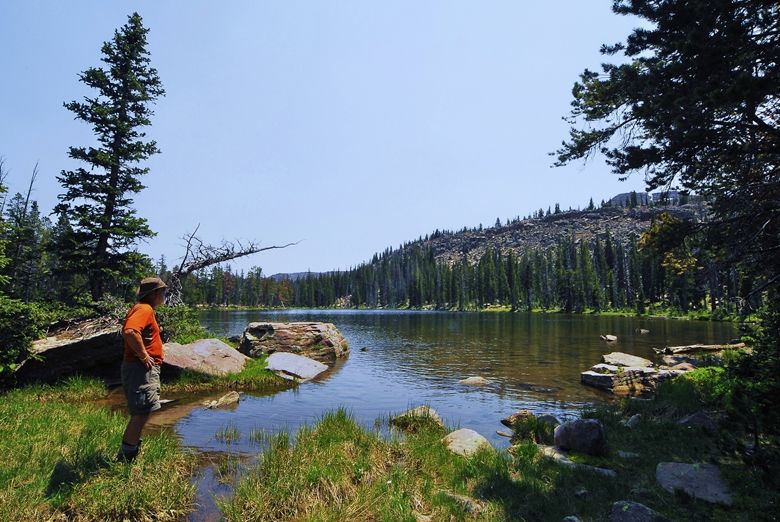
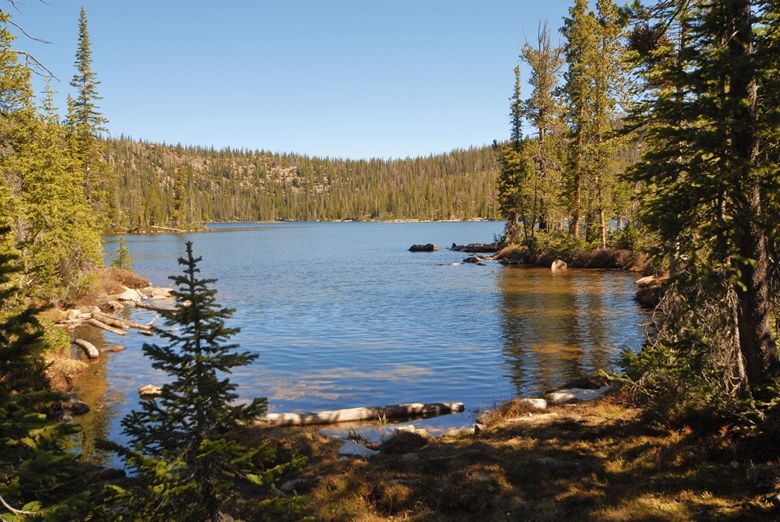
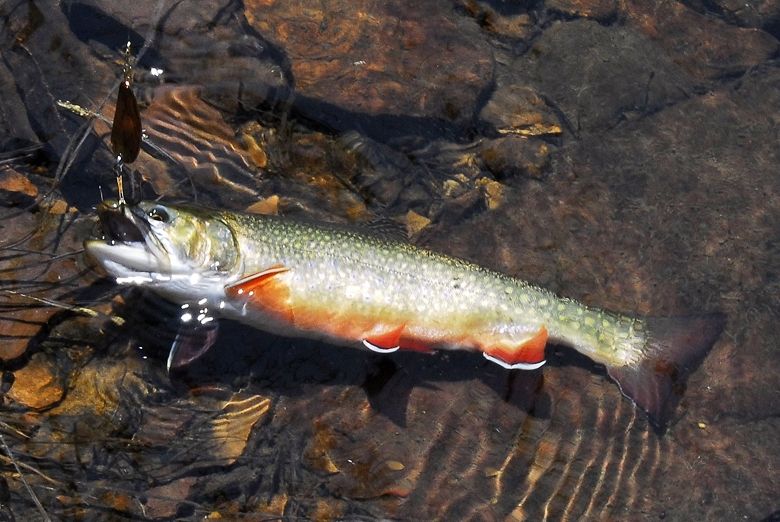
Fish Hatchery Lake was my objective for the first day–a distance of about 5.5 miles. The lake contains populations of both Eastern brook trout, and native cutthroat trout–that were spawning in the inlet stream as they were doing in Grandaddy.
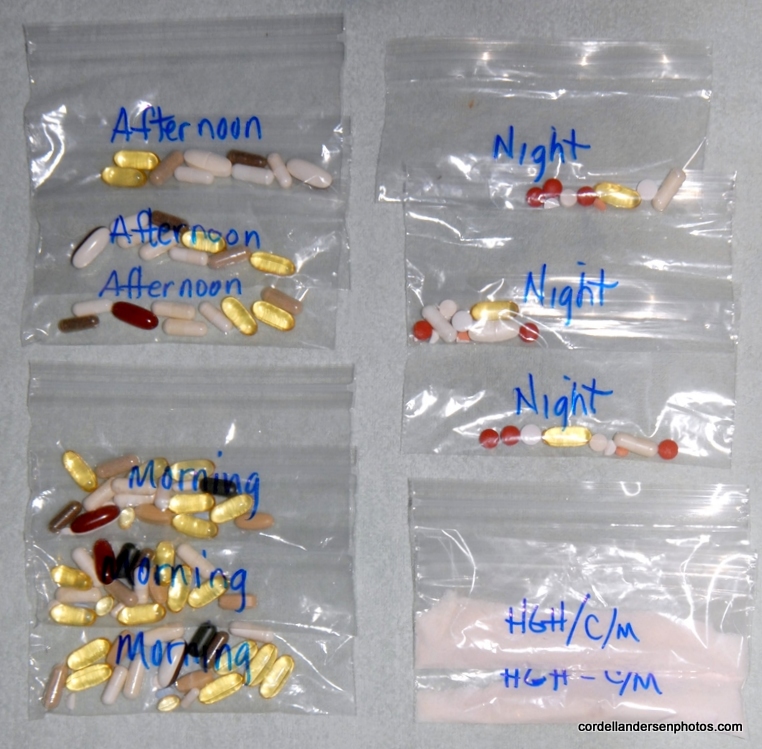
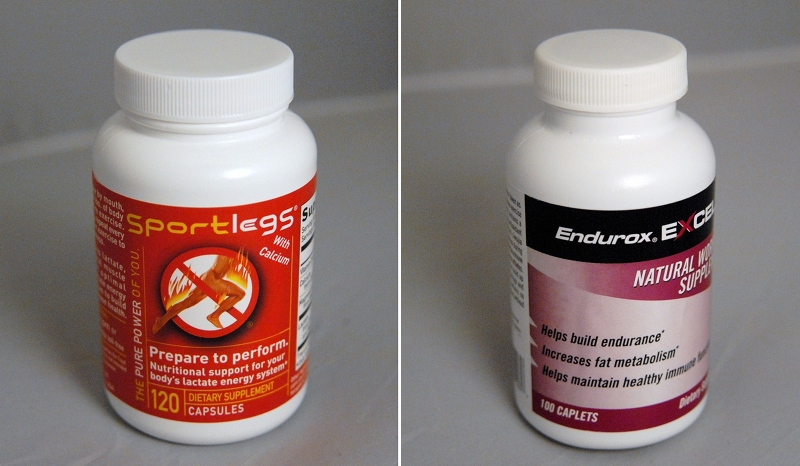
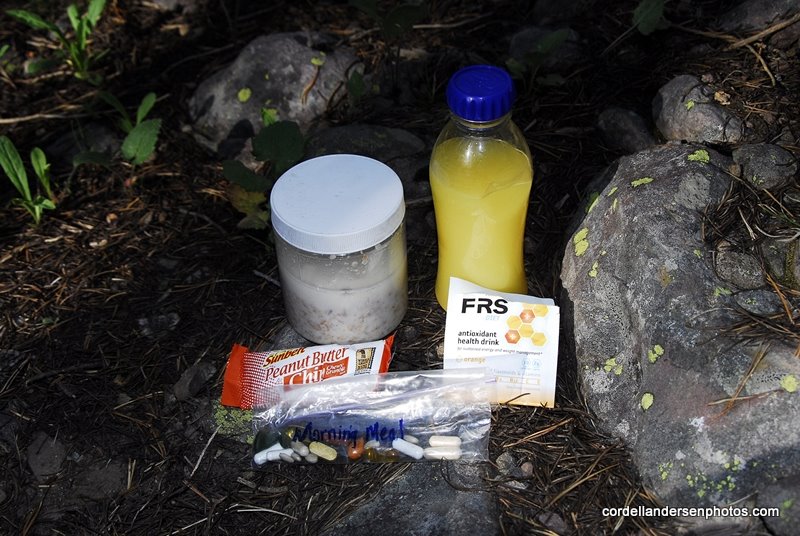
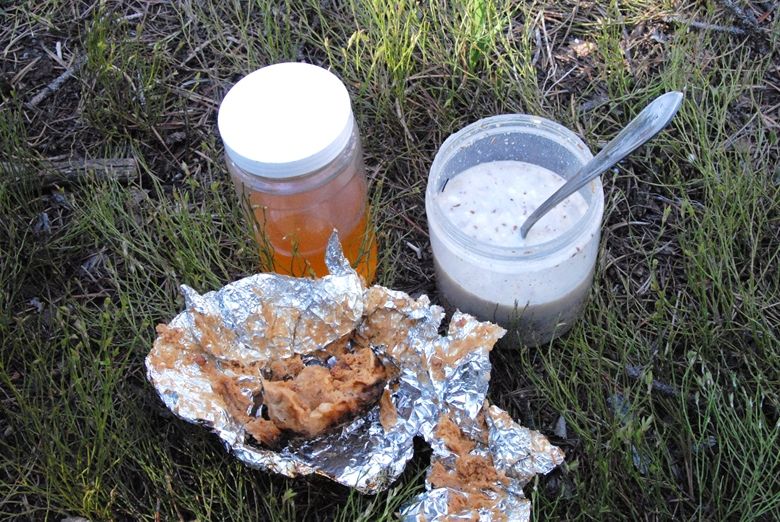
Now to how I was doing.  First it was clear that hiking with nearly a 40 lb. load  (that included my photo equipment) at above 10,000 ft. on a very rocky trail is much different than jogging around the Reams Supermarket parking lot in Springville, Utah.  I was quite fatigued with a sort of nauseous feeling that had me with no interest in eating, and even feeling as though I was sick.  I went for water, purified it and mixed my Endurox with extra Glutamine, Gatorade, and Cal/Mag.  I drank about 11 oz. using it to swallow my 2nd dosage of vitamins/minerals–all as outlined in my articles on ENERGY (scroll down)  and GEAR/SUPPLEMENTS.
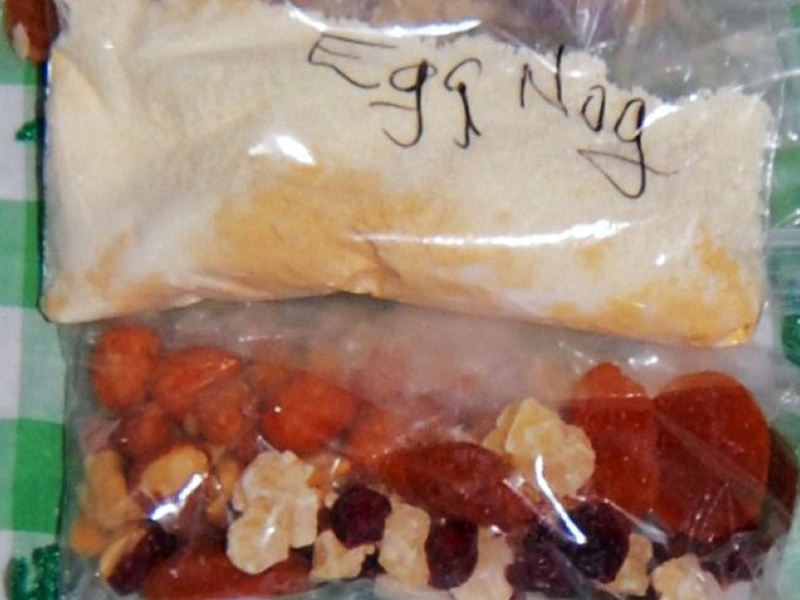
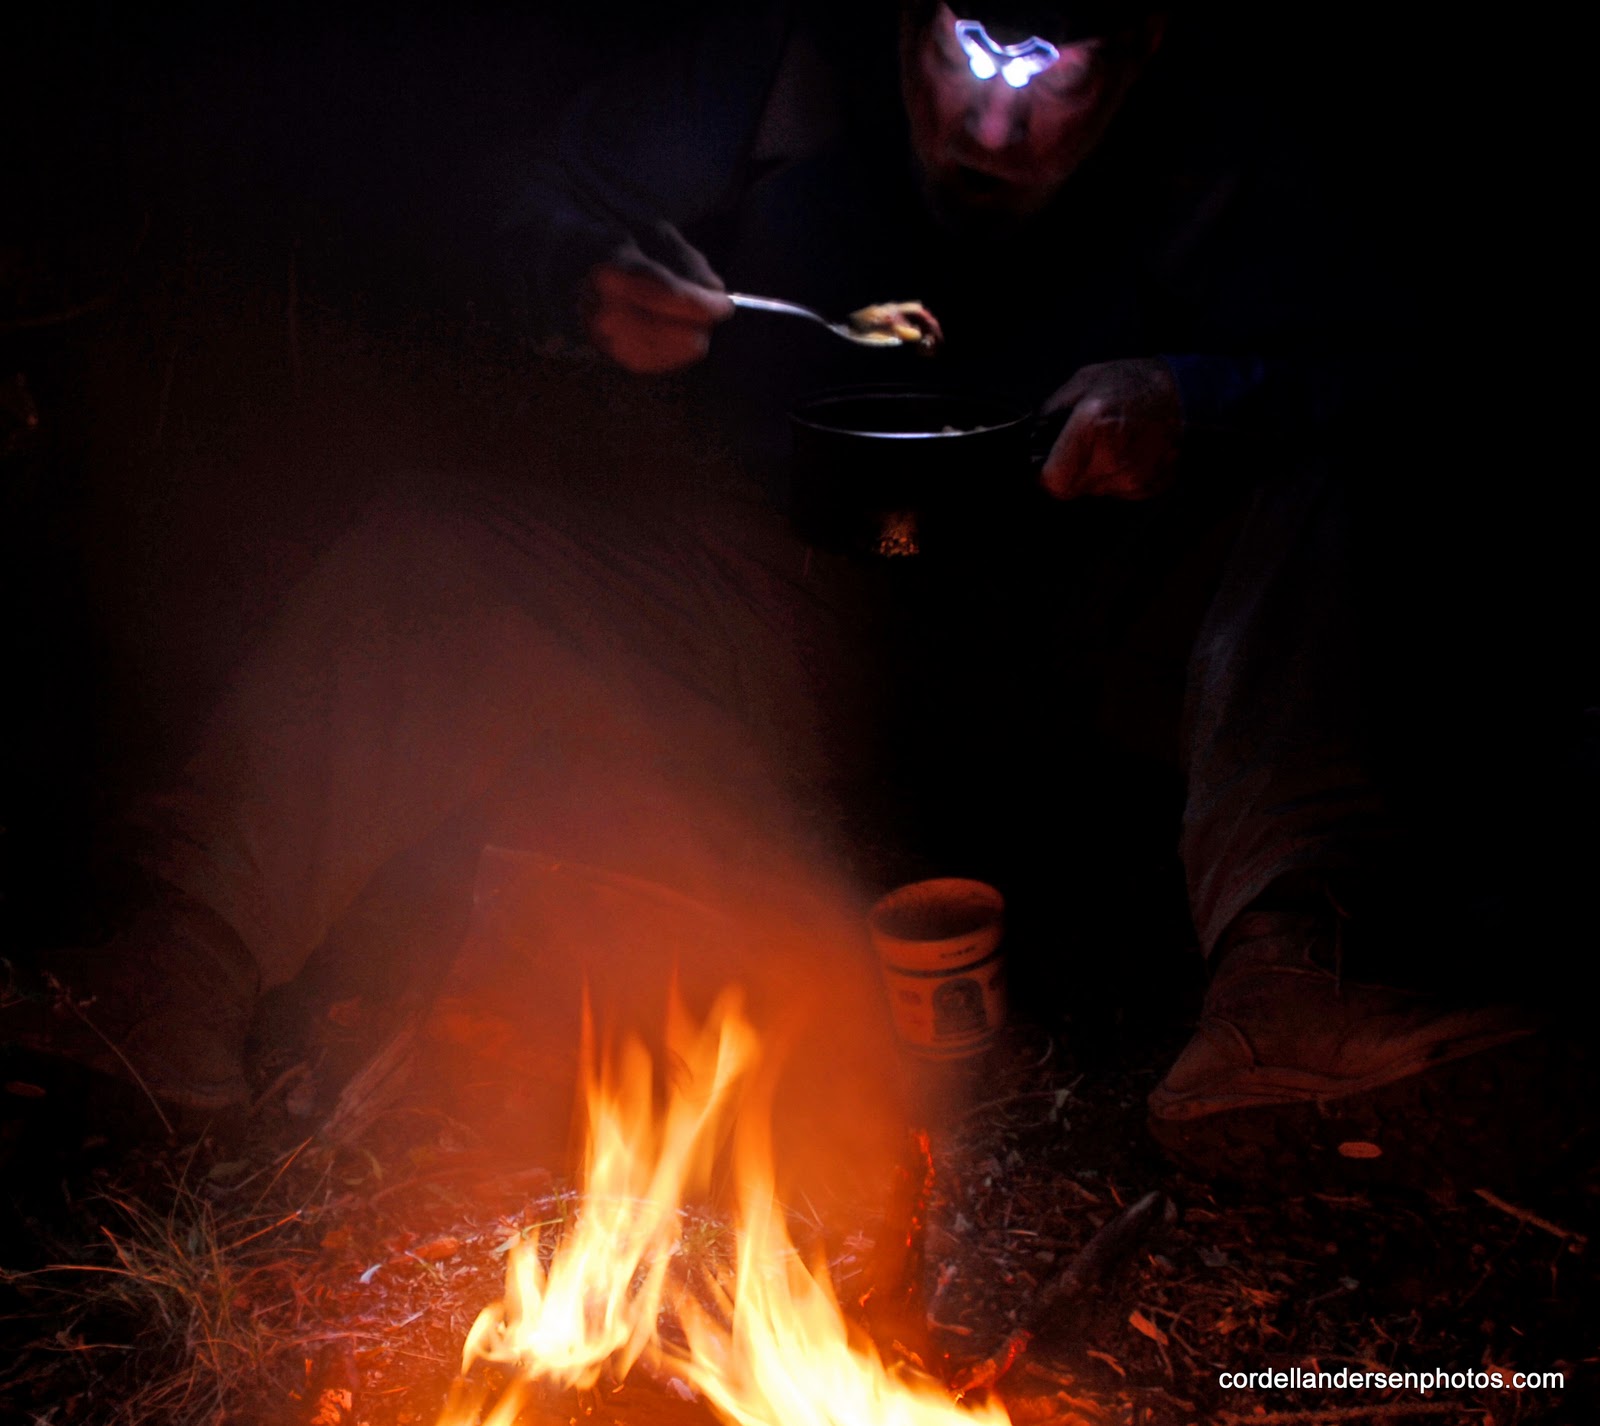
But, I had already drank the one drink that was delicious even when not feeling well:  EGG NOG (12 oz. water, 2 dehydrated eggs, milk powder, sugar and cinnamon).  Within an hour I felt well enough to go fishing and caught my dinner.

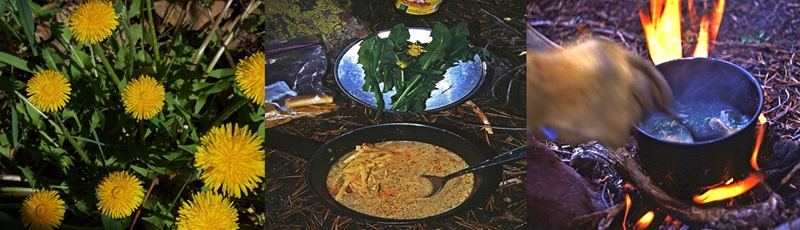
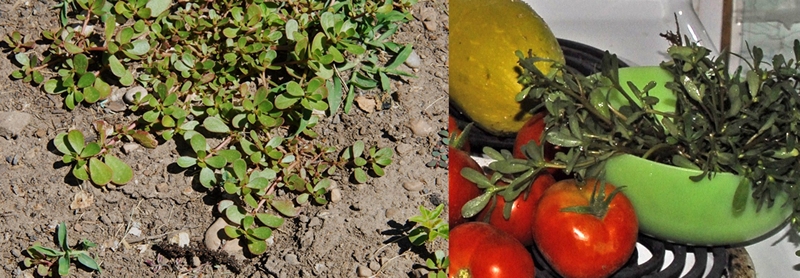
THE BIG NEWS THAT MADE THE TRIP A DELIGHT–NO MOSQUITOES YET! But the downside was that  I couldn’t enhance  the nutrition of my Spanish Rice as the dandelions hadn’t come out yet above 9,000 ft.  I talk about them being “the spinach of the weed world” in my backpacking and other articles.  For info go to DANDELIONS
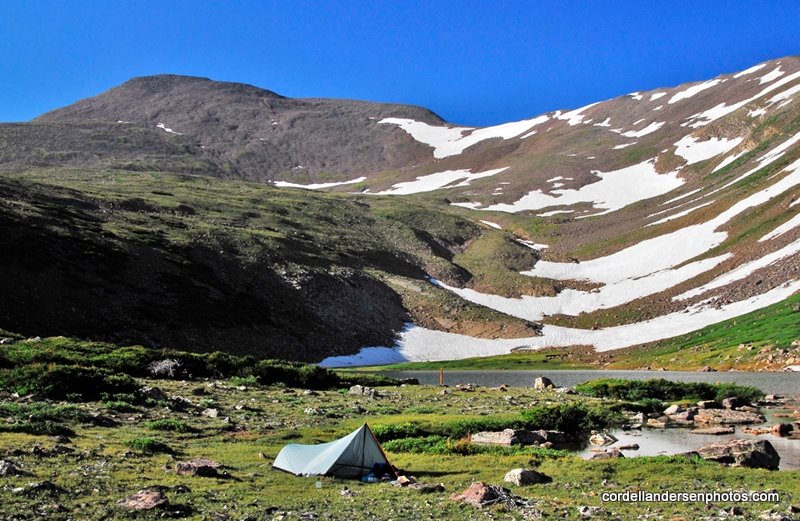
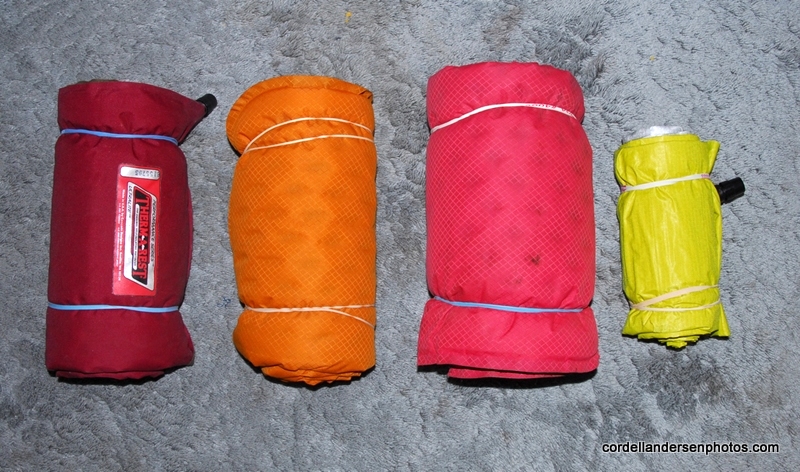
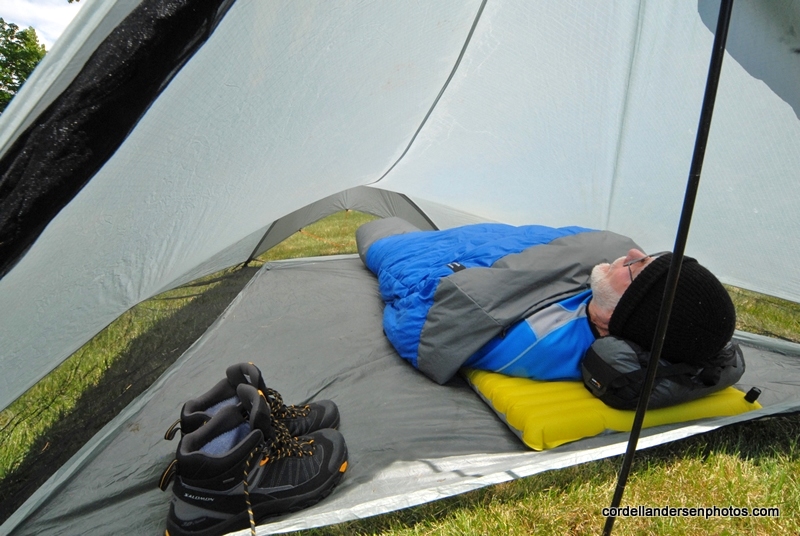
The weather was great and warmer than usual, so my new sleep system–Golite Quilt, and Therm-a-Rest NeoAir mattress was almost too warm–stripping myself down to the barest essentials, but these two items more than met my expectations for being “the best.”
To go along with my breakfast of Dee’s Cereal, and Energy drink, I had cooked my omelet (with bacon bits) in the evening fire when doing my Spanish Rice and fish.  I just mixed water in it’s Ziploc bag forming a paste and then put it in aluminum foil to set in the fire for a few minutes.

I actually overcooked and browned it some but ate it the next morning using Ketchup and a Mild sauce from Arby’s or Taco Bell.

It was a bit rubbery, and perhaps not at fault, but on eating breakfast I all of a sudden lost a tooth!  Rather a crown that came loose.  Luckily I didn’t swallow it, and had to do a bit of repair work you see below.

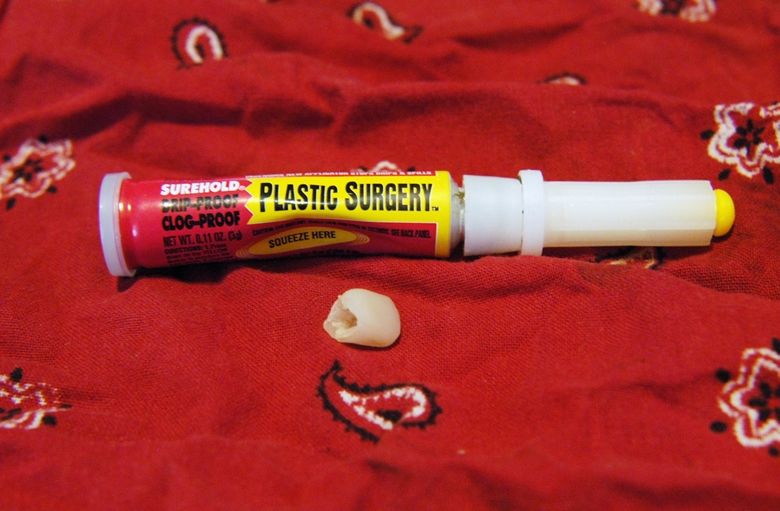
In my GEAR/SUPPLEMENT section I talk about Plastic Surgery for repairs (scroll down about 1/3 of the article until you see the tube and the link where you can get it.  It worked again–and is still working as I do this report–4 days later.  Of course I cleaned it up, along with where it was to go, drying thoroughly and then stuck it in, holing it in place biting down on a wad of cotton for 30 minutes.

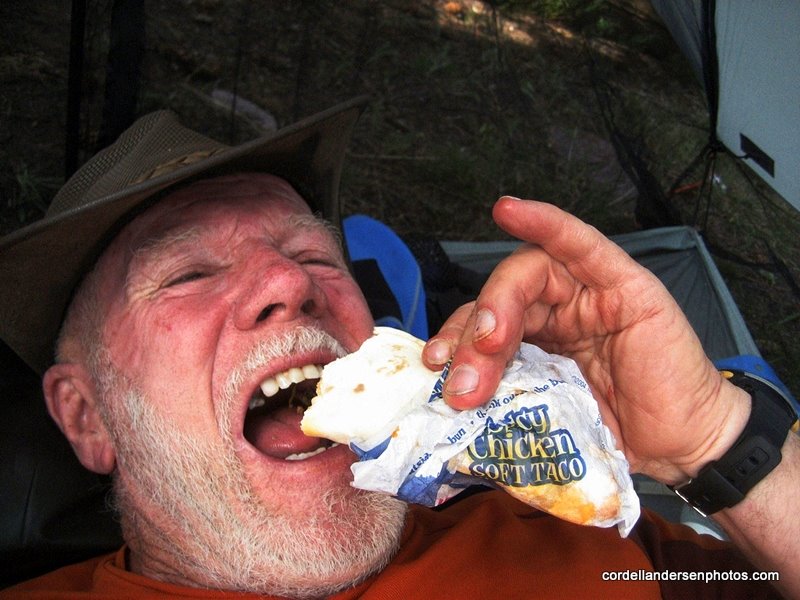
Hate to show my ugly teeth, but as you see I’ve got a complete mouth full–thanks to Plastic Surgery! By the way the glue itself is likely a powerful disinfectant and so all will go well, I hope.  I’ll report how it goes.

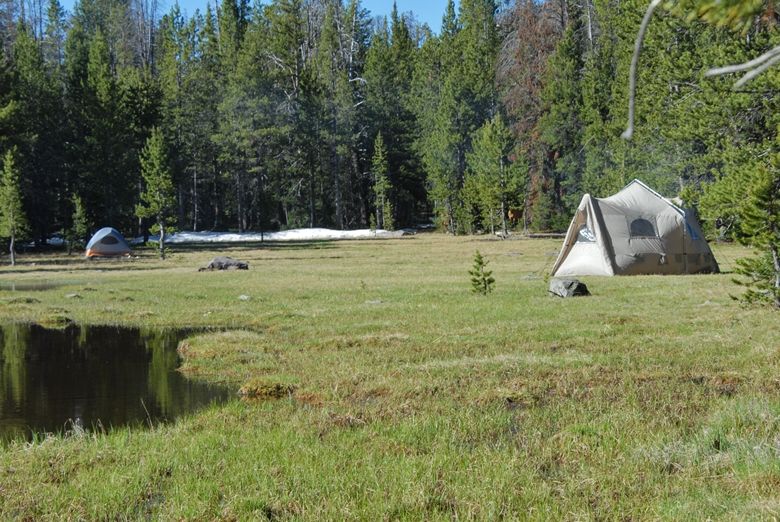
Wow–a mansion in the Wilderness!  I’m approaching the Heber group to say hello and goodbye.


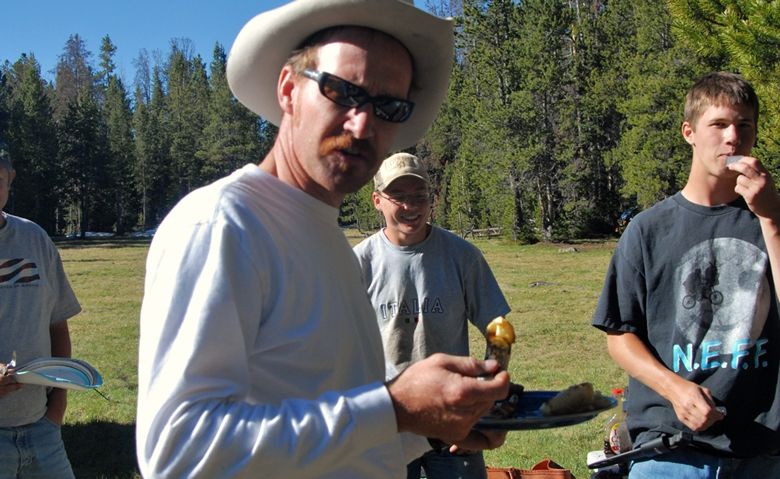
Here’s Dr. Toby, an Emergency Room physician, one of the leaders of the group.

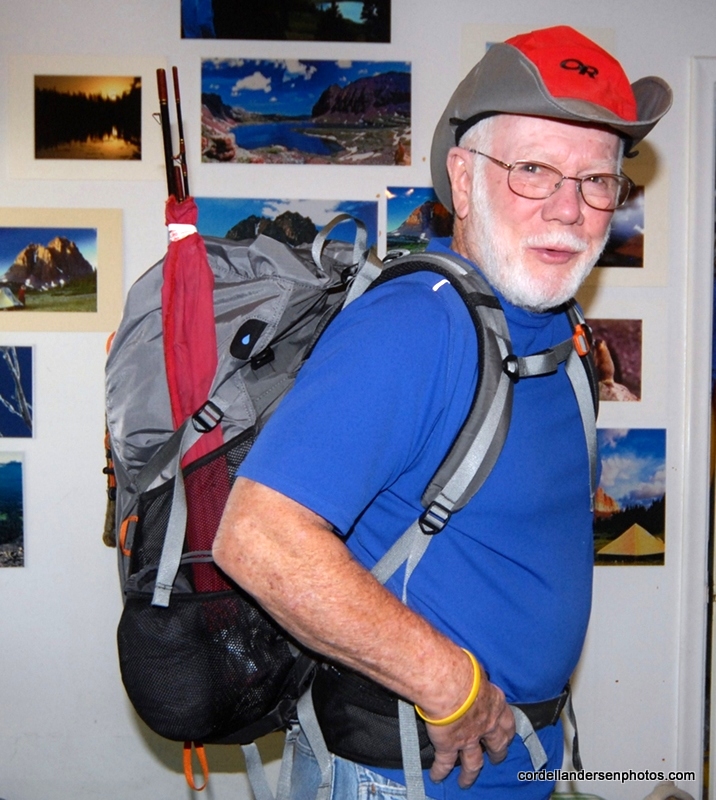
Here’s the “Big Honcho” Scot Lythegoe. Then I was ready to head up the trail, Scot offering to take my portrait:

But before moving up the trail, let me pause to mention that throughout the Grandaddy Basin there are off trail lakes that offer real “wilderness experiences” and almost always far better fishing than in the lakes along the trails.  From Fish Hatchery you can bushwhack your way to one of them climbing due west to the top of the saddle you see in the Lake’s photo a few back.  On that saddle is Farney Lake where you can catch Arctic Grayling.  You see this beautiful lake below:

From Farney Lake, you can bushwhack your way to Sonny Lake I show below. Sonny has nice brook trout.

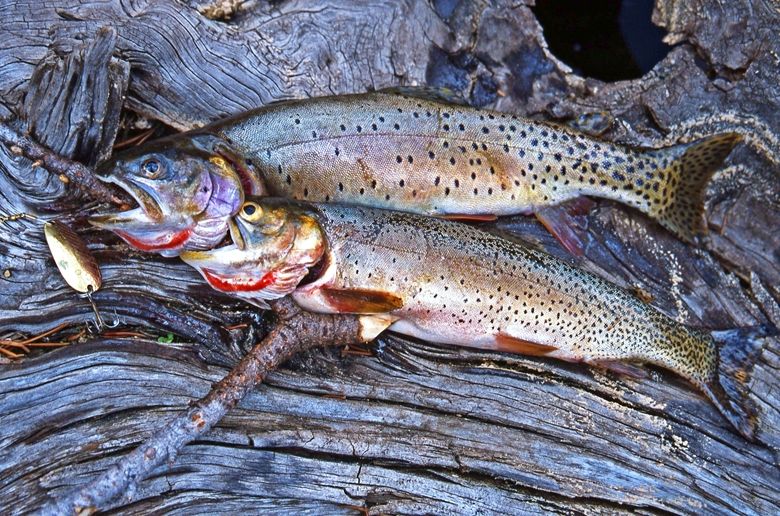
From Sonny Lake you hike around to its southern end and a 100 yards or so further you find Marsell Lake.

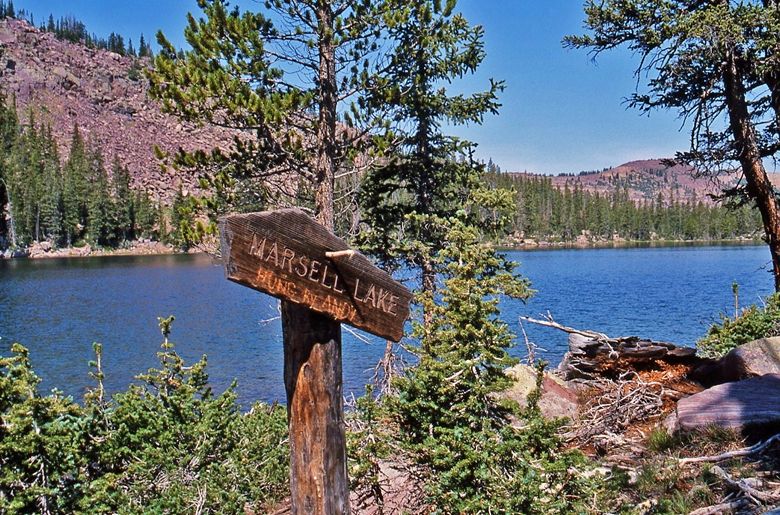
Below you see a pair of beautiful and quite large Native Cutthroat trout I caught here.

I should say that generally it is easier to get to Marsell Lake by coming up the trail towards Mohawk Lake from Betsy Lake.  About 200 yards before Mohawk you head due north and come to a large pond and meadow area, work your way down to its upper end through the rocks, and then go west up the drainage until you find Marsell Lake.  Use your topo map and compass and you’ll find it and be richly rewarded.


Now let’s head up the trail from Fish Hatchery Lake towards Pine Island Lake. I’ll insert here the Google Earth image from my SPOT tracker messages to orient you as to where we are heading.  These are the tracking views of my progress you can see by accessing the SPOT TRACKING website.

For this 2nd day I will loop up north then swing around back south and continue on back to Betsy Lake where I will set up my 2nd camp.
All along the trails I hike I take many photos of wildflowers, but to see most of them you’ll have to go the Galleries section and scroll down:   WILDFLOWER ALBUMS.

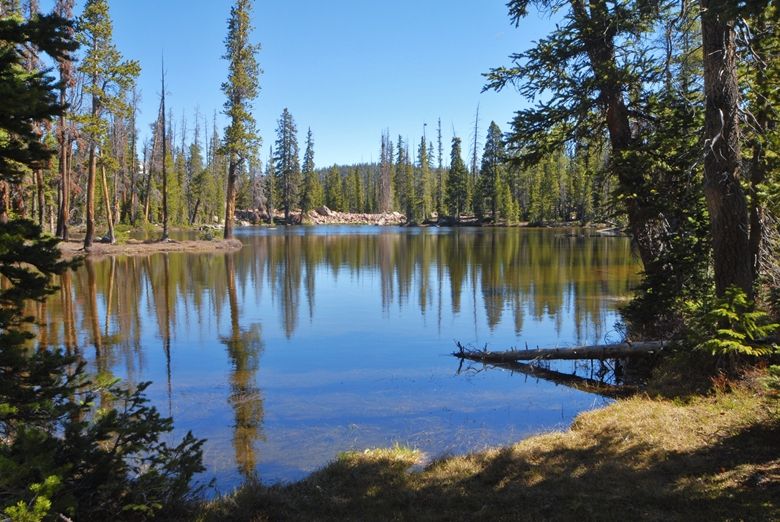
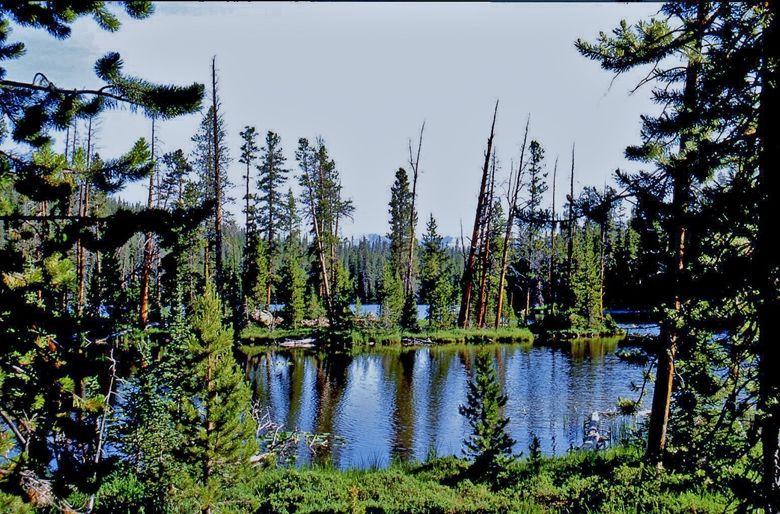
The trail leads you up to higher country, passing by one of many small lakes and ponds that generally don’t have fish, and no name or number designation, such as the nice one seen below.

Below is seen one of the early bloomers in the High Uintas–Spring Beauty.  

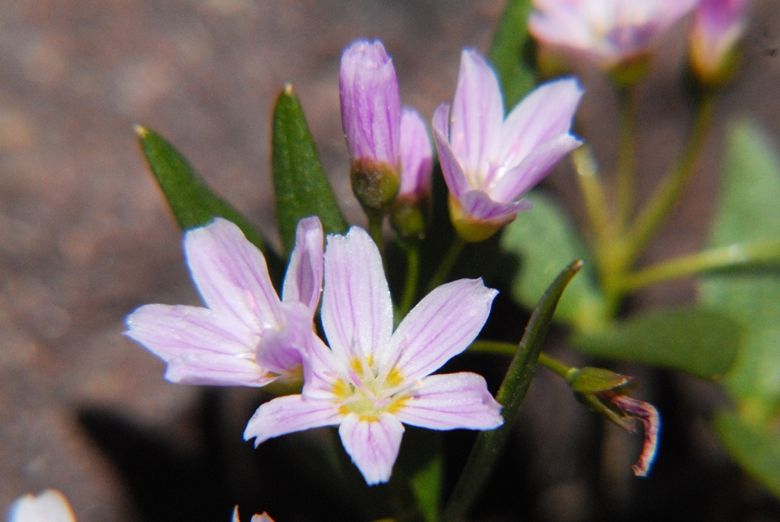
It is about a 1/4 inch across.


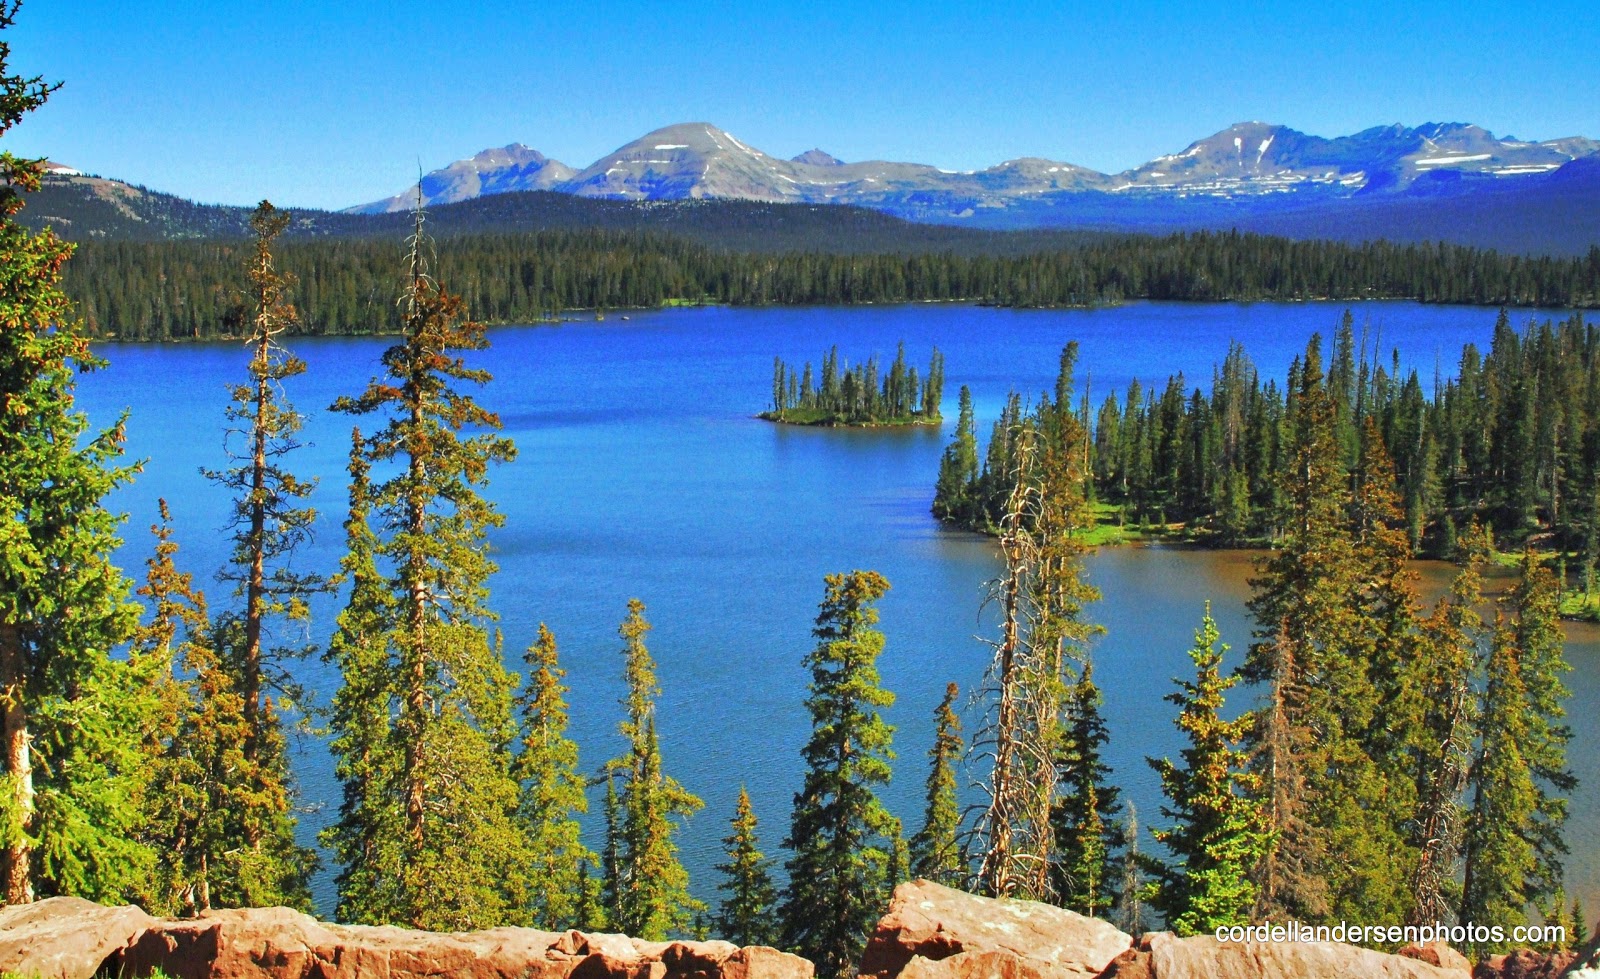
Then we come to Pine Island lake.  My friend, Jeffrey Probst in his excellent Uinta guide book describes it as “the gem of the West fork of Rock Creek.”

A few casts produced a few scrappy Eastern brook trout.

Pine Island panorama.  Over the low saddle in the direct middle of this photograph is found Margo Lake.  I had wanted to get to this lake, but it would have required a very rocky climb off-trail and to that point I was well aware that my balance was weak at best and decided that this limitation had to be heeded, especially as I was alone.  Hate to admit it, but my “mountain legs” hadn’t clicked in yet, and so had to back off a bit from my objectives.  Let me mention that the best way to get to Margo Lake is following a trail from Pinto Lake accessed from the Highline Trail.  At the northern tip of Pine Island, Lily Pad Lake is just to the right of the trail, and I stopped for a photo and a few casts.

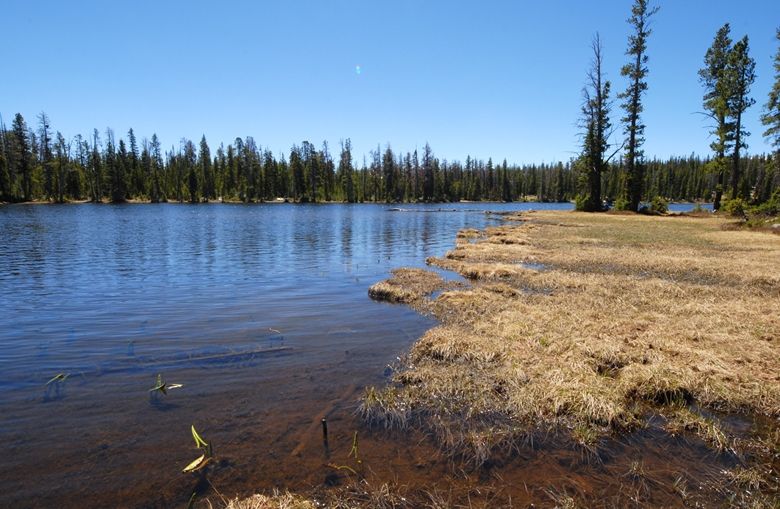
You see on the left the lily pads just beginning to break the surface of the lake.  Later it will be ringed with them, especially on the northern end.

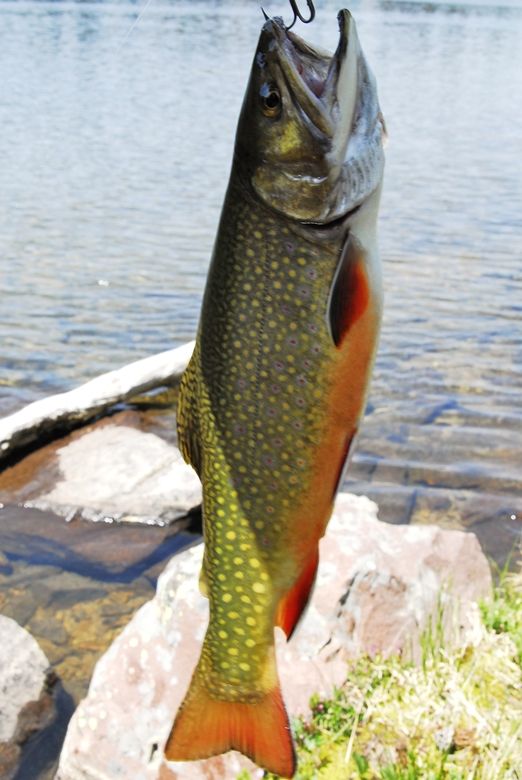
Another Eastern brook trout grabbed my lure.  During the entire trip I saw no fish surfacing.  There weren’t mosquitoes, but plenty of flies and other insects, so I’m not sure why I didn’t see feeding fish.

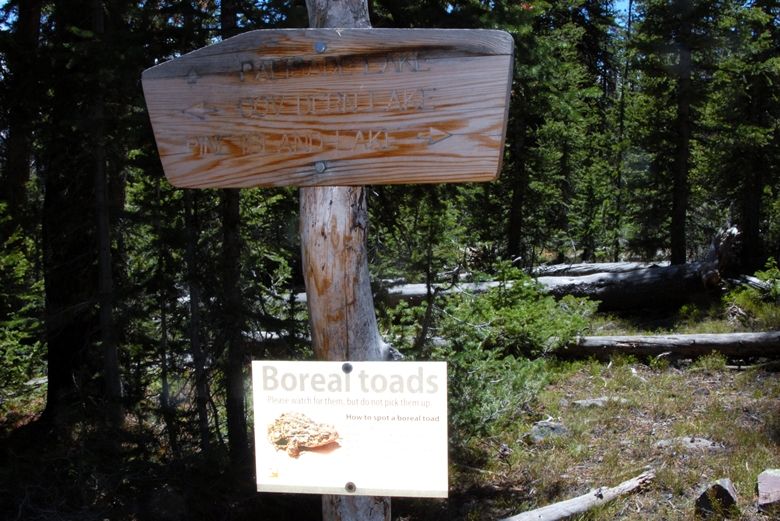
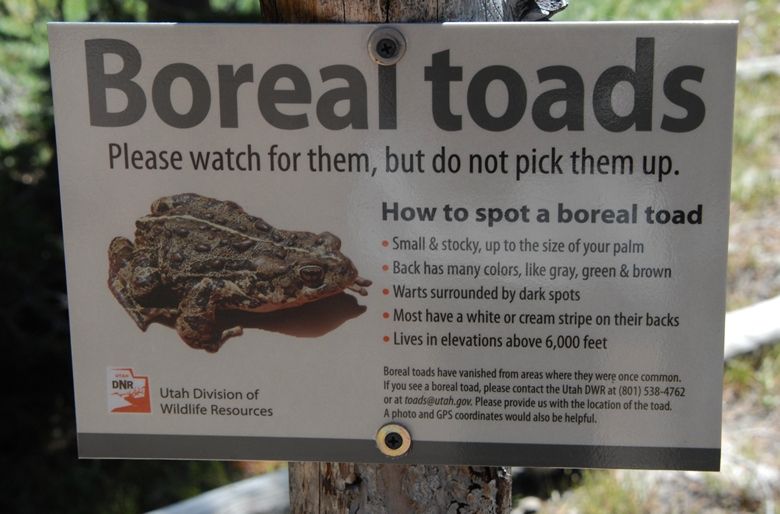
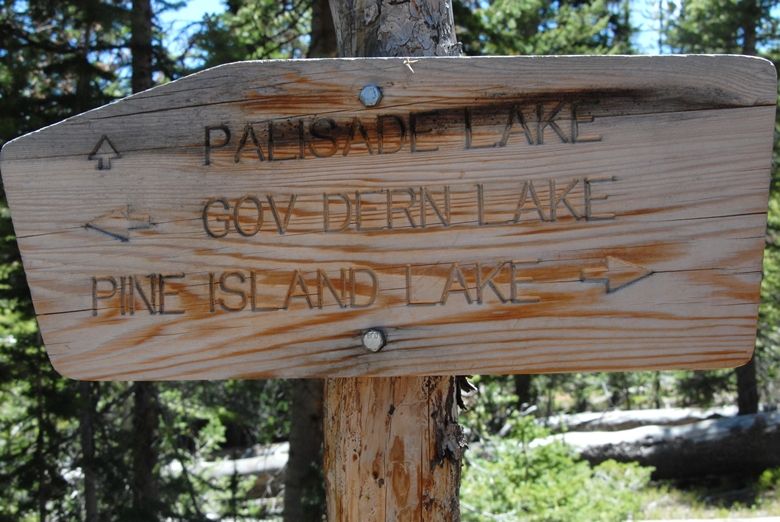
Down the trail a 1/2 mile one comes to a cross-trail where the trail from Pinto and Governer Dern Lakes joins that trail south towards Palisades Lake.  A rare sign mentioning an endangered toad has been posted.


I continued south dropping down quite a bit.  In the moist areas the wildflowers continually caught my attention–here Spring Beauty and the Glacier Lily.

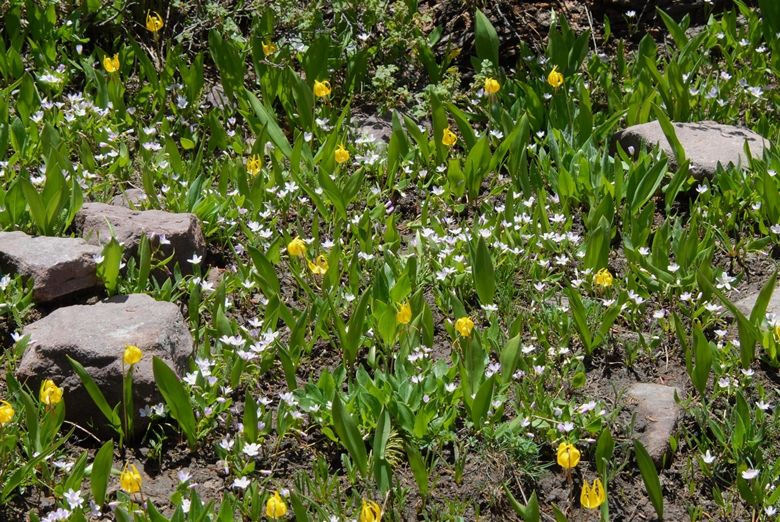
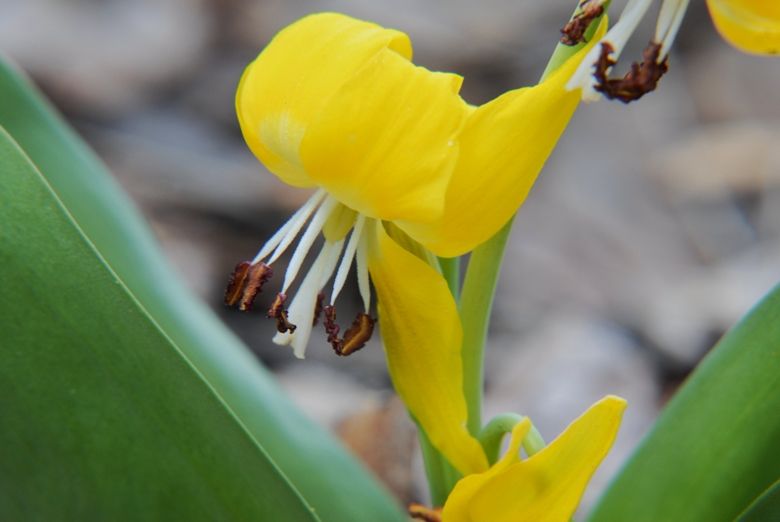
The Glacier lily is one of the early bloomers.


I arrived at an overlook high above Palisades Lake, but didn’t get a photo as I thought I’d get to a better vantage point.  My plan had been to squirt around its northern end and bushwhack southeast passing the tip of Lost lake and continuing on to Powell Lake.  But, I could see that such an off-trail bushwhack would be through cliffs and very rocky areas interspersed with tons of downed timber.  What with my ankle held together with screws, my titanium knee, and the problem I was experiencing with balance, once again I decided to take seriously my limitations and back off on my objectives.  I just continued down the trail–but the trail  became invisible at times.  Only a horse had been by this year– a day or so ago, and so I followed his tracks.  This got me way off course.  There was just no sign of a trail, but only the horse tracks and I finally thought, “Who knows where he’s headed!”  I figured the trail had to be to my east and bushwhacked my way along until finally finding the trail, but by then Palisades Lake was behind me.  I continued on until joining the main trail.  By then I was pretty tired, and wisdom had me deciding to head for Betsy Lake where I could camp for the night,  

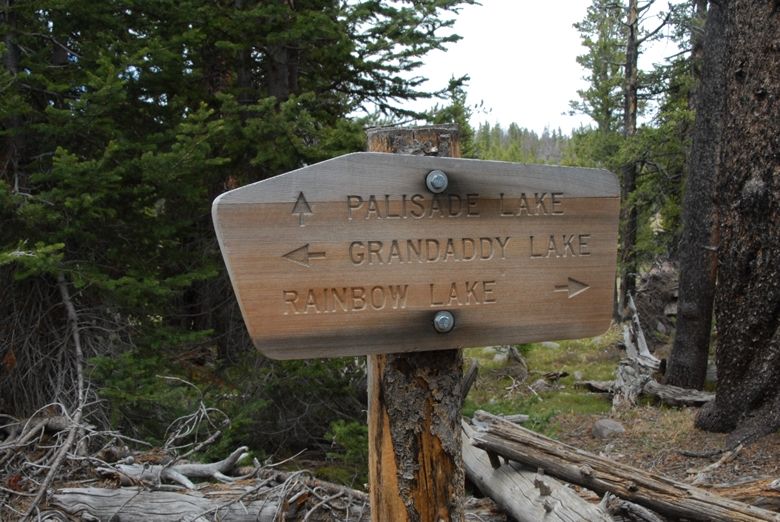
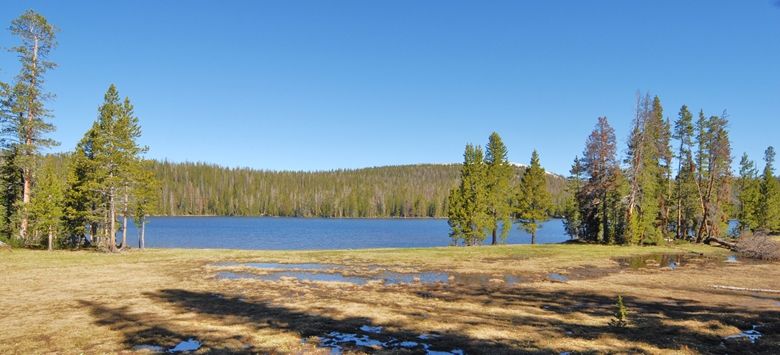
Here again let me pause to mention the options one would have from this spot.  To the east the sign says Rainbow Lake, but fairly close to there, a bit off-trail is Shadow Lake seen below.

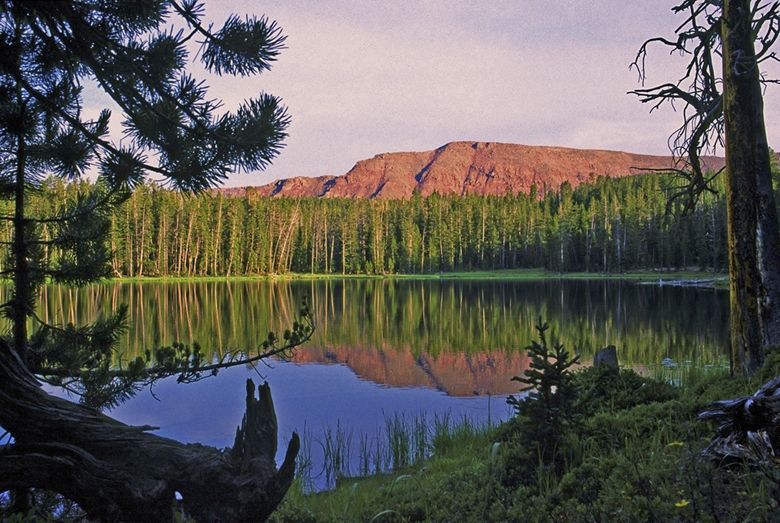
Shadow Lake is mentioned in the autobiography of Snooks Roberts, from Hanna.  He relates going into the Grandaddy Basin on horseback in 1925, and along with his buddies fishing from a crude raft and taking home 300 brook trout.  The brookies there are self-sustaining.  Then a ways down the trail to the east you come to Lost Lake you see below.

From about mid-Lost Lake there is a faint trail heading south a mile or so to Powell Lake, named in honor of John Wesley Powell, the one armed explorer who was the first to boat down the Colorado River.

Back to the main trail going east you come to Rainbow Lake, and eventually to Bedground Lake, a small lake ringed by lily pads.  From Bedground you can go due east 1 mile off-trail to Allen Lake, named in honor of a Forest Ranger, Floyd Allen,  who was killed by lightning there in 1938.  Allen has exclusively Arctic Grayling some experts believing it will eventually produce a Utah State record (see my section on FISHING THE UINTAS for the record grayling).  Further to the north you come to the Four Lakes Basin, just 1.5 miles from the Highline Trail. From said Basin you can get adventurous and climb Cyclone Pass to get a view back towards Bald Mountain.

From Cyclone Pass you can drop down to the east and boulder  hop 1.5 miles to remote Thompson Lake, or 1.5 miles south to even harder to get to Sea Lion Lake.  Now back to the Grandaddies.
 The Grandaddy Basin has a total of 26 lakes–8 of which are off-trail. I would be very incomplete if I didn’t mention two of the best that are located on the southern edge of the basin–right up against East Grandaddy Mountain.  They are:  Fern, a couple of miles east from Grandaddy Lake, going past Lodgepole Lake.

 This is the all time favorite of me and Uinta buddies.  Then, if you want to go real “remote” continue from Fern about 1.5 miles bushwhacking to Doc’s Lake where the fishing is usually even better than at Fern.  It is at the far eastern end of East Grandaddy Mountain you see below.

 When I was last here at Doc’s in 2005 there were no signs of anybody having been there for years.


We are now up the trail to the west and at Betsy Lake.

I set up my camp 1/4 mile from the lake and had a nice meal and rest in preparation for hiking to the Trailhead the next day.  Egg nog was still the favorite drink.

Once again I had a problem and need to dig out my Plastic Surgery Super Glue.

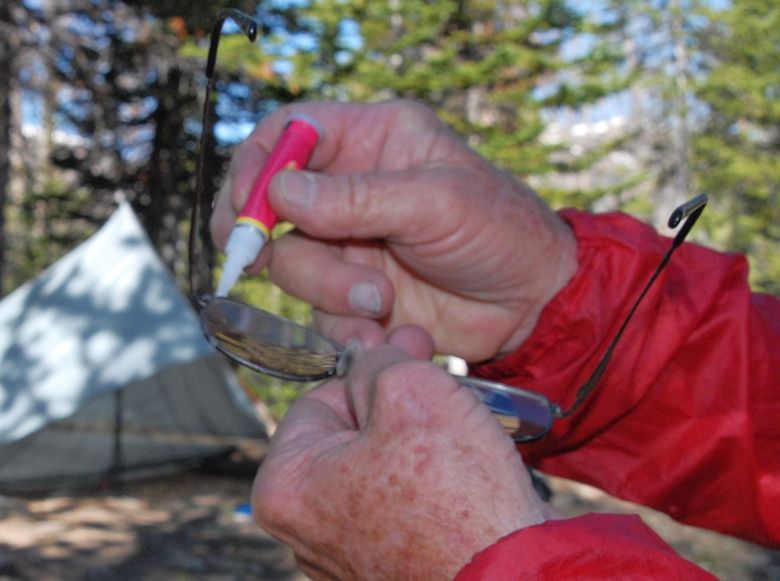
One of my lenses came loose and just wouldn’t stay in, but solved by 4 tiny drops of glue around the edge.


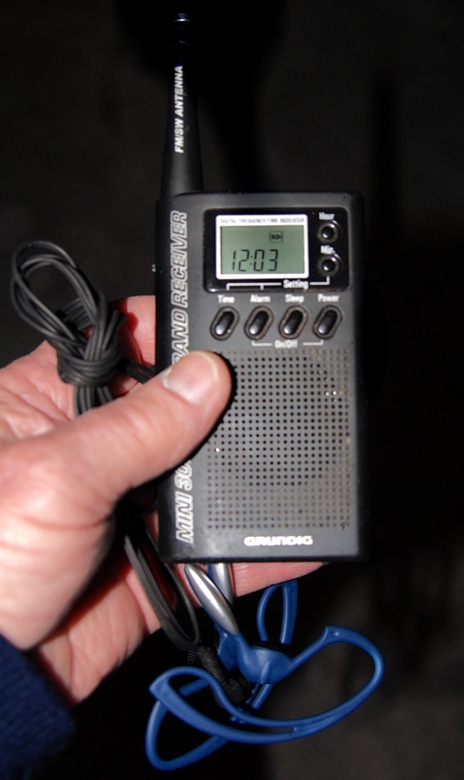
At 6:35 a.m. on Saturday, June 26th, I made my call to KSL OUTDOORS RADIO.  You can hear the podcast if you’re interested my part at about 6:37.   I’ll be making a similar call each Saturday from my location in the Uintas.  You can hear it at 102.7 FM or 1160 AM, or online at:  KSL OUTDOORS.

All packed up and ready to hike the 4.5 miles to the Trailhead.  Just one more inspection trip around my camp spot to LEAVE NO TRACE.  I filled in and disguised my hip hole with some pine needles, and picked up a candy wrapper, and was ready to move.

You can see my route to the Trailhead, and from there in the car down to Defa’s, and then southeast to Hanna.

There were about 15 cars in the parking lot, so things were picking up.

Stopped at my favorite freshening up spot, and filled my water containers so I’d have good water for a day or so.

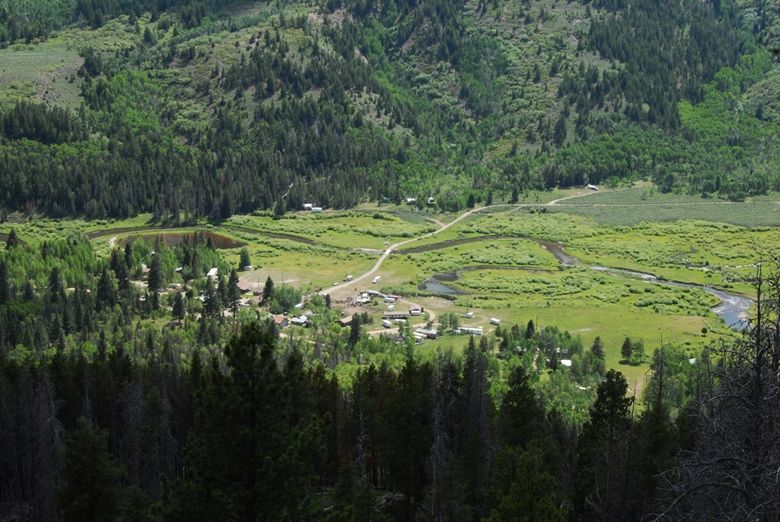
Approaching Defa’s Dude Ranch and the community of cabins that has grown up in the area.


They say the place rocks on weekend nights.  Sort of sounds like the  wild west frontier.  Frank Defa is likely there in spirit!

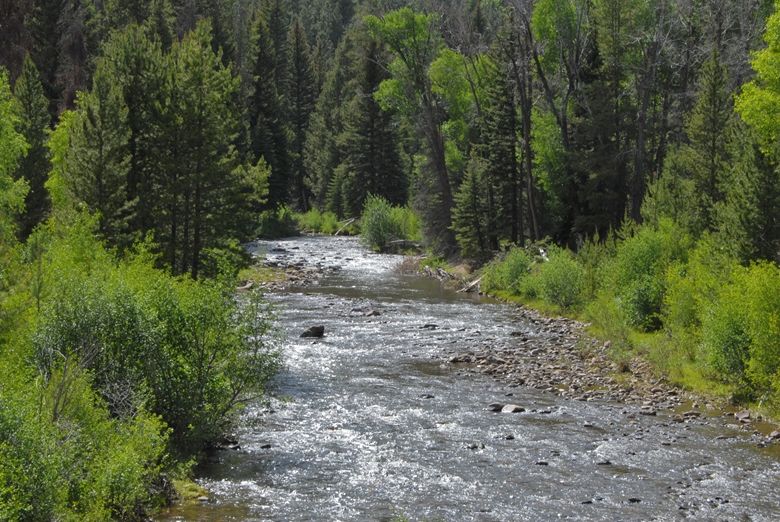
The North Fork of Duchesne River with reportedly good fishing.

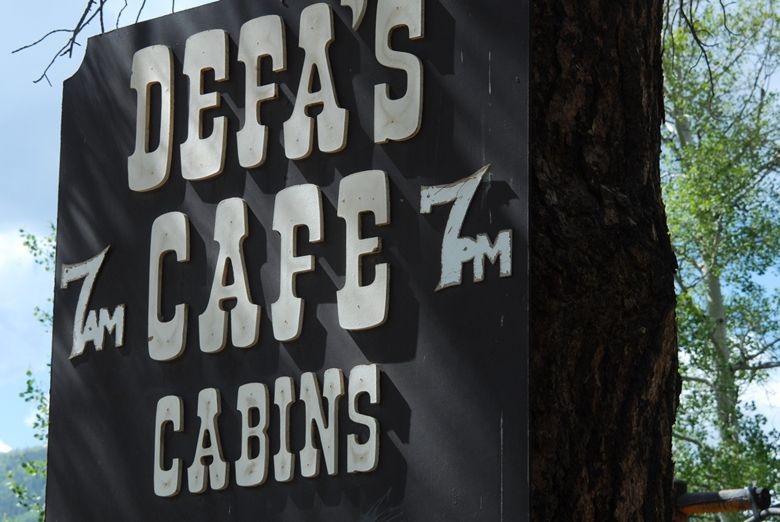
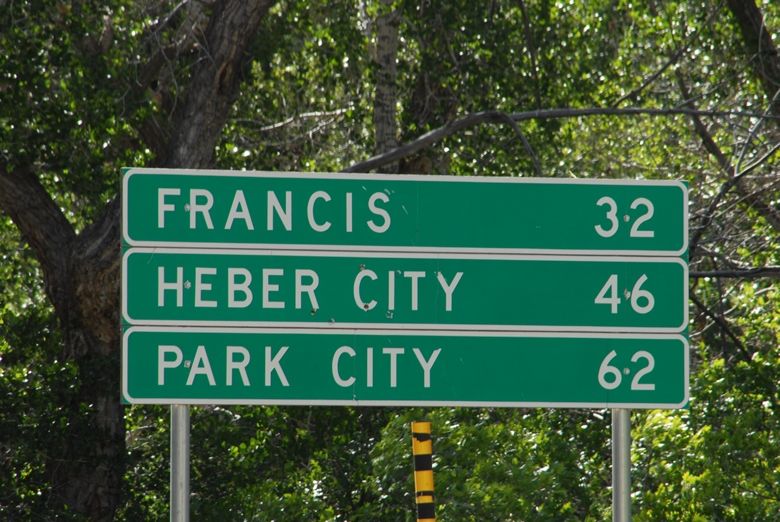
As you come out of the Canyon you see on your left this sign.  It is the site of a Uinta gold rush–not known to hardly anyone and not published as far as I know–so here’s the scoop. The Hanna area was settled by several Italian families and even become known as “Little Italy.”   The gold rush story  started with Frank Defa building a cabin in the area and turning it into a saloon where he sold his bootleg whisky (the still he used is at Snook Robert’s museum next to the Hanna Country Store).  Then a Mr. Stockmore and a partner came into the area and bought up a bunch of land cheap.  They employed a fellow to travel over to Park City and buy a drink in a saloon with a gold nugget.  The wide-eyed crowd asked where he had got the nugget.  He replied, “Over on the North Fork of the Duchesne River.”  That started the rush, many going for the gold and buying properties at high prices from Stockmore and partner.  But, after 6 months and no gold had been found the sheriff from Duchesne came to investigate only to find Stockmore and partner long gone with all the cash.
There are other stories of “gold in the Uintas” but so far the only gold I have found is when I got a shot of Kings Peak at sundown that turned it into gold, seen below.

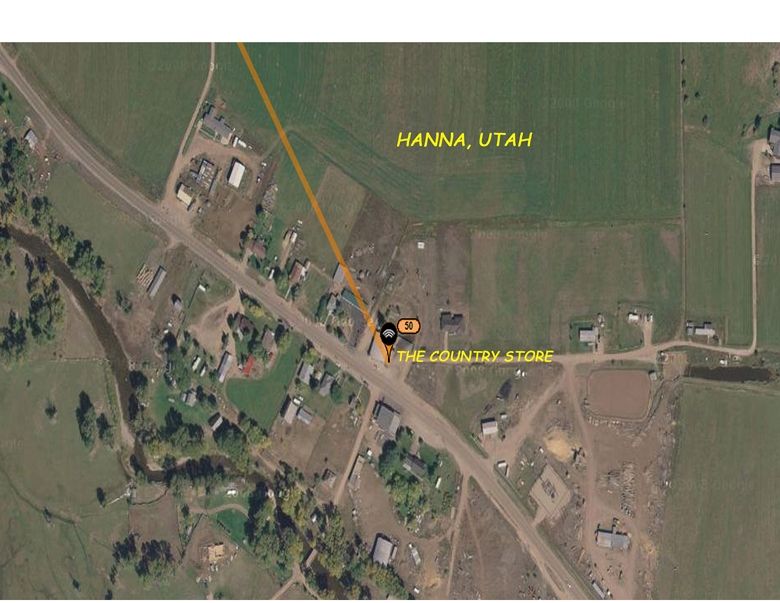
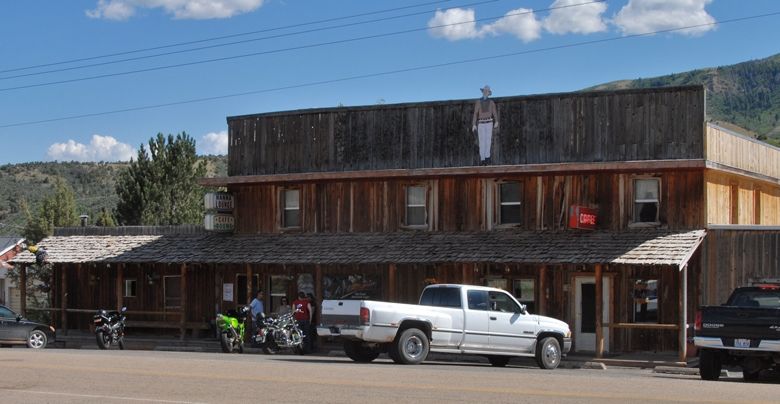
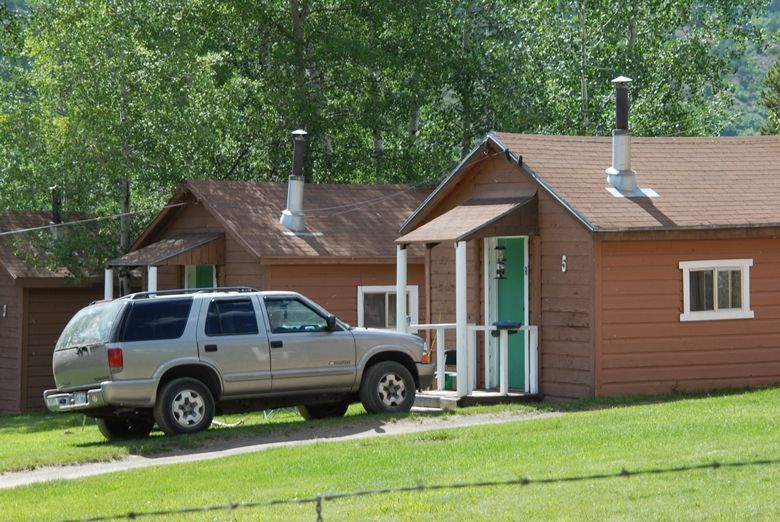
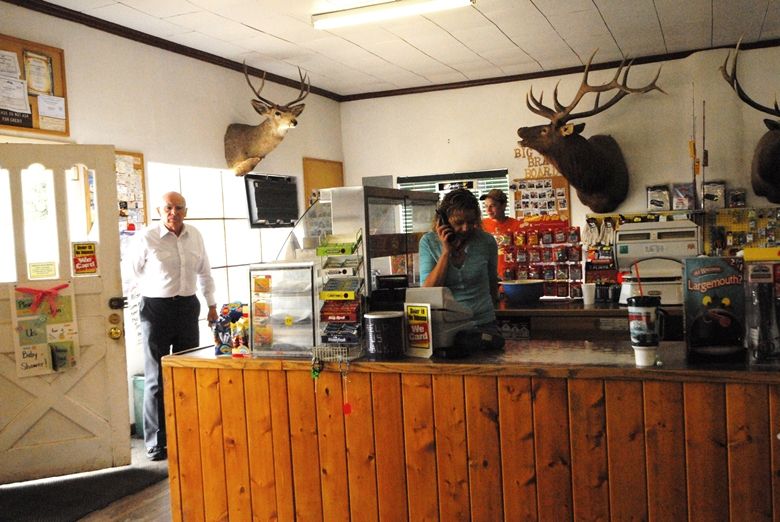
In Hanna there is a Cafe, Lounge, with rooms for rent.  It used to belong to the Defa Family.  In front is the Country Store and gas station.

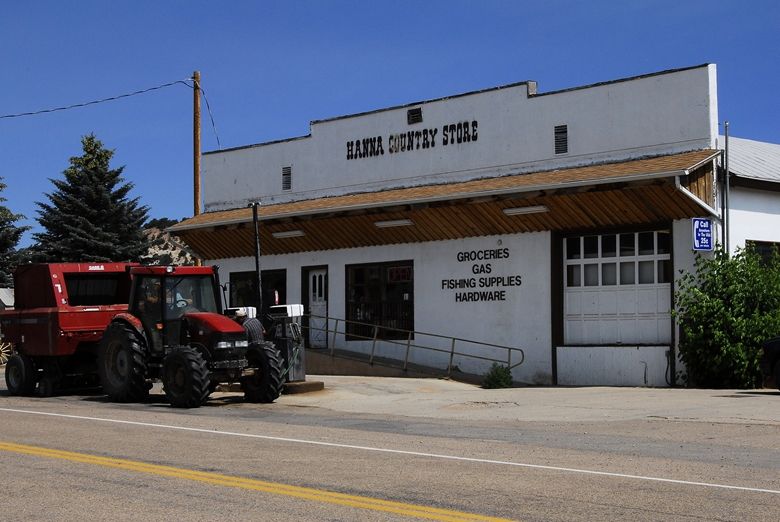
This store and the Dude Ranch do belong to the Defa family, specifically to Gino Defa, but who died of cancer on June 26th the very day when I just happened to drop by for munchies.


So with some “potato slabs,” “chicken tenders,” and a soda pop I was on my way back to Springville to work a few days, and then head for the hills again next Friday, Saturday and Sunday in “Search of the Golden Trout.”  .

All my “basic pack” and gear worked like nothing I’ve ever had before.  Of course the MIRACLE FORMULA FOR ENERGY and LONGEVITY worked again.  No matter what your age it will all enhance your performance and enjoyment of our great outdoors.  Good luck to all–hope to meet you on the trail soon.

WHERE DO YOU GET SO MUCH ENERGY?

SCROLL DOWN FOR THE NEW ADDITION ABOUT
COLDS:  Prevention and Cure
The crucial formula: PASSION + Exercise and Physical Training + Good Nutrition and Sports Supplements
 

The “energy” question is posed almost daily by customers at Reams Supermarket in Springville, Utah where I work, jokingly calling myself a “bagger technician  and shopping cart herder.” I work mosltly with young high school guys but with my unique twist as I do the 8 miles a day jogging and sometimes outright running  to help a customer, and then moving quickly back pushing long chains of carts.


I’m asked often why I hustle so much, and I reply, “I approach my job as though it was my business and  do what I do  to get full benefit from the job.  Of course part of what I do is to get myself in shape for my High Uintas Project—and I’m getting paid to work-out, like as though I was a professional!”   I’ve been invited to train for a more sedentary perhaps higher paying job, but I’ve declined saying, “Thanks, but for me and my needs right now I already have the perfect job.  It has already been a miracle for me and my health!”  


Another customer the other day said, “Congratulations!”  What for I asked, “I notice you quite frequently slow down, bend over and scoop up garbage.  Why do you do it?”  My reply, “Bending exercises which I need a lot, and besides I hate garbage and would like to hang signs here like we have in the Uintas–LEAVE NO TRACE!”   This is another of the blessings and benefits of exercise, hard work, and doing a job to the best of your ability.   Read on and you’ll see what I mean.


So  we begin to answer the question with the first ingredient being PASSION—having a passionate interest in something that requires keeping healthy, strong  and energetic.


Obviously EXERCISE is the next ingredient, but  from the get-go we shouldn’t overlook the possibility that ONE OF THE KEYS IS THE GREAT PRODUCE AT REAMS–SECOND TO NONE UNDER THE SCRUPULOUS AND ENTHUSIASTIC CARE OF DAVE THOMAS!  Come to REAMS in Springville and you’ll see what I mean.  


Now back to the “passionate interest,” as the first key to having abundant ENERGY.


In my 75th year I’m about to shoulder my backpack (on June 24th) and begin 46 days and 250 miles of backpacking in the High Uintas Wilderness, all of it above 10,000 feet and much of it off-trail seeking the most remote and un-named lakes testing the fishing in 82 lakes during the summer–and then, as I have done so far, share what I learn so all who are interested can also enjoy the incredible High Uintas.  I’ve already done the 1,000 miles referred to below and still going, going, going….   If interested you can see it clicking on the link, slide show on my website,

Some of you likely know that I have been at this since 2003 logging through 2009 1,327 miles, but I need two big 250 mile summers to complete my goal—to explore, photograph and share the High Uintas Wilderness with all interested. Thus, the crucial importance of being strong enough to do it—and my year  at Reams is supposed to make possible achieving that goal.


But, still begs the question of many customers, “WHERE DO YOU GET SO MUCH ENERGY?”


I believe it’s important to answer clearly that question, as my formula and my secrets can help many, old and young, men and women—even those with what some experts would consider serious impediments or obstacles.


Let me first outline what I mean by impediments which I have called “glitches in my path,” that will sound familiar to some of you and convert what I say into even perhaps life changing advice–for those willing to pay the price.


In 1953 my dream of becoming the smallest running back in the history of the NFL came to a screeching halt with a serious football injury since dubbed my “football ankle.” After 54 years of limping it finally gave out in the middle of my Uinta Project and had to be reconstructed in 2007, so my ankle is now held together with 3 screws and a tendon transplant. Certain crucial supplements have been of key importance.


In 1976 a motorcycle accident ruined my knee, since called my “motorcycle knee.” It was operated on then and I was told to forget running in half-marathons, and backpacking. I’m sometimes known to be slow at accepting advice and/or being a slow learner, so two weeks later my oldest son, David, and myself shouldered backpacks and bivouacked on the above timberline backbone of the Henry Mountains for the deer hunt. Twenty-seven  years later on the first day of my 27 day expedition along the Highline Trail with 83 lbs. on my back and around my waist the pain in my knee was so intense I was ready to throw in the towel, but with inspiration from Lance Armstrong I found a way to hang in there.  If interested in learning about that survival experience click on KNEE.


The next year mid-summer there was another temporary-fix operation in the 2nd year of my Uinta Project. Then to end the 2006 backpacking season my knee was gone and my future was to just limp around my living room for the rest of my life. I opted to heed Winston Churchill’s advice and “NEVER GIVE IN! NEVER! NEVER! NEVER!” resulting in major surgery and doing a few miles in 2009 on my new titanium knee. Again key supplements were and are crucial. Now I’m ready for a full fledged backpack season, but there were more obstacles to overcome along the long trail.

You can see this slide show on my website at:  THE CHALLENGE

In 1980 I was becoming a cripple with arthritis at 45 and was getting desperate, only half getting by with pain killers. Then I was introduced to the “Cod Father.” Once again a key supplement, important in solving all of the above “glitches,” came to my rescue—literally doing the miracle that has me moving still—and with energy.


In 1994 after running an International Half Marathon in Guatemala, my feet were shot and a specialist in Guatemala City said I was through with running and backpacking with what he called metatarsilitis. I modified my running shoes adding a piece of old tire to the arch portion of the sole to keep the ball of my foot off the ground and kept running–and got to the finish line 14 consecutive times. During those years I created better modifications and inserts in shoes and boots you see below and explained in my LIGHTWEIGHT BACKPACKING photo essay,


and have gradually improved so that this summer most trips in the high country will be with mid-height lightweight hiking boots, and some with mountain running shoes. The same supplements hinted at above have helped solved this problem.


After the 2003 backpacking season and my “27 day no re-supply expedition” in the Uintas, a complete physical I underwent moved me into the operating room and two cancer surgeries—losing my thyroid gland, and some big chunks of skin. Several radiation treatments  followed and recent scans have pronounced me cancer free. My Lance Armstrong wrist band hasn’t been removed since–and will remain until it rots, or I rot.  Make a contribution and get a bunch of them at:  LIVESTRONG  If you are interested in a  SURVIVAL STORY connected to Lance Armstrong  click on:  DON’T QUIT.


Since 1992 and a difficult marriage fiasco that literally damaged my heart, I have had what the cardiologist called an incurable irregular heart-beat, coupled with high blood pressure. This heart glitch resulted in one of my great survival experiences in 2004 when I had a heart attack 8 miles from the Henry’s Fork Trailhead, but quite miraculously I made it out on my own.  If you’re curious about that experience click on SURVIVAL ON KINGS PEAK.


Fast forward 6 years and half-way through my year-long (and counting) 8 miles, 3-5 days a week JOB AT REAMS, ALONG WITH TAKING THE GREAT SUPPLEMENTS I WILL OUTLINE, MY HEART ARRHYTHMIA AND HIGH BLOOD PRESSURE ARE GONE, AND MY PULSE APPROACHES THAT OF LANCE ARMSTRONG!


One has to keep moving, walking better than nothing, but in my opinion it has to be fast walking, and then move up to jogging, remembering the advice  “QUICKEN THE PACE AND LENGTHEN YOUR STRIDE!”  With my passion for backpacking and the Uinta Project, I then go one step further to keep my back and legs strong:  During Utah Jazz, BYU games, and now World Cup soccer, I walk around my sofa as I watch TV with a 60 lb. load on my back and around my waist.  All of the exercise, for me, requires of course good nutrition and marathoner supplements I will outline below.

I strongly believe that the High Altitude Sickness I have experienced some in recent years will also be reduced if not completely eliminated due to the overall improvement in my health and energy.


Now to the formula I believe has helped make all of this possible. But first I guess it’s correct to begin with the normal DISCLAIMER you find on your vitamin/mineral/amino acid supplements—but my own tongue-in-cheek version:


NOTE: This is based on my personal experience, plus my credibility as an Army Medical Specialist—back in the days when bloodletting was a favorite treatment, and also my experience among the Mayan Indians for 40 years as a shaman/medicine-man performing thousands of treatments each year, including even minor surgery.

I guess I’d better clarify said “surgery” relating my experience given at a lecture at the BYU Education Week back in 1977. I quote from my Facebook page:


In 1967 we began our efforts in Guatemala calling it, “The Andersen Family Private Peace Corp.” Thousands of medical treatments were performed each year in areas where there were no medical services available, or where the Indians didn’t trust the Ladino medical people. This even included a few times minor surgery. One experience was related in a BYU Education Week lecture with a Dr. in the group who became very upset saying I wasn’t authorized to do such. I then related the surgery–a hernia operation. I strapped down my patient and did the best I could, but did it wrong. A few days later I tried for the second time. A day or two later I realized I had still done it wrong, and did it for the 3rd time. All looked well, but on the 30th day the hernia opened up again, so I pulled out my pistol, shot the pig and we ate her! The crowd was stunned until they realized what I had said, and then broke into laughter, except for the Dr.


So here is my

CLAIMER


These statements and experiences have not been evaluated by the Food and Drug Administration. The foods, supplements, elixirs, potions and snake oils outlined below are INTENDED, and in many cases, GUARANTEED to help in the treatment, cure and prevention of the conditions outlined in this article!


THE FORMULA

NOTE:  Most of you don’t have all the problems I have to cope with, but many have one,  two or more.  Then as we grow older the body doesn’t assimilate as well many nutrients, and its capacity to produce necessary hormones and other essentials diminishes making it necessary to use supplements and concentrate more on good nutrition.  So, you young bucks out there perhaps don’t need quite as much of the supplements as I do, but all of them in normal doses will likely help you a lot, and if you take all of this seriously soon enough you can keep from becoming an old geezer like me!


We’ve got to keep this simple, so let’s just outline exactly my routine beginning with the evening preparation for beginning my day the next morning. I will capitalize each key ingredient that will also be a link to where you can usually get it cheaper than anywhere else (Amazon). Remember, if you use my links a small commission will be earned for the High Uinta Project, helping to make all of this effort possible.

EVENING PREPARATION:

(1.) Mixing my energy drink for the next day in (24 oz. water): 2 scoops ENDUROX R4 + tsp. or 5 gms. GLUTAMINE + ¾ scoop GATORADE + 5 gms. CAL/MAG


(2.) 1 cup DEE’S CEREAL +2 tsp. sugar + ¼ cup milk powder + cinnamon + water. Soak overnight.


MORNING:

1.) On awakening take 6 1000 mg. gel caps of COD LIVER OIL (30 minutes before eating anything)


(2.) Take medications for (not having) a thyroid gland.


(3.) Prepare 1 egg with cheese in microwave for 1:20 min. When backpacking this will be a 2 (dehydrated) egg omelet with bacon chips cooked the night before in my small cooking fire using aluminum foil.


(4.) Prior to eating, take my “Morning” Ziploc bag of Vit/Min:  2 capsules of GLUCOSAMINE/CHONDROITIN/MSM, 1 cap of WELLNESS FORMULA, 2 of STRESS CARE, 1 of COQ10, 1 of DHEA, and 1 of CHLORELLA. This will be repeated in mid-afternoon.

Of course I don’t take all of these bottles backpacking, but do as seen below:


(5.) Breakfast, eating my egg omelet and Dee’s Cereal.   In my work at REAMS, for breakfast I have one egg with cheese, and Dee’s Cereal,  it being for me  the best combination to give me the energy and endurance I need to feel good until lunch time, while avoiding putting on weight. My backpacking menu is the same, except it is an omelet of 2 eggs with bacon bits, rather than the 1 I eat in civilization as I’ll be working a lot harder (doing 5-10 miles a day with 35-50 lbs. on my back, at high elevations).


Why COD LIVER OIL? It saved me from being an arthritic cripple 30 years ago. It also gives me relief from joint and muscle pain. The “Cod Father” is Dale Alexander (click to learn more) who discovered that taking 2 tbls. of cod liver oil 30 minutes before eating in the morning, and 30 minutes before dinner and keeping it up for 6 months has your arthritis GO AWAY. It worked miraculously for me. Then for maintenance you take a tablespoon full (4 gel caps) once a day in the morning–FOREVER. For many years of normal living I only took 2/day for maintenance and it was enough.  Now  I take 6 in the morning as I’m dealing with major joint and arthritic problems while doing 8 miles,  3-5 times a week. I take 2 more with my noon meal, and 1 prior to going to bed.  Two years after the initial miracle I quit for a month and the arthritis all came back. I then started it again, and at 4 months the pain left me and has never returned, except when doing extreme exercise, but upping the dosage as explained above, solves my problem.  I must add that my body stiffness felt when I get up in the morning, very literally is felt dissipating in about 10 minutes after taking my cod liver oil.  For an experience along these lines while backpacking last year coming down from Allsop Lake, go to:  Cod Liver oil in the Uintas.


Why GLUCOSAMINE/CHONDROITIN/MSM? This is a joint formula that some even claim will help your body re-grow cartilage, and the worn-out cushioning tissues on your feet. My backpacking buddy Ted Packard and my Marine son, Jesse, both claim it alleviates their joint pain—as do I.


Why WELLNESS FORMULA, STRESS-CARE, and CHLORELLA? They act as my multivitamins, but with much more than vitamins and minerals, i.e. powerful herb combinations, and antioxidants known to provide energy, protection from stress, and support for the immune system when under physical stress. If you begin feeling imbalances in your well-being (like  coming down with a cold, flu, etc.) you should take 3-6 capsules of the WELLNESS FORMULA every 3 hours.   Chlorella is a super food considered the secret of longevity among some of the oldest people on earth. Click on it to learn more.


Why COQ10? It is a vitamin-like compound also called ubiquinone. It is an essential component of cells and is necessary for mitochondrial energy production. Years of research has shown that CoQ10 supports healthy cardiovascular and immune system functions in addition to its vital role in energy production. I take one in the morning and one at noon–everyday.


Why DHEA? This is the “Mother hormone” for both men and women as it converts into whatever hormone the body needs and is essential to keep your body in proper balance. Some have called it “the fountain of youth,” levels of which are known to fall precipitously with age, and with low levels common among those who suffer from cancer, heart disease, diabetes, osteoporosis and chronic fatigue. I take just one 25 mg of these tiny capsules to begin the day.  I will be upping that to one 100 mg. capsule daily  for the summer.


Why CINNAMON? As you will see next, I also add it to my lunch meal egg nog drink. One study discovered that people with high blood pressure who ate apple pie experienced an improvement. Digging deeper they found it was because apple pie commonly has cinnamon. So cinnamon is the miracle ingredient which I use liberally in the cereal, and also in my egg nog. Dee’s Cereal also has helped people with heart and weight problems, etc.

COMING DOWN WITH A COLD
OR IN SUSPICIOUS CONDITIONS FOR GETTING ONE?
When working hard on the trail the fatigue you experience, sometimes coupled with getting a little wet in the rain, and especially coupled with advancing years, will lower your resistance and might  bring on a debilitating cold.  To ward it off, and/or get better quicker I have always recommended ZICAM Cold Remedy, but recently a new product has appeared that I feel is more effective, and half the price.  It is called COLD-EEZE, pictured below.  NOTE:  You can get this item cheaper at the pharmacy or supermarket.
Make sure and take a handful of them on your backpack, and don’t wait to start sucking on them until you are sick, but do so at the first suspicion of maybe it happening and immediately start taking also the increased dose of Wellness  capsules explained above.  In most cases you will avoid getting sick, or if you start a bit late, you will get over it much quicker.  This item is cheaper through the above link.


PREPARATION TO GET ON THE TRAIL (in the mountains, or to head for REAMS).


(1.) I take two more supplements: ENDUROX EXCEL that builds endurance, increases fat metabolism, and helps maintain healthy immune function. One investigation showed it to increase a marathoner’s performance by around 15%. I find myself clearly more alert and energetic taking 2 tablets. I also take 1 capsule of SPORTLEGS designed to support your body’s lactate energy system. I take another one when the day’s hike is over to help minimize muscle soreness.


(2.) In spite of all the above, I’ll have to confess that my work and backpacking sometimes makes it necessary to take 2-3 EXCEDRIN in the morning, and when needed again mid afternoon. As you will notice, I also need to take something to be able to sleep, which is IBUPROFEN.

MID-MORNING and LUNCH:

(1.) About half-way through the morning I will drink about half of my energy drink mixed the night before, or that morning. The other half is usually drank once the day’s hike is over and I’m setting up my camp. This will be for recovery, replacing electrolytes , essential vitamins and minerals—especially CALCIUM/MAGNESIUM, and the essential amino acid, GLUTAMINE. A few years ago RUNNER’S WORLD reported a study showing that the mineral marathon runners lose most is calcium. The same for backpackers. Also it was reported that marathon runners who took 5 gms. of Glutamine after a race were able to avoid getting sick. I have certainly found this so in my own experience—thus these ingredients are added to my energy and recovery drink (Endurox R4 already has enough Glutamine for average people–I add 1 tsp for being an old guy with special needs).


(2.) My lunch in the mountains is a munchies bag consisting of nuts, dehydrated fruits, jerky, an energy bar, a bag of egg nog (equivalent of 2 eggs, with powdered milk, sugar, and cinnamon). I find that eggs give me greater energy and endurance than about anything else. Also in the munchies bag is my small bag of vitamins/minerals, the same as those taken in the morning.

(3.) At REAMS my lunch break is extremely simple (to keep from getting fat) taking my vitamins/minerals as in the morning plus a half sandwich of whole wheat bread with peanut butter, jam and cinnamon, and half of my energy drink.

AFTERNOON and EVENING:


(1.) In the mountains I first take the rest of my energy drink to begin the process of recovery. Then set up camp, get all the water I need purified, filling my containers, putting to soak my dinner meal, my breakfast for the next day, cleaning up with a fresh T-shirt on, and used-sweaty one drying, and then rest some prior to going fishing as my dinner will almost always include a trout cooked in aluminum foil, to go along with Spanish Rice, or whatever.


(2.) With purified water in hand sufficient for the night and next morning, I also mix my crucial evening supplement of  CAL/MAG and HGH (Human Growth Hormone stimulator made up mostly of amino acids). The brand I use of HGH is Goldshield that comes in powder form–an envelope per day.  The one shown here is in tablet form and very reliable.    This combination is a great aid to being able to sleep better, avoid Irritable Leg Syndrome,  and leg cramps.  HGH helps to stimulate the body’s production of Human Growth Hormone, crucial for longevity and avoiding the degenerative processes that bring on old age.


This will be taken just before going to sleep, along with 1 aspirin (suggested by my cardiologist), my thyroid stuff, 1 Gluco/Chon/MSM, 1 Cod Liver Oil gel cap, 1- 5 mg tablet of MELATONIN (to help me sleep), and 2-3 IBUPROFEN (you can get 40 of them for $1 at Dollar Tree).  In the above combination photo I  show  FRS  that provides energy on the trail.  It is promoted by Lance Armstrong.  See a wide variety of  them at  FRS  I prefer the chews that I suck on  as I hike.  

OTHER SUPPLEMENTS TO BE TESTED THIS SUMMER (2010):


(1.) ENDUROX EXCEL REPLENISHER —  is good to take during your workout, or on the trail.


(2.) ENDUROX ANTIOXIDANT REGENERATOR — This is good to take towards the end of your hard day to get you to the finish line, and begin recovery.


(3.) The FRS provides energy on the trail as mentioned above.


(4.)  HIGH ALTITUDE SICKNESS — As I have gotten older, usually after being sick, I began experiencing High Altitude Sickness.

To solve this problem I finally concluded I would try a combination of the supplement shown below designed to boost oxygen levels, plus the normal medication for high altitude sickness–ACETAZOLAMID or DIAMOX–which alone hadn’t worked, except to help me sleep better. DIAMOX is a prescription medication.

This combination worked and my last 2009 trip was successful, and I’m excited about a big 2010 season.  Go to CRYSTAL OXYGEN  For more information click on OXYGEN  I am actually hoping that my improved health will have me back where I was a few years ago when high altitude didn’t phase me.  


(5.) REDMOND CLAY — I go nowhere without Redmond Clay–which is a fine powder called “bentonite.” It will solve any intestinal problems, and works as a healing agent for wounds, rashes and burns. You just take some of the powder in a Ziploc bag, and when you feel you need it, mix as a paste in a small plastic bottle or Ziploc bag. You then take a generous spoonful, and down it with water. For wounds, spread the paste on and cover with Saran wrap or such. Learn more at: INFORMATION.   You can get it at: REDMOND CLAY–  For one of my many experiences with it go to: EXPERIENCE NEAR CRATER LAKE and MORE


FREE NUTRITION and MEDICINE

I can’t really end this without another word about nutrition–the kind that will cost you nothing, but give big results. THIS IS NOT TONGUE-IN-CHEEK!  The two items I mention below aren’t the reason my heart is healed, as the irregular heart beat and high blood pressure disappeared during the winter and early spring, but their incredible nutritive qualities are going to help keep me above ground and hustling.

First up, DANDELIONS

 that I have called the “Spinach of the Weed World.”  Others have called them “The Gourmet Weed.”  Of course you have them all around your home, at the park, and also in the High Uintas Wilderness,  at all but the extreme elevations.  They come and go but if they are around where you’re hiking or camping, think seriously about them.  The leaves and the flowers can be used  to increase the nutrition of your soup, or whatever. They can also be eaten raw as a salad. They have amazing nutritional qualities as the links below will demonstrate.

Here you see me  adding dandelions to a pot of macaroni soup.  THEY HAVE AMAZING NUTRITIONAL & MEDICINAL VALUE. ranked in the top 4 of all green vegetables, and the 3rd food in vitamin A content, only topped by cod liver oil and beef liver. The flower and leaves are high in the Vitamin B’s, and effective for dealing with stress. Also rich in potassium, iron and calcium, with medicinal benefits to cure high blood pressure, hepatitis, etc. and rich in enzymes to aid digestion. Of ALL VEGETABLES dandelions rank 9th best.  I eat a handful daily, some in a salad, and more just slightly cooked along with swiss chard.  For incredible information click on:  FREE NUTRITION

Next, PURSLANE 

which you have among your flowers, and all over your vegetable garden.  You likely even HATE IT!  Below you see this old enemy–soon to become a cherished friend, and a shot with some cleaned and ready for my salad.

Purslane has 6 times more vitamin E than spinach, 7 times more beta-carotene than carrots, and is rich in vitamin C, glutathione, riboflavin, potassium, magnesium, phosphorus, tryptophan, and has more omega-3 fatty acids than any other leafy plant. It is also rich in protein.   Purslane  may have positive effects on the brain and may aid in such conditions as depression, bipolar disorder, Alzheimer’s disease, autism, schizophrenia, attention deficit disorder, hyperactivity and migraines. For other medicinal uses see: MEDICINAL    American Indians used the plant as a poultice for burns, juice for earaches, tea for headaches and stomachaches.  For more information click on WONDER WEED.  It has a very bland and agreeable taste.  I usually eat it as one of the ingredients in my “rainbow salad” each day.  It can be added to soaps and other cooked dishes.  Purslane is not a High Uintas Wilderness weed, but grows all over the world.  I discovered it in Guatemala where it is called “verdolaga.”

Well, that’s about it. I imagine many of you will be impressed that it’s all pretty complicated and maybe expensive. But, once you get the routine down, it’s more than simple–and believe me IT’S A LOT BETTER THAN THE OTHER OPTION!  You also end up saving a lot of money by eliminating some of the less healthy food options, and you’ll save a bundle having less health problems.  Don’t get me wrong as I have been caught eating at McDonalds once in a while, and, as I say in my LIGHTWEIGHT BACKPACKING photo essay and elsewhere, I love Taco Bell, and how can you not like Mountain Dew?


Of course I’ve have found that it is far better to stick with what is giving me the health, energy and enthusiasm I need to NOT GIVE IN, and stick with what has become a passion that keeps me above ground and breathing—not only breathing, but hustling around fully engaged in living and enjoying REAMS and all the wonderful customers and employees, and of course the fascination of our Creators incredible swath of color and beauty we call the High Uintas Wilderness.


Now, INTO THE UINTAS TO SEE IF I KNOW WHAT I’M TALKING ABOUT OR NOT–or just so much HOT AIR! I’ll be posting reports, and you should listen each Saturday from 6:00 to 8:00 KSL OUTDOORS RADIO and get my satellite phone report from June 26th on–most likely in the first half hour of the show.  Go to:  KSL RADIO ONLINE.


Once I can say about my Uinta Project  “IT’S DONE!”  I’ll go on to do a real number on some other wonder of nature right under our nose, like THE WEST UTAH DESERT, or maybe return to the Land of the Mayas to finish what I started there–along with taking on those S.O.B. drug traffickers!

HOW I DO A 3 DAY BACKPACK & Links to all the Best Gear & Supplements

 WARM UP WITH A 3 DAY BACKPACK IN ALPINE COUNTRY
Introduction:  For a photo essay on my (so far) 58 year evolutionary history with backpacking in the High Country, from a beginning using equipment that saw action in World War II against the Japanese, down to pretty good lightweight equipment used in 2009, go to the Articles section and Lightweight Backpacking and Gear. This “WARM UP. . . ” article will show you some of the best gear now available that I will be testing this summer (2010) and I’ll describe exactly how I go about preparing a trip, showing you every piece of equipment and food that goes into my backpack.  Some of it will include specialty items that this 74 year old adventurer needs to have for 3 to 18 day no-resupply  trips in alpine country.  Learn what I do, and then adapt to your own needs and pocket book.  I’ll provide links where everything I use and similar options can be acquired. I’ll be frank in telling you that purchases from some of the links will earn me a small commission–others not.   I share everything in hopes I can make a small contribution to enhancing your outdoor experience. Below is the way we were doing it more than half a century ago.
Along with my buddy Ted Packard, here I am with my World War II rucksack.  
Inside I have my Army surplus 9 lb. mummy bag, etc.  Almost everything has been exchanged, 
like my heavy leather jacket changed for a 4 oz. wind shirt, my tough looking sheath knife
changed for a 2 oz. Leatherman Squirt tool, etc., etc.  
READ ON and  LEARN TO ENJOY OUR GREAT OUTDOORS!

TO GET READY FOR YOUR BACKPACK–GATHER ALL THE STUFF YOU MIGHT WANT and NEED. . . . .
LIKE THE MOUNTAIN OF STUFF BELOW

THEN YOU HAVE TO GET SERIOUS and PRACTICAL

THE BASIC PACK 
Most of us backpackers begin with what we call ‘”the basic pack,” which includes:  Backpack, shelter, sleeping bag, and sleeping pad.  The combination photo I use in the photo essay is seen  below–showing what I used until 2009. The indicated weights are exaggerated down a bit by 14 oz. the actual weight was 6 lbs. 4 oz.  Actually pretty good.


My 2010 “Basic Pack” is as follows:

 BACKPACK 
TENT (or shelter)
QUILT (instead of sleeping bag)
SLEEPING PAD (or mattress)
Weight = 6 lbs.
Now let’s examine each item:
THE BACKPACK :  The one I have chosen is the REI Flash 65 Backpack.  The complete pack as seen below weighs 3 lbs.  To it’s right it is  seen with the top hood/lid and the frame sheet removed, resulting in a weight of only 2 lbs.  which you will see is still large enough for trips up to 9 days or more.  The complete pack will be used for one 18 day no-resupply  trip which the very lightweight pack used for the last couple of years couldn’t do.

This pack won the “2009 Editor’s Choice Award” in BACKPACKER MAGAZINE.  You can learn more about it, and acquire it clicking on:  REI Flash 65 Backpack.


THE TENT:  My choice for 2010 is to continue with the same tent I have used for several years:  It is the Gossamer Gear Tarp Tent.  It is pricey, but extremely light and compact.  See it’s slightly improved version called SQUALL CLASSIC at www.gossamergear.com   The packed tent (orange), stakes and poles are seen on the left side of the above BASIC PACK photo.  Total weight is 28 oz. including the center pole I made as I don’t use trekking poles–with them you could save a couple of ounces in the tent weight, but then have to add  the weight of the trekkers to your total weight–a net increase, but hands unavailable for a quick chance photo, or for munchies on the trail.  Below is seen the Tarp Tent in the arctic tundra near Bob’s Lake on the slopes of Tokewanna Peak. 
Click here:  For other tent options.    I’m linking mainly to GoLite tents as they are very light and inexpensive, but remember that until late in the summer season you need mosquito protection.

SLEEPING PAD (or air mattress):  Below you can see the packed up pads I have used since 2003.

All these pads are from Therm-A-Rest. From the left the maroon and orange ones are 20″x48″. Thickness is 1″ and 1.5″. There are pads as thin as 5/8th in. for the real believers, but after ’03 I went to 1.5″ thick for greater comfort–the flaming pink one  is 66″ long, my exact length. I needed the extra length as I began using my bag layed over me like a quilt, laying directly on the pad.


Most of us as we grow older have more difficulty sleeping, and so need more in a sleeping pad rather than less. In addition to the thicker pad, I also need to dig a hip hole (that I dutifully fill in afterwards to “Leave No Trace.”) The young gun “marathon backpackers” can perhaps sleep soundly on a rock, or a very thin pad, but NOT ME. To go with their gear I would also need a sackful of Ambien tablets!

The TINY YELLOW one on the far right is my new one–Therm-a-Rest NeoAir Air Mattress that is 20″x66″x2.5″ thick–just what I need for greater comfort.  As you can see it is also very compact, and only weighs 12 oz. compared to 22 oz. for the pink one.  It is pricy, but for me will be worth it.  Check it out at:  Therm-a-Rest NeoAir Air Mattress   Click here for other sleeping pad options.

The next photograph shows the NeoAir in use inside of the Tarp Tent.  My Mountain Hardware primaloft jacket fills the quilt’s compression sack as my pillow.

My new Golite Quilt is ready to spread over me–below.

For the last 5 years or so I have used my REI Sub-kilo bag as a quilt only zipping it up when the weather was abnormally cold.  I now have a real quilt–the Golite UltraLite 3-Season Quilt that weighs 1 lb. 8 oz.  You see it covering me in the above photo.  Note I use a stocking cap as I can’t stand covering my head as most do with mummy bags.  What will I do if the weather turns real cold?  I’ll leave my clothes on, including my Mountain Hardware jacket, and use as a pillow. . . maybe a rock?  Even colder still?  I can give myself another 10 degrees warmth wrapping up in my poncho.  But usually my 20 degree bags are on the edge of being too warm for alpine country in summer.  
You can learn more about the Quilt  and acquire it at:  GoLite 3 Season Quilt    
For your interest I’ll insert below a photo of the packed up Quilt, compared to my last two down sleeping bags–all 3 rated at 20 degrees.
The Golite Quilt is of course the smallest on the left weighing 1 lb. 8 oz. The middle bag is the REI Sub-Kilo, weighing 2 lbs. 
The one on the right is a NORTH FACE Blue Kazoo down bag weighing 3 lbs. I used from 1981 up to and including when I began my Uinta Project in 2003.  
So my 2010 sleeping gear is seen packed up above–1 lb. 2 oz. lighter than the previous gear, and more compact.
SUMMARY OF BASIC PACK.  Compared to my previous “Basic Pack” I’m only saving 4 oz. in weight, some in volume, but greater comfort with the air mattress, and a very versatile backpack that will even be capable of carrying what I will need for an 18 day backpack–and even more using loops and extra straps to lash  items like the tent outside. 

NOW TO THE NEXT ESSENTIAL ITEMS
I’ll insert below the photo essay depiction of 4 more categories of needed equipment.

Below is the new version of BASIC EQUIPMENT #2 with a couple of additions:  Upper left a plastic bottle I use as a urinal so I don’t have to get up and go outside each night–for this old guy with an enlarged prostate that would mean from 3 to 5 times a night–often in the rain;  Next, a plastic bucket used to bring water from the lake, stream or spring to purify at camp, use for washing, etc.  Then along the bottom as emergency equipment next to the compass, The SPOT Personal Satellite Tracker. 

NOW LET’S TAKE A LOOK AT EACH CATEGORY

First the all important RAIN GEAR seen in the upper left above.  We deal with this first as usually every year in the High Uintas, and other alpine areas of the West, hypothermia–simply getting wet and cold to the point where your body can’t keep itself warm any longer is perhaps the most common problem that often kills a few hikers who don’t go prepared to keep dry and warm–in an area where almost daily rain is the norm, accompanied often by very cold temperatures, even below freezing while others are sweating it out in the lower valleys.  For information on Surviving it go to HYPOTHERMIA 

This photo is a bit different with one item added on the left, and the item from the right in a small bag.  The right item is my waterproof Kelty jacket that weighs 9 oz.–an essential item. NOTE:  The Sierra Designs jacket shown in the photo essays has failed a bit. The Kelty one is very inexpensive.   You can see many options at:  Rain jackets  As you will notice many are very expensive, but a very inexpensive and very lightweight option is Rain Shield hooded jacket and pants seen below all packed up. 
The SNICKERS is for size comparison. 
They weigh 5 oz. (jacket) and 4 oz. (pants). I will be testing them this season and you’ll get my report.  They are a bit more bulky, buy their light weight makes up for it.  The pants are very simple without pockets, and without leg zippers–so you’ll have to remove your footgear to put them on or off.
The middle item in the above photo, also an essential,  is a rain poncho that will cover you and your gear (backpack) when it rains.  The one I use is a 9 oz. Integral Designs product you can find at:  Sil Poncho  It is pricy but has ties around the edge and can be used also as a shelter. You can see it as a shelter at:  Sil Poncho shelter Other inexpensive options can be seen at:  Ponchos   The last item to the left is a pair of Marmot brand waterproof pants.  This is  a specialty item I only take on a trip when I know I’m heading into the teeth of a big storm, and/or late in the season.  They weigh 10 oz. mainly because they have zippers up each side so that they can be put on and off without removing boots and they have pockets–both very worthwhile advantages.

NEXT, let’s deal with the critical item of WATER–PURE & CLEAN free of the feared “GIARDIA” an intestinal infection that you can get from contaminated water.  On my 27 day “expedition” in 2003 I first tried purification tablets, but didn’t like the taste, and the need of drinking lots of water to avoid dehydration would have been very expensive with tablets.  I then tried boiling water and hated the smokey taste–besides it would have required far too much fire.  I didn’t even know yet about purification pumps.  So for the next 200 + miles I was just careful to use reliable water sources–and WAS LUCKY!
For the next few years (2004-2007) I wore out a Katadyn water filter.  I now use the very effective 

MSR HyperFlow Microfilter you see below.

 To go along with the MSR system I use a Platypus bucket to bring water to camp and from it filter the water into my 1/2 gallon water bladder supplied with a bite-me valve that I have hanging over my shoulder to constantly sip water as I hike. After filling my bladder & bottles I usually leave half a bucket full for washing, etc. evening & morning.   For more info go to MSR HyperFlow Microfilter  For what I call a bucket go to:  Platypus buckets  They seem pricey as I recall paying less at REI.  Cheaper options:  other buckets  Of course you can forget a bucket  filtering  your water at the spring, lake or stream filling your water containers directly.   I don’t even recall what the brand is of my water bladder–it is so well used any name has worn off, but remember, to work with the MSR filter you have to have wide-mouthed bladders or canteens.  Perhaps the best and cheapest are:  NALGENE canteens

Below you can see my water bucket at work getting water from about a quarter of a mile from our camp.
The below you see me back at camp doing the  pumping and filling of my containers that need clean water:
Last of all let me include one item related to my water bladder–a special glue to repair it and any other items–the only glue I have found that really works on plastics and anything else.
It is PLASTIC SURGERY in a super glue kind of tube.  This item will always go with me for emergency repairs.  Let me tell you the story quoting from my GEAR and SUPPLEMENTS section. 
This 48 oz water bladder has served me well for 6 years, but 3 years ago it split open on the upper left corner.  I tried many glues, but none lasted until I found Plastic Surgery Super Glue. The repair has lasted 3 years and counting. 
You can get it at ACE HARDWARE STORES, or at Plastic Surgery   NOTE:  It is much cheaper using my link.  With water in camp I’m ready to get going on my recovery supplements, and dinner.  Below is my simple system (for a solo hiker):  A 1 quart pot, and clear plastic shaker containers that cost nothing.
The 1 quart pot I have used since 2005 is Titanium.  It is very light, with a no-stick coating inside.  The outside is well coated from my small camp fires–so I always carry it inside its cover to keep from soiling my gear.  It would actually be sufficient for 2 backpackers, but for 3, 4 or more you will need something larger.  You can see a large selection at:  TITANIUM POTS and PANS Of course titanium is quite expensive.  For several years I used a 1 qt. pot bought at the supermarket for $11.95–yes, a few ounces more weight, but it worked fine.  To save a bunch of money go to:   OTHER POTS & PANS
As mentioned the clear shaker bottles cost nothing.  Just buy supplements, peanut butter, etc. or drinks that are clear plastic, preferably smooth for easier cleaning,  and large mouthed.  Then soak the label, remove and clean-up with Goop-Off or such. You might say, “But they aren’t tough and will wear out.”  Yes, but they are so much lighter and a replacement filled with whatever will still cost less than what you get at outdoor outlets.
The pot also serves to fry an omelet/bacon bits for breakfast.  For fish I used aluminum foil–usually folding up a piece sufficient for a fish a day. 
Next up FIRE MAKING KIT seen below
  Of course for preparing a hot meal a day, and crucial for survival as mentioned in the Article on SURVIVAL.  I use strike-anywhere matches in a water-proof medicine bottle, along with a few of those magic birthday candles you, or a breeze, can’t blow out.  Just in case I take along a lighter.  As mentioned in the SURVIVAL article, once there was nothing dry to strike a match on.  Once the lighter saved me, another time I used the file on my tiny Leatherman Squirt tool to strike a match. The Montana Fire Maker dripped over the twigs you use to get the campfire going makes it all very easy.  You should be able to find it at outdoor outlets.  
Last, on the lower right is a gob of pine pitch mixed with a candy wrapper or such.  This will burn long and hot enough to dry out your firewood and get a warming, maybe life saving, cook fire going.  On your first day up the trail you can easily gather a bit of this in a Ziploc bag and be ready for any emergency.
Now to the last category in our Equipment #2 gear:  Knife, SPOT Tracker, Compass and Headlamp
To see my evolution on knives, go to:  KNIVES  As explained I have got smaller and smaller, now convinced that the Leatherman Squirt is all I need–not just in the mountains, but it’s in my pocket always even in Church!  The blade is small, but sufficient to gut a fish, etc.  and the pliers always come in handy–like to unhook a fish, etc.   See it at:  LEATHERMAN SQUIRT
Next in line is the SPOT Satellite Personal Tracker.  Check out how important it is to let people at home know you, or your group is alright each day.   A SPOT EXAMPLE  click ahead about 3-4 times.  Of course you can also hit the HELP or the 911 buttons if you have a serious problem–and help will be on its way.  
You can get information, and  buy/rent one from Russ Smith at:  SKYCALL COMMUNICATIONS seen
below.  You can also get more info at:  SPOT SATELLITE PERSONAL TRACKER
I can’t let this shot of Russ go by without putting emphasis also on a satellite phone like he is using in the photo.  A solo backpacker should have one for sure.  For all my trips I have had one–and for the first 4 years didn’t need it for myself–but twice was able to loan it to Scout groups with injured boys.  A group should have one for sure, and I can guarantee that  parents would be more than happy to share the cost.  Then at the end of my 4th year–2006 I had my own emergency and used it to call Russ for help.  Check out the experience at SURVIVAL  The opening shot of the experience is seen below.  Once again you can rent a satellite phone from Russ Smith at:  SKYCALL COMMUNICATIONS

Next comes the all important compass–to orient yourself, or your map to navigate safely in the high country, as seen below being taught to a group of Explorer/Boy Scouts in the Four Lakes Basin.

You don’t have to spend much money.  Mine probably cost $2.95 or so.  Get info at:  COMPASS
Last comes the all important LIGHT, which in my mind now means HEADLAMP.  Forget the big flashlight you might need to protect yourself from a thief.  The one I show in the photo is very inexpensive Energizer you can see along with other options at:  HEADLAMPS   See other well-known brands at:  OTHER OPTIONS  The main one I show in the OPTIONS  is the Princeton brand, one of which I have used for years. It has important features your headlamp should have:  3 light levels for long  (150 hours) life, tiltable head, and waterproof.
TOILETRIES
To be able to live happily with myself, and not rub a companion or two the wrong way, I have found it worthwhile to put a little effort into personal hygiene.  I don’t use deodorant as reportedly it attracts bears, but I do try and keep clean.  Each afternoon after finishing the day’s hike and setting up camp I remove my t-shirt, rinse it out and hang to dry, and splash a little water on my body, dry and put on a fresh shirt.  I include here a couple of items I keep handy on the trail:  Mosquito repellent (has to be 98-100% Deet), and Sun protectant as solar radiation at high altitudes is much more intense.  
Make sure and take a bit more than enough toilet paper.  If I recall I tell in my LIGHTWEIGHT BACKPACKING photo essay what I had to resort to on one trip when I forgot the bum fodder. Check the comments at:   NO BUM FODDER  Below is this collection of hygiene items in its Ziploc bag with the repellent, sun protectant and roll separate as they are put within reach as I hike each day.
The weight of these items is = 1 lb.

NOW THE MEDICINES and EMERGENCY ITEMS
This looks like A LOT, but only weighs = 1 lb. 4 oz.  Let me explain as briefly as possible. From the upper left reading across: 
1.  A handful of water purification tablets–just in case;  
2.  A bit of Moleskin, just in case of a blister (which I haven’t had since using special socks–shown later); 
3.  An assortment of band-aids; 
4.  Last on the right Zicam Cold Remedy, just in case;
5.  Back to the left, a roll of stretch tape to make my own bandages;
6.  A couple of toe bandages, and a package of 2 small ones;
7.  Disinfectant cleaner;
8.  Small chap stick which will be in my pocket (I find a rarely need it in the mountains);
9.  Back to the left, my Thyroid (a cancerous thyroid was removed in ’03) and blood  pressure medications;
10.  Small bottle of dental pain killer medication;
11.  Below it, another small bottle with Nitro Glycerin tablets in case of heart trouble;
12.  2 tubes of strong local anesthetic;
13.  3 larger tubes:  Camphor-Phenic, Hyrocortesone Cream; Neosporin Ointment (triple antibiotic);
14.  Aspirin–I take one a day, and more if chest pains occur;
15.  Zicam decongestant which I sometimes need to sleep soundly;
16.  Medicated talcum mainly for feet;
17.  Altitude sickness medication (Diamox) mainly used at night to sleep better;
18.  In 2nd film container, my emergency anti-biotic treatment (Arithromycin);
19.  Redmond Clay for intestinal problems, and difficult skin infections and wounds;
20.  Duct tape around the Redmond Clay bottle;
21.  Mineral treatment for leg cramps;
22.  Excedrin, Ibuprofen, and a narcotic pain killer for extreme situations.
23.  and 24.  Muscle Rub, and Hemorrhoid medication (useful for any irritations).
1 lb. 4 oz.
As  you can see I go into the Wilderness ready to solve almost any emergency that might arise–and I have   done so and survived everything up to and including a heart attack–faith was the key ingredient in that miracle, so don’t leave it behind.  I might add that the “Emergency anti-biotic Treatment” has been used 2 times in the 7 summers and 1,327 miles of the Uinta Project.  Each time I had to be patient, resting and giving the treatment 2-3 days to begin taking effect.
It’s worth mentioning that every individual in a group doesn’t have to have all this stuff, as most of the emergency items will not even be used.  Sufficient for each 3 or 4 individuals to have these items, just in case.

NOW THE HEALTH and EMERGENCY RELATED VITAMIN/MINERAL/AMINO ACID SUPPLEMENTS
To avoid any confusion and make everything easy and automatic I have all I need for a 3 day trip in “Morning,” “Afternoon,”  and “Night” bags you see here.  Don’t be shocked as everything here is simply nutrients that I have found make possible me doing 8 miles a day , 5 days a week in my work–half of it jogging, and half pushing heavy loads.  It is similar to doing a half-marathon a day, which I hope will translate smoothly into doing 250 miles of backpacking above 10,000 feet. Total weight for 3 days = 6 oz.

NOTE:  At the end of this article I will picture all the vitamin/mineral supplements I use and where you can get them.   

NEXT, FOOD FOR A 3 DAY BACKPACK
It starts with a whole bunch of stuff like you see below and more:
It is all put in individual marked meal bags to make everything easy in the mountains.  Just grab the right bag, empty into a pot or shaker bottle, & add water.  The main course needing cooking is left to soak while I do my personal cleaning, or go fishing to complete my dinner meal.  Then the small cooking fire and in 10 minutes dinner is ready.  My breakfast of Dee’s Cereal is also put to soak overnight.  This includes my recovery supplements (Endurox, Gatorade, glutamine, calcium/magnesium, and HGH) you see next:
Not the wide mouths on all the containers making it easy to pour in the powders to mix with water.  They are all very light and cost nothing.
THE FOOD:
The BREAKFASTS (2) are on the left which includes Dee’s Cereal with powdered milk, sugar and cinnamon  plus dehydrated egg with bacon bits to make an omelet.  This combination has helped to do the miracle in my work giving me the energy I need plus has had my 18 year old irregular heart beat and high blood pressure GO AWAY!
Next are the LUNCHES (3)  with a bag of Trail Mix (I create myself), plus an egg nog drink with powdered milk, sugar and, again, cinnamon.
Then the DINNERS (2) one with dehydrated potatoes, bacon bits, Wheat Thins, and an instant pudding. The other with Creamy Chicken Macaroni, Wheat Thins, and pudding.  A fish cooked in aluminum foil will complete the meal.
Previous to eating the dinner I will have a recovery drink made of Endurox and Gatoraid you see on the right.
Along the bottom are Chile flavoring, Bacon Bits, and sauces you will recognize.
Total weight of food and supplements  for 3 day trip = 4 lbs…1.3 lbs./day

FOR LONGER TRIPS JUST MULTIPLY BY 1.3 lbs./day AS SEEN BELOW
For a 6 day trip = 8 lbs. of food.
For a 9 day trip = 12 lbs. of food.
For an 18 day trip = 24 lbs. of food.


I ALMOST FORGOT!  FOR JUST A 2 or 3 DAY TRIP I EAT REAL GOOD THE FIRST DAY as you see below

TACO BELL IS GREAT!


LAST OF ALL THE FISHING EQUIPMENT
For more information and enlarged photos go to  FISHING THE UINTAS
Basically I use a combination rod–spinning/fly fishing, so I have both types of reels, plus an assortment of the lures and flies I have found most effective. 
Total weight = 2 lbs. 2 oz.

HERE’S A PORTRAIT OF ALL THE GEAR and FOOD
 BEFORE PACKING UP
I see a couple of items not mentioned yet and others not represented here.  Some of them are critical, so here goes: 
 1.  Socks:  I always take one change of socks with the theory being that each day I begin with a fresh pair–having washed out the ones used in the afternoon when I also rinse out my T-shirt.  Below is what I use:
I am not necessarily promoting REI  socks, but you need to have on 1 pair of good quality boot socks, but next to your skin you need to have the CoolMesh WrightSocks that prevent blisters.  
Since I have used them with my running shoes, and hiking boots I have never got a blister. They are worth their weight in gold!  See them at:  CoolMesh WrightSocks  You can see good boot sock options at:  boot socks
2.  Extra clothes and such:  You can see on the far left my small towel.  Then a couple of extra T-shirts, the blue one  long sleeved, the yellow one my Lance Armstrong cycling T-shirt. You should use polyester fabric T-shirts.  They are more expensive, but last forever, even when humid retain some insulation value, and dry quickly.   For a trip longer than 3 days I might take one more.  For more information see my photo essay at: CLOTHES
3.  Along the upper edge of the photo you can see something black.  It is my Mountain Hardware Primaloft jacket.  It weighs 12 oz. but feels fantastic when the sun goes down, or a real cold spell hits.  I use it in my quilt stuff sack to make a good pillow. I’ll insert a shot below showing it in use.
4.  GLOVES in the above photo you can see my fishermen’s gloves that help keep you warm but make possible zipping up or down whatever, operate a camera, or do a bit of fishing.  You can get info on them at:  FISHING GLOVES   Also pictured in my gear ready to pack up are my elk skin gloves I love to use as explained  in 3 or 4 shots at  Lightweight backpacking  You can get them at: Elk skin gloves
5.  One last item in the photo:  A length of nylon rope to hang my food away from the critters.
6.  A phone is in the photo, but just a regular one representing a Skycall Communications Satellite phone that will go with me, and make possible phoning into KSL Outdoors every Saturday morning–LISTEN IN!
7.  Tube of PLASTIC SURGERY — Not shown in this gear photo, but shown and explained above when talking about Water Bladder & other repairs.

NOW A COMMENT OR TWO ABOUT WHAT I WILL BE WEARING:


1.  BOOTS – 
In the LIGHTWEIGHT  BACKPACKING photos essay I tell my history from being told in 1994 that I shouldn’t run half-marathons or backpack anymore because of problems with my feet, but how I didn’t give up but began modifying my running shoes and high top boots to persist and that by last year I finally was able to backpack with just a mid-high hiking boot.  Well, for the last year I have done my 40 miles a week using the Salomon Mountain Running shoe you see here on the right and felt my ankles strengthening.  I began believing I would be able to do a 250 mile backpack summer with lightweight hiking boots.  So, with my REI dividend I got me a pair of waterproof Salomon 3D Fastpacker Mid GTX Fast Light Backpacking Boots  you see above on the left.  This boot will likely be my mainstay, but I’ll also use the mountain running shoe and see how it goes.  These are quality products without the high end cost.  See them at:  HIKING BOOTS  For your information the Salomon Wings Sky GTX book won the 2010 BACKPACKER MAGAZINE’S Editor’s Choice award.   You can check it out, but will see it also has a high end cost.

3. CREW LENGTH TOESOCKS – just in case you need them. 
Get more information at   INJINJI TOESOCKS

3. PANTS –  
If you have gone thru my photo essays on LIGHTWEIGHT BACKPACKING and GEAR and SUPPLEMENTS, you will have noticed I am a believer in convertible pants as you see below.

Remember, it is important to have legs with zippers so you can put them on and off without removing your boots or shoes. Also go for synthetic material, like Nycott, as it is lightweight, a windbreaker, and mosquitoes can’t go through it.  See a number of options at PANTS
4.  HAT – 
You see below what I have used since 2009.  It is waterproof, and the sides come down to give you protection from the sun or rain.  See it at:  OUTDOOR RESEARCH SEATTLE HAT


I THINK WE’RE READY TO SHOULDER OUR PACK and GET ON THE TRAIL
Here I am with a 23 lb. pack for 3 days of adventure.


MAYBE ONE MORE ESSENTIAL — A CAMERA TO BRING THE WONDERFUL EXPERIENCES HOME TO SHARE WITH LOVED ONES.

This means for me this year 12 lbs. of photographic equipment!  Just the wide angle zoom lens you see here weighs more than my backpack.  That’s what happens when you really begin to take capturing the beauty of nature seriously. 

But for 99% of you, something similar to the following is the way to go–and the quality will be exceptional.  Even this above photograph was taken with the tiny camera that follows–using my left arm to get the hand held shot.

For the story of this camera and why I give the following recommendations, go to Canon point and shoot experience  and click on several shots reading the captions.  But first believe me that these little cameras, even this antiquated 4 year old, one are capable of taking great photos–for example the following from my wildflower collection.
With  the need of being waterproof, shock proof and more,  I narrow my recommendations down to two great little cameras.  The first one you see below:


It is the PENTAX Optio W80  which is one good waterproof option–they also say “freeze proof and crush proof” with 12 MP with 24-140mm zoom, and even video capability, etc. 


It is the size of a deck of cards.   For more info click on:  PENTAX Optio W80
My other recommendation is an Olympus product you see below:
The OLYMPUS STYLUS TOUGH-8000, virtually indestructible, and of course waterproof.  12 MP with image stabilization and slim enough to fit in your pack’s hip belt.  


Get info at:  OLYMPUS STYLUS TOUGH

ALSO IN MY PHOTO WAISTE PACK:   I always take with me my tiny Grundig radio to listen to the news, a talk show, the weather report, and OF COURSE KSL OUTDOORS each Saturday morning from 6:00-8:00 to make sure Tim, Russ and Jeff are ready for my call from the High Uintas. See the best and smallest I’ve found so far at MINI RADIO

IN THE INTEREST OF FULL DISCLOSURE I ALSO HAVE IN MY WAIST PACK  my OLYMPUS Digital Recorder (DS-30) which is sort of a specialty item that perhaps only someone like me needs, but here it is. I use it to record names and addresses of new “Uinta Friends,” interesting stories and experiences, and even once a great recording of a pack of coyotes. Of course I have some good things recorded to listen to: Special music, and even an audio book or two. See it and other options at RECORDER

One last item I feel is a necessity:  READING MATERIAL
As seen below, for me it usually includes one National Geographic, one Outdoor Photographer (or more often than not a handful of special techniques articles I rip out), and my tiny Military version of the scriptures.   Add 1 lb. to the pack weight.

NOTE:  Due to preparing this article I’m already packed up and ready to go for 9 days.


THE ALL IMPORTANT SUPPLEMENTS and links are found in the GEAR and Supplements section. Go to: VIT/MIN/ENERGEY/RECOVERY


WEIGHT TOTALS: 
The BASIC PACK, plus the other gear & personal items outlined and shown in this article  would basically be the same for trips longer than 3 days, approximately 20 lbs, plus food and perhaps an increase of 2 lbs. for 9 days and 3 lbs. for 18.

So without photographic equipment  the totals would be 3 days = 24 lbs., 6 days=28 lbs.   9 days= 34 lbs.  18 days=47 lbs.


I of course will take my photography equipment that weighs 12 lbs. bringing my totals to:


 3 days=36 lbs.    6 days=40 lbs.  9 days=45 lbs.   18 days=60 lbs


Still sounds like a lot but for me it will still be a light load as I train with a 62 lb. pack walking around my living room while watching TV.  To be able to do the 18 day trip with a starting weight of 60 lbs., I will likely have to up the weight of my training pack. What comes out of the 2010 season will indicate what and how will be possible for 2011.

If you will be carrying more than the 24 lbs. shown in this article, I highly recommend you do what you have to do to get in shape–even with 24 lbs. on your back at over 10,000 ft. you will need to get in shape.  


CONCLUSION:  I have shared in this article some of what I have learned over many exciting, enjoyable, and soul stirring years of backpacking.  Of course this is something with which you never stop learning to improve your technique and equipment to be able to even enjoy more the wonderful creations of our benevolent  Creator.  I pray that something I’ve brought to you will move you to pack up and experience  more the magnificant and vibrantly beautiful swath of God’s  great creation we call The High Uintas–or any of the incredible Wilderness Areas,  and  make your outdoor experience a continual inspiration and blessing.  May the Lord grant us the opportunity to soon meet on the trail–remember to not pass up an old bearded guy limping along, and say hello–HE WILL LIKELY BE ME!
Last of all remember the words with which  I end my LIGHTWEIGHT BACKPACKING photo essay.

BACKPACKER MAGAZINE publicity for Uinta Project

My effort to explore, photograph and share the wonderful High Uintas
Wilderness received a bit of publicity in the January 2010 issue of BACKPACKER MAGAZINE.
Click on the photo to view a large image, and read the comments one photo at a time.

SURVIVAL in the High Country

This “article” is rather a photo essay, the text found in the captions and comments. So to get the whole story click on the first image and then view one at a time, reading the captions and comments. The following crucial aspects of survival in high alpine areas, with certain elements applicable to any wilderness experience, are as follows:
1.  Lance Armstrong Inspired 27  Day Survival Epic
2. A Kings Peak/Henrys Fork life and  death experience–sick, heart attack and the ultimate survival principle.
3. Bears.
4. Hypothermia
5. Life and death survival tools: Satellite phone and SPOT personal satellite tracker.
6. Lightning.
7. High altitude sickeness.–an introduction on the Garfield Basin Trail.
8. My First Survival Experience complicated by High Altitude sickeness.
9. Survival:  Weakened by sickness and attacked by High Altitude Sickness–HOW TO GET HELP?
NOTE: Each of these will be added to and completed over the next year or two.

LIGHTWEIGHT BACKPACKING & GEAR

For a complete rundown on GEAR and SUPPLEMENTS,  click on:  GET THE BEST GEAR & SUPPLEMENTS .  There you will get links to my recommendations of the best books, equipment and supplements available.     In  this  photo essay, each image has accompanying text in the caption and comments. You will miss much of the text if you view it as a slide show. So click on the first image and then view one at a time reading caption, and then comments. You will see here a 58 year evolution of technique and equipment–from Army surplus gear that saw action against the Japanese in World War II, down to some of the best now available.   Links to  the options I present so you can get more information to make practical decisions for your needs and interests are only supplied in the GEAR….section and in the article mentioned below.
As the summer backpack season is approaching  I have created an article entitled HOW I DO A 3 DAY BACKPACK  with up-to-date information and links to all the best equipment available. I will always try and keep it simple and practical.  If backpacking requires studying a thick book, something is wrong in my opinion.